When you bring home a new electric vehicle, the focus is on the freedom of the open road, not the complexities of your garage wall. But figuring out the best way to charge it at home is a crucial next step. It’s a bigger project than installing a new outlet; it’s a significant upgrade to your home’s electrical system. A safe and reliable installation requires a dedicated circuit, the right wiring, and a clear plan. That plan is mapped out in a professional electric car charger home installation diagram, which acts as the blueprint for the entire project. In this guide, we’ll walk you through what that entails, from assessing your electrical panel to choosing the perfect location for your new charger.
Key Takeaways
- Prioritize Safety with Professional Installation: An EV charger is a high-power appliance that requires a licensed electrician to install correctly. A professional will assess your home’s electrical capacity, handle all necessary permits, and ensure the entire setup is safe and compliant with local codes.
- Plan Your Charger’s Location and Type: Before installation, decide if a Level 1 or faster Level 2 charger fits your driving habits. Then, choose a practical location that is close to your electrical panel to manage costs and near your parking spot for easy daily access.
- Understand the Full Installation Cost: The final price includes more than just the charger itself. Be sure to budget for professional labor, potential electrical panel upgrades, and local permit fees to get a complete picture of your investment.
What Are the Different Types of Home EV Chargers?
When you decide to get an electric vehicle, one of the first things to figure out is how you’ll charge it at home. It’s not quite as simple as plugging in your phone, as there are different levels of chargers, each with its own speed and installation requirements. The two main types you’ll encounter for home use are Level 1 and Level 2. Understanding the difference between them is the key to choosing a setup that fits your lifestyle, driving habits, and your home’s electrical system. Let’s break down what each level offers so you can make a confident choice.
Level 1 Chargers
Think of a Level 1 charger as the entry-level option. It’s the simplest way to charge your EV because it uses a standard 120-volt household outlet—the same one you use for your lamp or laptop. Most electric cars actually come with a Level 1 charging cord, so you can start charging right away without any special installation. The trade-off for this convenience is speed. Level 1 charging is slow, adding only about 3 to 5 miles of range per hour. This “trickle charge” can take more than 20 hours for a full battery, but it can be a perfectly fine solution if you have a short daily commute and can plug in your car overnight.
Level 2 Chargers
A Level 2 charger is the most popular choice for home charging, and for good reason. It offers a much faster charge by using a 240-volt circuit, similar to what powers a large appliance like an electric stove or clothes dryer. With a Level 2 charger, you can add 20 to 60 miles of range per hour, allowing you to fully charge your vehicle overnight, even from empty. This option requires professional installation, as an electrician will need to run a dedicated circuit from your main panel. Our team handles these kinds of residential electric projects all the time, ensuring your charger is installed safely and correctly for reliable, speedy charging right in your garage.
Which Charger Is Right for Your Home?
Choosing between a Level 1 and Level 2 charger really comes down to your daily driving needs and desire for convenience. If you only drive 20-30 miles a day, a Level 1 charger might be all you need. However, most drivers find the speed and reliability of a Level 2 charger to be a worthwhile investment. When making your decision, it’s also smart to think about your future needs. The US EPA suggests you plan for scenarios like adding a second EV or switching to other electric appliances. A professional can assess your current electrical panel to see if it can handle the extra load or if an upgrade is needed.
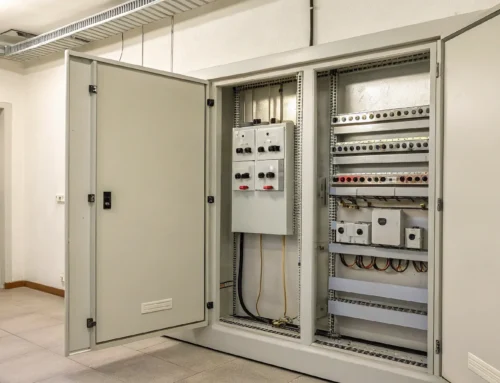
What Components Are Needed for a Home EV Charger Installation?
Setting up a home charging station is more involved than just buying a charger and plugging it in. A safe and efficient installation requires a few key electrical components working in harmony. Think of it as building a mini-superhighway for power, directly to your car. Getting these parts right is crucial for protecting your vehicle, your home, and your family. That’s why understanding the essential hardware is the first step, and why having a professional handle the residential electric work is always the best path forward.
The EV Charger Unit
The charger itself, also known as Electric Vehicle Supply Equipment (EVSE), is the heart of your setup. It’s not just a fancy extension cord; it’s a sophisticated piece of technology that communicates with your car to deliver power safely. When you’re choosing a unit, it’s smart to prioritize models with advanced safety features like built-in surge and ground fault protection. These features act as a safeguard for your car’s sensitive electronics. Most homeowners opt for a Level 2 charger, which provides much faster charging than a standard wall outlet and requires a 240-volt circuit, similar to what an electric dryer or oven uses. The charger you pick will determine the other components needed for the job.
A Dedicated Circuit Breaker
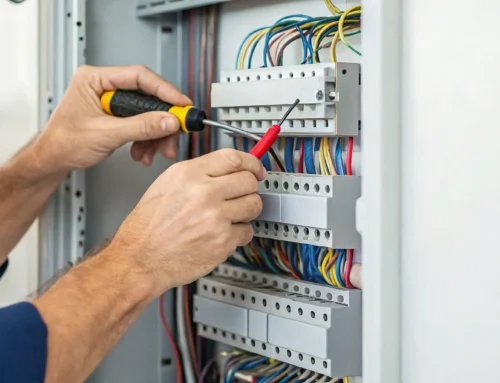
One of the most critical steps in any EV charger installation is setting up a dedicated circuit. This means your charger gets its very own circuit breaker in your home’s main electrical panel, and it doesn’t share power with any other outlets or appliances. Why is this so important? An EV charger draws a large, continuous amount of electricity for hours at a time. A dedicated circuit prevents the system from overloading, which could trip breakers or, in worse cases, create a fire hazard. This isn’t a suggestion—it’s a fundamental safety requirement for this type of high-power installation. If your panel is full, you may need some electrician repairs or upgrades to make room.
Proper Gauge Wiring
If the circuit breaker is the gatekeeper, the wiring is the path the electricity travels. The size, or gauge, of the copper wire used is extremely important. Thicker wires are needed for higher amperage chargers because they can handle more electrical current without overheating. For example, a 50-amp charger requires a much thicker wire than a 30-amp one. Using a wire that’s too thin for the electrical load is a serious safety risk. A qualified electrician will calculate the correct gauge based on your charger’s amperage, the length of the wire run from the panel to the charger location, and local electrical codes, ensuring a safe and reliable flow of power to your vehicle.
Safety and Mounting Hardware
Finally, the charger needs to be securely installed. This involves more than just a couple of screws. Professional mounting hardware ensures the unit is firmly attached to the wall, protecting it from accidental bumps and ensuring it can support the weight of the unit and the heavy charging cable. The installation also includes all the necessary conduits and fittings to protect the wiring as it runs from the panel to the charger. A professional installation covers all these details, from proper siting and equipment choice to ensuring every connection is tight and every component meets strict safety regulations. This final step guarantees your charging station is not only functional but also completely safe for everyday use.
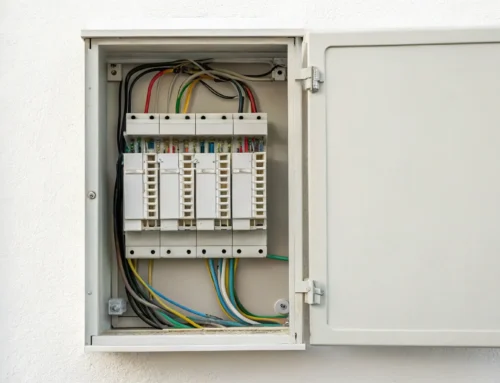
Understanding a Home EV Charger Wiring Diagram
At first glance, a home EV charger wiring diagram can look like a complex web of lines and symbols. But you don’t need to be an electrician to grasp the basics. Understanding the key components helps you appreciate what goes into a safe and effective installation. Think of it as a roadmap that shows how your new charger will connect to your home’s power source. This plan ensures every connection is secure, every wire is the right size, and every safety measure is in place. A licensed electrician uses this diagram to perform the installation correctly, protecting your home, your vehicle, and your family.
Following this plan is non-negotiable for a safe setup. It involves carefully connecting to your main electrical panel, selecting the right circuit breaker, and running the wiring properly. Each step is designed to handle the high, continuous power draw that EV charging requires. When you work with a professional for your residential electrical needs, you’re not just getting a charger installed; you’re getting the peace of mind that comes from knowing it was done right.
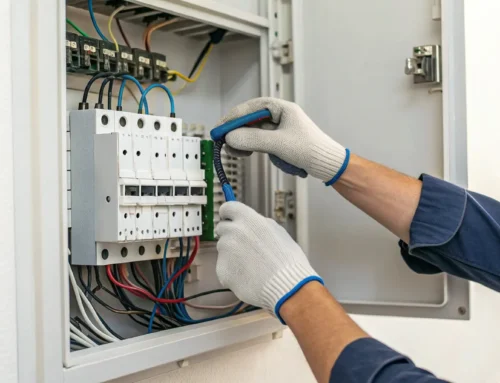
Connecting to the Main Electrical Panel
One of the most important steps in any EV charger installation is setting up a dedicated circuit. This means your charger gets its very own connection to your home’s main electrical panel and doesn’t share power with any other appliances. Why is this so important? An EV charger uses a significant amount of electricity for hours at a time. Giving it a dedicated circuit prevents your electrical system from becoming overloaded, which reduces the risk of tripped breakers or, in worse cases, an electrical fire. It’s a fundamental safety measure that ensures your charger operates reliably without putting a strain on your home’s power grid.
Placing the Circuit Breaker
The circuit breaker is the gateway between your home’s power and your EV charger. Its job is to automatically shut off power if it detects a dangerous electrical surge, protecting both your charger and your car. Choosing the correct size breaker is critical. A professional will calculate the right size based on your charger’s amperage. For example, a 40-amp charger typically requires a 50-amp breaker to safely handle the continuous load. Installing the wrong size breaker can lead to constant tripping if it’s too small or create a serious fire hazard if it’s too large. This is a key reason why a qualified electrician should always handle work on your electrical panel.
Mapping the Wiring Route
The physical path the wiring takes from your electrical panel to your charger’s location is a key part of the installation plan. The goal is to find the most direct and secure route possible. If your charger is installed far from your panel, like in a detached garage, the length of the wire becomes a major factor. Longer distances can cause something called “voltage drop,” which means the power weakens by the time it reaches your charger. This can lead to slower, less efficient charging and even cause wires to overheat. To prevent this, an electrician will use a thicker gauge wire for longer runs, ensuring consistent and safe power delivery.
Selecting the Charger’s Mounting Location
Where you decide to mount your charger directly influences the wiring diagram and the complexity of the job. The location determines the length of the wire needed, the path it will take, and the materials required to run it safely. Whether it’s inside your garage or on an exterior wall, the spot you choose needs to be practical for daily use while also being feasible from an electrical standpoint. An ideal location is relatively close to your electrical panel, which can help keep installation costs down. Your electrician will help you find the perfect balance between convenience and electrical efficiency.
Including Ground Fault Protection
Ground fault protection is a non-negotiable safety feature for any EV charger installation. It’s designed to protect you from electric shock. This system constantly monitors the flow of electricity. If it detects that even a tiny amount of current is leaking—for instance, to the metal body of your car—it instantly cuts the power. This is known as a ground fault. Modern EV chargers have this protection built-in, often referred to as a Ground Fault Circuit Interrupter (GFCI). It’s a life-saving feature that ensures if anything goes wrong with the electrical current, the system shuts down before anyone can get hurt.
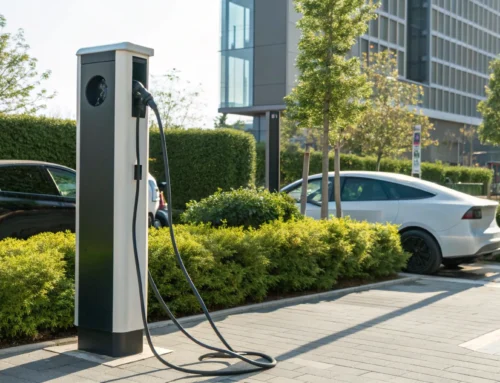
How Do You Choose the Best Location for Your EV Charger?
Picking the right spot for your home EV charger is about more than just convenience—it affects installation cost, safety, and how easily you can use it every day. You’ll want to think through a few key factors before the installation begins. A little planning goes a long way in making sure your setup is perfect for your home and routine. The ideal location is a sweet spot that balances proximity to your power source with your daily parking habits. A location that seems convenient at first glance might introduce unexpected costs or daily frustrations if it’s far from your electrical panel or forces you to park awkwardly.
Considering where the charger will live on your property helps streamline the entire process. Will it be inside your garage where it’s protected from the weather, or outside on a wall or post for easier access? Do you need the charging cable to reach more than one parking spot? Thinking about these questions helps you and your electrician map out the best plan. A professional can help you weigh the pros and cons of each potential spot, ensuring the final choice is both practical and compliant with all safety standards. Let’s walk through the four main things to consider to find the perfect home for your new EV charger.
Proximity to Your Electrical Panel
The distance between your EV charger and your home’s main electrical panel is one of the biggest factors in determining installation cost. The closer the charger is to the panel, the less wiring and labor are required, which helps keep the price down. A long run of heavy-gauge wire from a panel in the basement to a garage on the other side of the house can add significant expense. Before anything gets installed, a qualified electrician will perform a load calculation to ensure your current residential electric system can handle the added demand. This assessment is a critical first step to a safe and effective installation.
Your Usual Parking Spot
This might seem obvious, but it’s worth stating: the best place for your charger is near where you normally park your car. Think about how you pull into your driveway or garage. You want the charger located so the cable can easily reach your car’s charging port without being stretched taut or creating a trip hazard. Consider the length of the charger’s cable—typically 18 to 25 feet—and make sure it provides enough slack. A well-placed charger makes plugging in at the end of the day a seamless part of your routine instead of a daily hassle.
Weather Protection for Outdoor Units
If you plan to install your charger outdoors, protecting it from the elements is key. While most modern EV chargers are built to be weatherproof and durable, placing them in a somewhat sheltered location can extend their lifespan and prevent unnecessary wear and tear. Consider installing it under an eave, in a carport, or on a wall that’s partially protected from heavy rain, snow, and direct sun. A professional installation will always meet local safety codes, ensuring all outdoor wiring and connections are properly sealed to withstand Pennsylvania’s changing seasons and keep your system running safely for years.
Everyday Accessibility and Convenience
Finally, think about the day-to-day logistics of using your charger. The location should be easy to access, well-lit for nighttime charging, and clear of obstructions. You don’t want to be squeezing past lawn equipment or storage bins every time you need to plug in or unplug your vehicle. Also, consider the path of the charging cable when it’s in use. Make sure it doesn’t block a walkway or create a tripping danger for your family. Planning for these small details ensures your charging station is not only functional but also safe and convenient for everyone at home.
Safety First: Understanding Local EV Charger Regulations
Installing a home EV charger is more involved than just hanging a unit on the wall and plugging it in. It’s a significant electrical upgrade, and with any major electrical work, safety has to be the top priority. Local and national regulations are in place for a very good reason: to protect your home, your vehicle, and your family from potential electrical hazards. These rules ensure that your charger is installed correctly, operates safely, and won’t strain your home’s electrical system.
Think of these regulations not as red tape, but as a blueprint for a safe and reliable installation. They cover everything from the type of wiring and circuit breakers required to the specific location of your charger. Because these codes can vary slightly between townships and counties, what’s required in Chester County might differ from the rules in Bucks County. Working with a licensed electrician who is familiar with your local requirements is the best way to ensure every box is checked. This guarantees your installation is not only functional but also fully compliant with all health and safety standards, giving you complete peace of mind every time you charge your car.
Meeting Electrical Code Requirements
Every electrical project, including an EV charger installation, must follow the National Electrical Code (NEC) as well as any local amendments. These codes are detailed sets of safety standards that dictate exactly how electrical work should be done. For your charger, this means using the correct wire gauge to handle the electrical load, installing the right size circuit breaker, and ensuring the unit is properly grounded. An experienced electrician understands these requirements inside and out and will make sure your installation meets every single one. Following these codes is non-negotiable for a safe, reliable charging system that protects your home’s entire residential electrical infrastructure.
Securing the Right Permits
In most areas, installing a Level 2 EV charger requires an electrical permit from your local municipality. This process involves submitting your installation plan for review by a building official to confirm it meets all current health and safety standards. While it might seem like an extra step, the permitting process is an important safeguard. It provides an independent review of the work and ensures it’s done correctly. A professional electrical contractor will handle the entire permitting process for you, from filing the application to scheduling the final inspection. They know the specific requirements for all the service areas they work in, making the process smooth and straightforward.
Why Professional Installation Is a Must
While a DIY project can be tempting, installing an EV charger is a job that should always be left to a licensed electrician. This isn’t just about convenience; it’s about safety and compliance. A professional ensures the installation is done correctly, adheres to all local codes, and won’t create issues with your homeowner’s insurance. They will also assess your home’s electrical panel to confirm it can handle the added demand of an EV charger. Attempting this work yourself without the proper knowledge can lead to overloaded circuits, fire hazards, or damage to your vehicle. When you need electrical work done right, you call for professional electrician repairs, and installing a charger is no different.
Understanding GFCI Protection
GFCI, or Ground Fault Circuit Interrupter, protection is a critical safety feature for any EV charger installation. A GFCI-equipped circuit breaker is designed to quickly shut off power if it detects an imbalance in the electrical current, which could indicate a ground fault. This rapid response helps prevent dangerous electric shock. Given that EV chargers are often located in garages or outdoors where moisture can be present, GFCI protection is essential. The NEC has specific requirements for GFCI use in EV charging circuits, and a qualified electrician will know precisely which type of protection is needed to keep your setup safe and code-compliant.
What to Expect During Your Home EV Charger Installation
Getting a home EV charger installed is an exciting step toward easier, more convenient electric vehicle ownership. While it’s more involved than just hanging a unit on the wall, the process is straightforward when you work with a qualified electrician. A professional home EV charger installation ensures your charger is safe, efficient, and perfectly suited to your home’s electrical system. From the initial site check to the final power-up, a certified team handles every detail so you can have complete peace of mind.
The entire process can be broken down into a few key stages. It starts with finding the perfect spot and making sure your electrical panel is up to the task. Then comes the technical work of running wires and mounting the unit. Finally, thorough testing confirms everything is working correctly. Let’s walk through what you can expect at each step.
Preparing the Site
Before any wiring begins, the first step is to choose the best location for your charger. Your electrician will work with you to find a spot that’s convenient for your daily routine, typically in your garage or near your driveway. They’ll consider the length of your vehicle’s charging cable and your usual parking spot. The choice between a Level 1 and a more powerful Level 2 charger also plays a role, as a Level 2 unit requires a dedicated 240-volt circuit. Once the location is finalized, your electrician will ensure the wall surface is suitable for mounting and that the area is clear for them to work safely and efficiently.
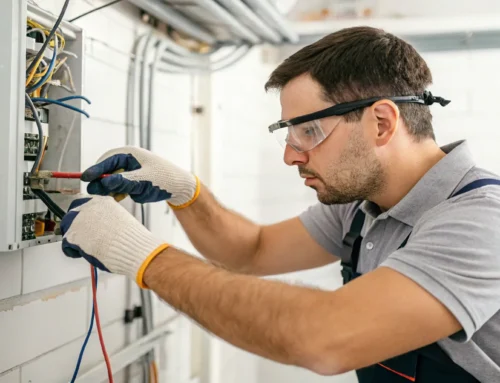
Assessing Your Electrical Panel
This is one of the most critical steps in the entire process. Your home’s electrical panel is like its central nervous system, and adding an EV charger is a significant new demand. A licensed electrician will perform an electrical load assessment to confirm your current system can support the charger without becoming overloaded. Many homeowners don’t realize their panel might not have enough capacity, which can lead to tripped breakers or more serious safety issues. Your electrician will inspect the panel for available space and calculate your home’s total energy usage to ensure a safe installation. If needed, they can discuss options for a panel upgrade as part of the project.
Running the New Wiring
With the location set and your panel approved, it’s time to run the new electrical line. This involves installing a new, dedicated circuit that runs directly from your main electrical panel to the charger’s location. Depending on where your panel is relative to your garage or parking spot, this could involve routing the wiring through walls, ceilings, or outdoor conduit. Your electrician will use the proper gauge wiring to handle the electrical load safely and meet all local electrical codes. This isn’t a simple DIY task; it requires a deep understanding of electrical systems to ensure the connection is secure, protected, and built to last.
Mounting and Connecting the Charger
Now for the exciting part—seeing your new charger go up on the wall. Your electrician will securely mount the EV charging unit at the agreed-upon height and location. They’ll make sure it’s level, stable, and easily accessible for you to use every day. After the unit is mounted, they will connect the new wiring to the charger’s terminals. This is a precise task where every connection must be tight and correct. Professional-grade chargers often include important safety features like built-in surge and ground fault protection, and your electrician will ensure everything is wired properly to keep your home and vehicle safe.
Final Testing and Inspection
The job isn’t finished once the charger is connected. The final step is to test the entire system from end to end. Your electrician will turn on the new circuit breaker, test the voltage at the charger, and verify that it’s delivering a stable and correct charge. They will often plug in a test unit or your own vehicle to confirm everything is communicating and functioning perfectly. Research shows that one of the most common installation mistakes is an incorrect load calculation, which is why this final check is so important. Depending on your location, a final inspection from your local building department may also be required to officially close out the permit, a process your electrical contractor will manage for you.
What Are Common Installation Mistakes to Avoid?
Installing an EV charger seems straightforward, but a few common missteps can cause major headaches and safety issues down the road. Getting it right from the start means you can enjoy convenient, reliable charging without any worries. The key is to plan ahead and understand the potential pitfalls before the work even begins. From assessing your home’s electrical system to picking the perfect spot, every decision matters. By avoiding these frequent errors, you ensure your charger is not only efficient but also safe for your home and family. Let’s walk through the biggest mistakes we see so you can get your installation done correctly the first time.
Misjudging Your Home’s Electrical Capacity
It’s easy to overlook, but you have to know if your home’s current electrical system can handle the extra load of an EV charger. Many homes, especially older ones, have electrical panels that are already near capacity. Adding a powerful Level 2 charger without checking first can lead to constantly tripped breakers or, in worst-case scenarios, an overloaded system that poses a fire risk. Before you buy a charger, a qualified electrician should perform a load calculation to confirm your panel has enough room. If it doesn’t, you may need an upgrade, but it’s a crucial step for a safe installation.
Choosing the Wrong Type of Charger
Not all chargers are created equal, and picking one that doesn’t fit your car or lifestyle can be a frustrating and costly mistake. A charger might be incompatible with your vehicle’s charging capabilities, leaving you with painfully slow charging speeds. Or, you might select a charger that demands more power than your home’s electrical system can safely provide. It’s important to match the charger’s amperage to what your car can accept and what your dedicated circuit can supply. Doing a little research upfront ensures you invest in a charger that delivers the performance you expect every time you plug in.
Picking a Poor Location
Where you install your charger matters more than you might think. Many people make the mistake of choosing a spot that’s inconvenient or doesn’t comply with local codes. Tucking it away in a hard-to-reach corner of the garage might seem tidy, but wrestling with a heavy charging cable every day gets old fast. You want a location that’s close to where you park, protected from the elements if possible, and allows the charging cable to reach your car’s port without being stretched or creating a trip hazard. Proper placement makes the daily routine of charging your car seamless and safe.
Forgetting to Install a Dedicated Circuit
Your EV charger is a high-power appliance and needs its own private line to the electrical panel. Sharing a circuit with other outlets or appliances is a recipe for trouble. A dedicated circuit ensures the charger receives a consistent, reliable flow of power without overloading the system. Failing to install one can cause frequent breaker trips and can even damage the charger or your vehicle’s battery over time. If you’re constantly dealing with electrical issues, it might be time to call for electrician repairs to ensure your system is set up correctly and safely for the demands of EV charging.
What Potential Installation Challenges Should You Know About?
Getting a home EV charger installed is usually a straightforward process, but it’s smart to be aware of a few potential hurdles. Thinking about these things ahead of time can help you and your electrician plan the perfect installation, ensuring everything goes smoothly from start to finish. Most of these challenges are simple for a professional to solve, but knowing they exist can save you from surprises down the road. From the capacity of your electrical panel to the rules of your neighborhood, here are a few common challenges to keep on your radar.
Limited Electrical Panel Capacity
Think of your electrical panel as the heart of your home’s electrical system—it distributes power everywhere it needs to go. An EV charger is a high-power appliance that adds a significant new demand on that system. If your panel is already close to its maximum capacity from running your air conditioning, oven, and other major appliances, adding a charger could cause overloads. This might lead to frequently tripped breakers or, in worse cases, create a safety hazard. A professional electrician will perform a load calculation to determine if your current panel can handle the extra demand. If not, you may need a panel upgrade, which is a common part of our residential electric services.
Long Distances from the Panel to the Charger
The ideal spot for your charger might be in a detached garage or on the far side of your driveway, a good distance from your electrical panel. While this is completely doable, the length of the wire run is an important factor. The longer the wire, the more potential there is for “voltage drop,” which means the charger receives slightly less power than it should. This can result in slower, less efficient charging for your vehicle. To prevent this, electricians use a thicker gauge of wire for longer runs, which can add to the material cost of the project. This is why planning the location carefully is a key step in the installation process.
Working with Older Electrical Systems
Many homes in our area have a rich history, but that can sometimes mean they also have older electrical systems. These systems were built long before anyone imagined plugging in a car, and they may not be equipped to handle the sustained, high-power draw of an EV charger. Issues can range from outdated wiring that isn’t up to current safety codes to panels that simply don’t have the space or capacity for a new dedicated circuit. For your safety, it’s absolutely essential to have a qualified electrician thoroughly inspect your system before installation. If any part of your system needs an update, handling those electrician repairs first will ensure your new charger works safely and reliably.
Navigating HOA Rules and Restrictions
If you live in a community governed by a Homeowners’ Association (HOA), you’ll want to check the rulebook before scheduling your installation. HOAs often have specific guidelines about any exterior modifications to your home, and that can include the placement and appearance of an EV charger. Some may require you to submit your plans for approval or have rules about where the conduit can be run. Taking a few minutes to review your HOA’s bylaws and get any necessary permissions upfront can prevent delays and ensure your project complies with community standards. It’s a simple step that makes for a much smoother process for everyone involved.
Breaking Down the Cost of a Home EV Charger Installation
Figuring out the budget for a home EV charger involves more than just the price tag on the unit itself. The total investment is a mix of the equipment you choose, the cost of professional labor, any necessary updates to your home’s electrical system, and local permit fees. Understanding each piece of the puzzle helps you get a clear picture of the final cost and ensures there are no surprises along the way. Let’s walk through the main expenses you can expect.
Equipment Costs
The first major cost is the charger itself. While most electric vehicles come with a basic Level 1 charger that plugs into a standard wall outlet, many owners opt for a faster Level 2 charger. A Level 1 charger is slow, adding only a few miles of range per hour. A Level 2 charger, on the other hand, requires a 240-volt outlet (like an electric dryer) and can fully charge your vehicle overnight. The price for Level 2 units varies, typically ranging from $300 to over $1,000, depending on the brand, power level, and features like Wi-Fi connectivity and smart scheduling.
Professional Installation Fees
Unless you’re a licensed electrician, installing a Level 2 charger is not a DIY project. Professional installation is essential for safety and to ensure everything is up to code. The fees for this service can vary quite a bit based on your home’s specific layout. Factors that influence the cost include the distance from your electrical panel to your desired charger location and the complexity of running the new wiring. An experienced residential electrician can give you an accurate quote based on a direct assessment of your property, ensuring the job is done right.
Potential Electrical Upgrades and Permits
Your home’s current electrical system plays a big role in the total installation cost. A Level 2 charger needs its own dedicated 240-volt circuit, and if your electrical panel is already full or lacks the capacity to handle the extra load, it will need to be upgraded. This is a more involved and costly job. In some cases, a load management system can be installed to balance electricity use and avoid a full panel replacement. Additionally, most municipalities require a permit for this type of electrical work to ensure it meets safety standards, which adds a small fee to the project.
Available Incentives and Rebates
The good news is that you can often lower the overall cost with financial incentives. There are federal tax credits available for both the charging equipment and the installation costs, which can save you a significant amount. Many state governments and local utility companies in Pennsylvania also offer their own rebates to encourage EV adoption. It’s always a great idea to check with your electricity provider and look into state programs before you start, as these savings can make the investment in a home charger even more worthwhile.
How to Maintain Your Home EV Charging System
Once your home EV charger is installed, it’s easy to think the work is done. But just like any other important piece of equipment in your home, a little routine maintenance goes a long way. Taking a few minutes every month to check on your system ensures it runs safely and efficiently, protecting both your vehicle and your home’s electrical system. Think of it as simple preventative care that safeguards your investment for years to come.
Regular upkeep doesn’t have to be complicated. It mostly involves simple visual inspections, basic cleaning, and knowing who to call if something seems off. By staying proactive, you can catch small issues before they become bigger problems, ensuring you always have a reliable charge ready when you need it. Let’s walk through the simple steps to keep your home charging station in top condition.
What to Look for During Regular Inspections
Set aside a few minutes each month to give your EV charger a quick once-over. Start with the charging cable and connector, looking for any signs of wear and tear like cracks, frays, or exposed wiring. Check the connector pins to make sure they are clean and straight. Next, inspect the charger unit itself for any physical damage. During a charging session, pay attention to any unusual sounds like buzzing or clicking, and check for any error messages on the display. If you notice anything that concerns you, it might be time to call for professional electrician repairs to get it checked out.
Simple Cleaning and Care
Keeping your charging station clean is one of the easiest ways to maintain it. First, make sure to turn off the power to the charger at the circuit breaker. Use a soft, damp cloth to wipe down the exterior of the unit, the cable, and the connector handle to remove any dust, dirt, or grime. Avoid using harsh chemicals or abrasive cleaners. If your charger is installed outdoors, periodically clear away any leaves, snow, or debris that could block ventilation or damage the unit. This simple step helps maintain the charger’s weatherproofing and ensures it continues to operate safely and effectively through every season.
When to Call a Professional for Service
While routine inspections and cleaning are great DIY tasks, some situations require an expert. You should never attempt to open the charger unit or perform electrical work yourself. It’s time to call a professional if your charger repeatedly trips the circuit breaker, if you see persistent error codes, or if the unit feels unusually hot to the touch. Slower-than-normal charging speeds or visible damage to the wiring are also clear signs you need help. For any of these issues, reaching out to a trusted expert for residential electric services is the safest and most reliable solution to get your system back in perfect working order.
Related Articles
Frequently Asked Questions
Do I really need a Level 2 charger, or is the one that came with my car good enough? The Level 1 charger that comes with most EVs is a great starting point, but it’s very slow, adding only a few miles of range per hour. If you have a short daily commute and can plug in for 10-12 hours every night, it might work for you. However, most drivers find a Level 2 charger to be a necessary upgrade. It provides a much faster charge that can completely replenish your battery overnight, giving you the flexibility and peace of mind to handle unexpected trips with a full “tank.”
What happens if my electrical panel can’t handle a new EV charger? This is a common situation, especially in older homes, so don’t worry. A licensed electrician will perform a load calculation to see if your panel has enough capacity. If it doesn’t, they will discuss your options. This might involve upgrading your main electrical panel to a higher amperage or, in some cases, installing a special load management system that intelligently balances the power between your charger and other large appliances.
Besides the charger itself, what other costs should I expect for installation? The total cost includes a few key components beyond the charging unit. You should budget for the professional labor, the cost of the new dedicated circuit breaker, and the heavy-gauge copper wiring needed to connect the charger to your panel. The biggest variable is the distance between your electrical panel and the charger’s location, as longer runs require more materials and time. Finally, there is typically a small fee for the local electrical permit.
Is it safe to install an EV charger myself? Installing a Level 2 charger is a job that should always be left to a licensed professional. This isn’t a simple appliance; it’s a high-power device that requires a new, dedicated 240-volt circuit to be run from your main panel. An improper installation can create a serious fire hazard, damage your vehicle’s sensitive electronics, and may even void your homeowner’s insurance. A professional ensures the work is done safely and meets all national and local electrical codes.
How much does the location of the charger affect the installation? The location you choose has a significant impact on both the final cost and your daily convenience. Placing the charger closer to your main electrical panel will reduce the amount of wiring and labor needed, making the installation more affordable. You also want to pick a spot that allows the charging cable to easily reach your car’s port without being stretched or creating a trip hazard in your garage or driveway.