One of the first questions homeowners ask about an ev car home charger installation is, “How much is this going to cost?” While it is an investment, you might be surprised to learn that you may not have to cover the full price yourself. Federal tax credits, state rebates, and even programs from your local utility company can significantly reduce the overall cost. Understanding these incentives is a crucial part of the planning process. This guide will not only walk you through the typical costs of equipment and labor but also show you how to find and apply for these money-saving programs.
Key Takeaways
- Choose the Right Charger for Your Lifestyle: While a basic Level 1 charger works for some, a Level 2 charger is the standard for most EV drivers because it provides a full charge overnight. Your daily commute and vehicle’s battery size will determine the best fit for you.
- Budget for the Full Installation, Not Just the Device: The final cost includes the charger itself, professional labor, and potential electrical panel upgrades. Get detailed quotes from qualified electricians that break down all expenses to avoid surprises.
- Always Hire a Licensed Professional: A qualified electrician is essential for a safe, code-compliant installation. They will handle the electrical assessment and permitting process, ensuring your home and vehicle are protected while helping you find available rebates.
What Are the Types of Home EV Chargers?
When you bring home your new electric vehicle, you’ll also need a way to charge it. The options are broken down into three categories, or “levels,” based on their charging speed and power requirements. Choosing the right one for your garage depends on your daily driving habits, your car’s capabilities, and your home’s electrical setup. Let’s walk through each level so you can figure out what makes the most sense for you. While it might seem technical, the differences are pretty straightforward.
The main thing to remember is that not all chargers are created equal. The level you choose will directly impact how quickly you can get back on the road with a full battery. For some, the slow and steady pace of a basic charger is perfectly fine. For others, especially those with longer commutes or families juggling multiple schedules, a faster charger is a necessity. It’s also important to think about your home’s current electrical capacity. Some charging solutions are simple plug-and-play, while others require a professional to come in and make sure your system is ready for the extra demand. Understanding these differences will help you avoid surprises and ensure your EV charging experience is as seamless as possible from day one.
Level 1: The Basic Plug-In Charger
Think of a Level 1 charger as the most straightforward option. It’s typically the charging cord that comes included with your EV purchase. This charger doesn’t require any special installation—it plugs directly into a standard 110-volt household outlet, the same kind you use for your phone or lamp. The convenience comes at the cost of speed. A Level 1 charger is the slowest, adding only about two to three miles of range for every hour it’s plugged in. For most people, this is best for overnight charging if you have a short commute or don’t drive your EV every day. It’s a great starting point, but many drivers find they eventually want something faster.
Level 2: The Standard for Home Charging
A Level 2 charger is the most popular and practical choice for home charging. It offers a much faster charge, adding anywhere from 10 to 35 miles of range per hour. This speed requires more power, so a Level 2 charger needs a 240-volt outlet, similar to what an electric stove or clothes dryer uses. Because of this, it requires professional residential electrical work by a licensed electrician. They will ensure your home’s electrical system can handle the load and install a new dedicated circuit for the charger. This is the sweet spot for most EV drivers, making it easy to get a full charge overnight and be ready for the day ahead.
DC Fast Chargers: Powerful, But Not for Home Use
You’ve probably seen DC Fast Chargers (sometimes called Level 3) at public charging stations along major highways or in shopping center parking lots. These are the heavy hitters of the charging world, capable of charging an EV battery to 80% in just 10 to 30 minutes. Their incredible speed requires a huge amount of power—far more than a typical residential electrical system can provide. For that reason, DC Fast Chargers are strictly for commercial and public use. They are perfect for long road trips or when you need a quick power-up while running errands, but they aren’t an option for your garage.
How Much Does EV Charger Installation Cost?
When you’re thinking about installing a home EV charger, one of the first questions that comes to mind is, “What’s this going to cost me?” The answer isn’t a single number, because the total price is a mix of a few key factors: the charger itself, the cost of professional installation, and any necessary upgrades to your home’s electrical system. It’s helpful to view it as an investment in your home and your daily convenience. Having a charger ready to go in your garage means no more trips to public charging stations and waking up to a full battery every morning.
The final cost can vary quite a bit from one home to another. A straightforward installation in a newer home with an up-to-date electrical panel will cost less than one in an older home that requires significant electrical work. That’s why getting a professional assessment is so important. A qualified electrician can evaluate your current setup and give you a clear picture of the total investment. Understanding these components will help you budget properly and make an informed decision about your home’s residential electric needs.
Breaking Down Equipment Costs
The first piece of the puzzle is the charging station itself. For home use, a Level 2 charger is the standard, offering a much faster charge time than a basic Level 1 charger that plugs into a regular wall outlet. The price for a quality Level 2 charger typically falls somewhere between $500 and $700.
This price range can shift depending on the brand and features you choose. Some chargers come with smart capabilities, like Wi-Fi connectivity that lets you schedule charging sessions from your phone during off-peak electricity hours. Others might have longer cables or higher amperage for a quicker charge. Think about what features are most important for your lifestyle when you’re comparing models.
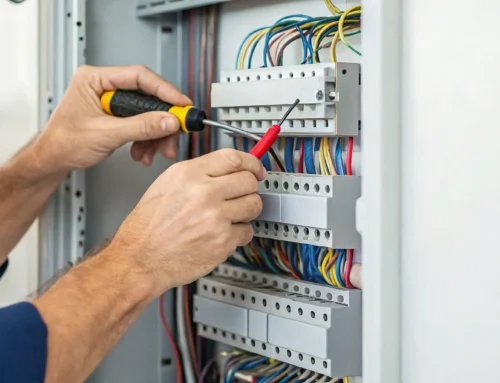
Understanding Labor and Professional Fees
Once you have your charger, the next step is getting it installed safely and correctly, and this is not a DIY project. Professional installation is crucial, and the labor costs for a standard Level 2 charger installation typically range from $400 to $1,200. This fee covers the licensed electrician’s time and expertise to run a new, dedicated 240-volt circuit from your electrical panel to your garage or driveway.
The final labor cost depends on the complexity of the job. A key factor is the distance between your electrical panel and the desired charger location. A longer run requires more materials and time, which can increase the price. A professional from our electrician repairs team can ensure the job is done to code, keeping your home and vehicle safe.
Planning for Panel Upgrades and Other Expenses
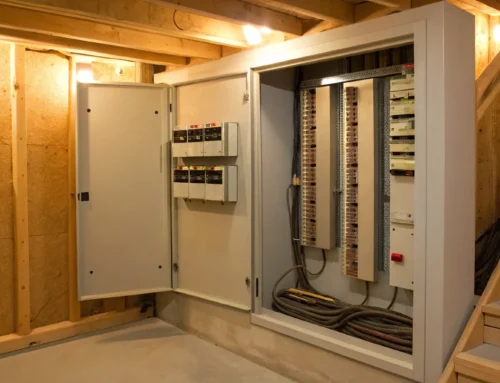
Sometimes, the installation process reveals that your home’s current electrical system needs a little help to handle the new charger. The most common “extra” expense is an electrical panel upgrade. Many older homes have panels that are already at or near capacity, and adding a high-draw appliance like an EV charger requires more power than is available. Upgrading your panel is a significant job that adds to the overall project cost.
Other potential expenses could include trenching to run wiring to a detached garage or installing a second electric meter specifically for your EV. While less common, these situations can add a few thousand dollars to the final bill. This is why a thorough initial assessment is so important—it identifies these potential needs upfront so there are no surprises.
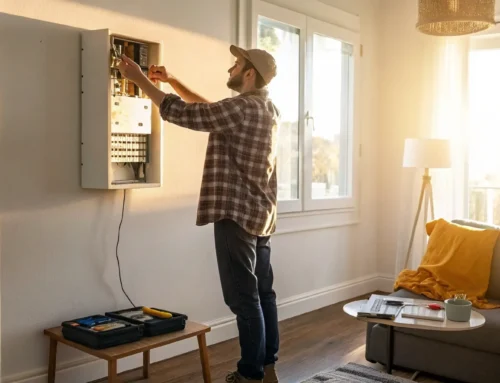
What Is the Home EV Charger Installation Process?
Getting a home EV charger installed is an exciting step toward making your electric vehicle a seamless part of your daily life. While it might seem like a big project, the process is quite straightforward when you break it down with a professional. It’s more involved than just plugging something in, especially for a Level 2 charger, because it requires working directly with your home’s electrical system. For safety and to ensure everything works correctly, this is a job that absolutely requires a qualified electrician. They have the training and tools to handle high-voltage wiring safely and make sure your new charger doesn’t overload your home’s circuits.
A professional will guide you through every step, from evaluating your current setup to flipping the switch on your new charger. They’ll make sure your home can handle the extra electrical load, secure the necessary permits, and perform the installation according to all local codes. Think of it as a small home improvement project that pays off every time you charge your car. The right team makes the entire process smooth and worry-free, handling all the technical details so you can focus on the convenience of at-home charging.
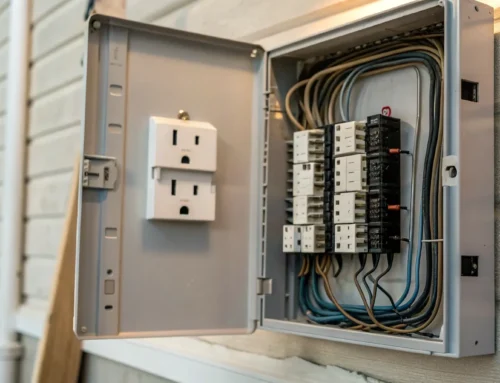
Assess Your Electrical System’s Capacity
Before you can install a Level 2 charger, the first step is to get an electrical assessment. A licensed electrician needs to take a look at your home’s electrical panel to see if it can handle the added demand. Most Level 2 chargers require a dedicated 240-volt circuit, which is a significant draw on your system. The electrician will check your panel’s total capacity and see if there’s enough room for a new circuit. If your panel is older or already powering a lot of appliances, you might need an upgrade. This initial check is crucial for a safe and effective installation and prevents issues like tripped breakers down the road.
Secure the Right Permits
After assessing your system, the next step is securing the proper permits. This might sound like a hassle, but it’s a non-negotiable part of the process. Getting a permit ensures that the work is done safely, correctly, and up to local electrical codes. It also protects you; as one homeowner on Reddit noted, it’s important for your insurance company in case there’s ever a problem. A professional installer will handle all the paperwork and logistics for you, coordinating with your local municipality to get the necessary approvals. This way, you can be confident that your installation is fully compliant and properly documented, giving you complete peace of mind.
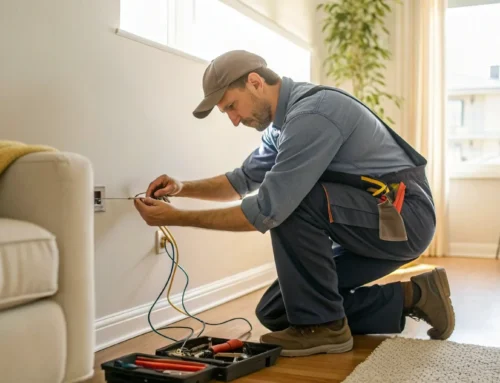
What to Expect from a Professional Installation
On installation day, a professional electrician will arrive to get your charger up and running. The process typically involves running a new, dedicated circuit from your electrical panel to your desired charger location, like your garage or driveway. They will install the 240-volt outlet or hardwire the charging unit directly, depending on the model you’ve chosen. The electrician will securely mount the charger to the wall and make sure all wiring is neat and safe. Finally, they’ll test the entire system to confirm it’s delivering power correctly to your vehicle. Using a professional for your residential electric needs ensures the job is done right.
What Should You Know Before Installing an EV Charger?
Getting an EV charger installed at home is an exciting step, but a little planning goes a long way. Before you schedule an installation, thinking through a few key details will ensure you get the right setup for your car, your lifestyle, and your home’s electrical system. This preparation helps the entire process run smoothly, from picking the perfect spot in your garage to understanding the type of power you’ll need. It also helps you have a more productive conversation with your electrician, so you can be confident you’re getting exactly what you need.
Taking the time to consider your vehicle’s specific needs, your daily commute, and even your future plans can save you from headaches and extra costs down the road. A well-planned installation means you’ll have a reliable, convenient, and efficient charging station that’s ready to go whenever you are. It’s about more than just plugging in your car; it’s about integrating this new technology into your home in a way that’s safe, smart, and sustainable. Let’s walk through the essential things to consider before you make the call to ensure your home charging experience is perfect from day one.
Check Your Vehicle’s Charging Needs
Not all electric vehicles are the same, and their charging requirements can vary quite a bit. The first step is to understand what your specific car needs. Is it a plug-in hybrid with a smaller battery or a fully electric vehicle built for long-range travel? A hybrid might do just fine with a basic Level 1 charger, while a full EV will benefit greatly from the faster speed of a Level 2 charger. Check your vehicle’s manual or the manufacturer’s website to find its maximum charge rate. This information is key to selecting a charger that can power up your car efficiently without being overkill.
Consider Your Daily Driving Habits
Think about how you use your car day-to-day. If your daily commute is short and you have plenty of time to charge overnight, a simple Level 1 charger that uses a standard wall outlet might be sufficient. However, if you drive long distances regularly or need the flexibility to top off your battery quickly, investing in a Level 2 charger is a smart move. A Level 2 unit can fully charge your EV in a matter of hours, not days, giving you more freedom and peace of mind. Your driving habits are the best indicator of which charging speed will fit seamlessly into your life.
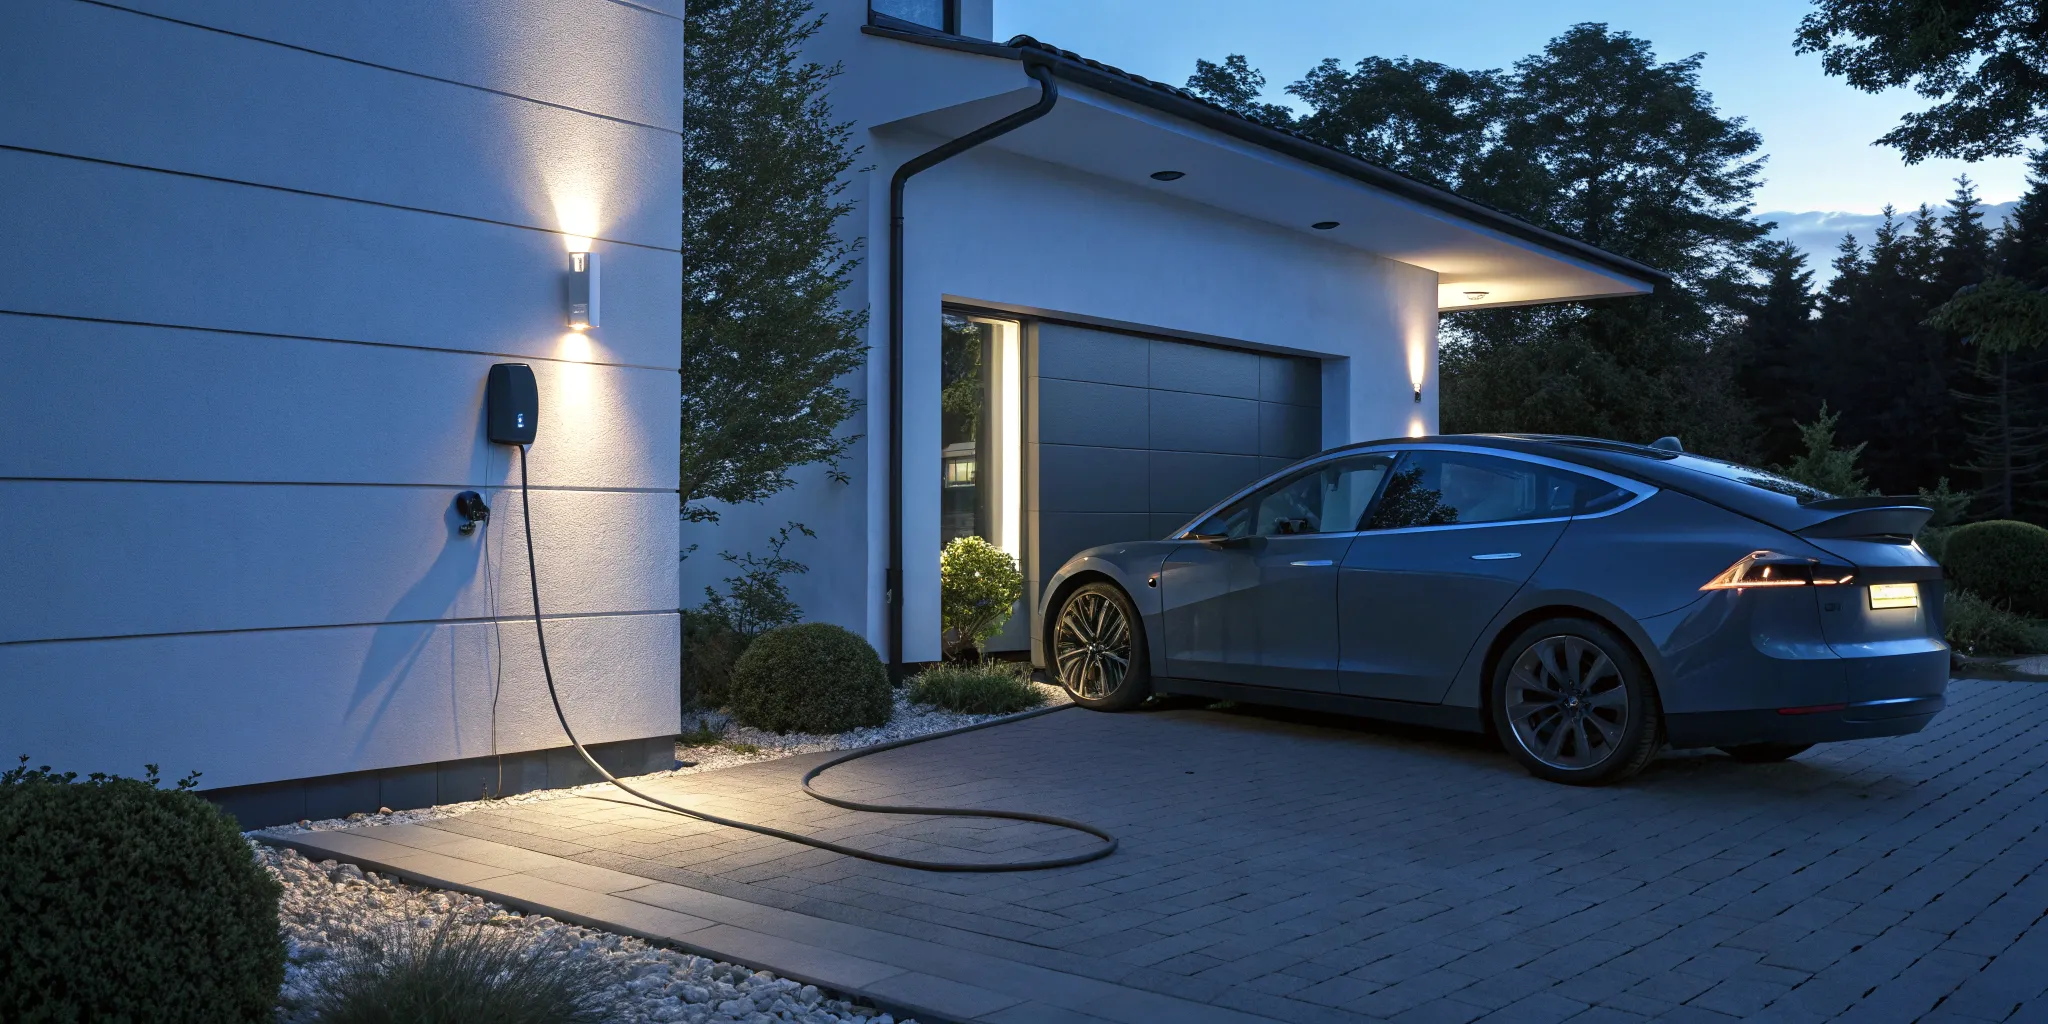
Find the Best Location for Your Charger
Where you put your charger matters for both convenience and cost. Most people install them in a garage or driveway, close to where they park. You’ll need to measure the distance from your home’s electrical panel to your desired charging spot, as a longer distance can increase installation costs. Also, check the length of the charging cable that comes with the unit you’re considering—they typically range from 12 to 25 feet. A professional can perform an assessment to help you find the safest and most practical location for your residential electric system.
Decide Between a Hardwired vs. Plug-in Charger
You have two main installation options: a hardwired unit or a plug-in model. A hardwired charger is connected directly to your home’s electrical system by an electrician. This often results in a more durable and weatherproof setup. A plug-in charger, on the other hand, connects to a high-voltage outlet (like one for a clothes dryer). This offers a bit more flexibility if you ever want to move the charger. Many professionals recommend hardwiring for its reliability, but the best choice depends on your specific needs and home setup.
Plan for Future Electric Vehicles
Your current EV might not be your last. As you plan your installation, think about the future. Do you see your family adding a second electric vehicle down the line? If so, you might consider installing a charger with a higher amperage that can be shared between two cars or wiring your garage to easily add a second charger later. Making these considerations now can save you significant money on future electrician repairs or upgrades. Investing in a slightly more robust system today can make your home ready for the next generation of electric cars.
Can You Get Incentives for a Home EV Charger?
One of the best parts about installing a home EV charger is that you often don’t have to cover the full cost yourself. Various programs are available to make the switch more affordable, from federal tax credits to local rebates. These incentives are designed to encourage the adoption of electric vehicles by reducing the initial cost of setting up your home charging station. Think of it as a thank you for making a more environmentally friendly choice. These programs can change, so it’s always a good idea to check for the latest details, but they can significantly lower your overall investment.
Taking a few minutes to research these opportunities can save you hundreds, or even thousands, of dollars. A qualified electrician can often point you toward current programs and help ensure your installation meets the requirements for any incentives you plan to claim. They stay up-to-date on the paperwork and technical specifications needed, so you don’t have to worry about missing out on a technicality. It’s a simple step that makes the whole process smoother and more rewarding. Before you even purchase a charger, it’s wise to see what financial help is out there.
Federal Tax Credits
The federal government offers a tax credit that can help you recoup a portion of your installation costs. The Residential Clean Energy Credit covers 30% of the cost for new, qualified clean energy property for your home, which includes certain EV charging equipment. This isn’t a simple discount; it’s a credit, meaning it directly reduces the amount of income tax you owe. If you spend $2,000 on your charger and installation, a 30% credit would save you $600 on your tax bill. Be sure to check the latest federal guidelines and consult with a tax professional to confirm your eligibility and claim the credit correctly.
State and Local Rebates
On top of federal incentives, many states and even local municipalities offer their own programs. Here in Pennsylvania, it’s worth looking into what rebates or grants might be available to you. These programs can vary widely, from direct cash-back rebates after your installation is complete to grants that cover a portion of the upfront cost. These incentives are a fantastic way to stack your savings. You can often find information on your state’s Department of Environmental Protection or energy office website. These programs are popular, so it’s smart to check for available funds and apply as soon as you can.
Utility Company Programs
Don’t forget to check with your local electric company. Many utility providers offer their own incentives to encourage home charging. They might provide a rebate on the purchase of a specific Level 2 charger, offer a discount on the installation, or give you a bill credit after the work is done. Some also have special rate plans for EV owners, allowing you to charge your vehicle overnight at a much lower electricity cost. For example, customers in the area can explore PECO’s EV programs to see what rebates and special rates are currently available. A quick call or visit to their website can uncover savings you might have otherwise missed.
Common EV Charger Installation Mistakes to Avoid
Installing a home EV charger is an exciting step toward a more convenient and sustainable lifestyle. But a smooth installation process requires a bit of planning. Rushing into it without the right information can lead to extra costs, safety issues, or a setup that just doesn’t meet your needs. By being aware of a few common missteps, you can ensure your installation is done right the first time, giving you a reliable charging station for years to come. Let’s walk through the key mistakes to sidestep so you can get the most out of your investment.
Skipping a Professional Assessment and Permits
It can be tempting to try and save a few dollars by cutting corners, but skipping a professional assessment is a mistake you don’t want to make. A licensed electrician will evaluate your home’s electrical system to confirm it can safely handle the load of an EV charger. They can also help you pull the necessary permits for the installation. Getting a permit isn’t just about following rules; it ensures the work is done correctly and safely, which is crucial for protecting your home and your family. Plus, having a permitted installation protects you with your insurance company if a problem ever arises. A professional handles all of this, giving you complete peace of mind.
Choosing the Wrong Charger or Location
Not all EV chargers are created equal, and picking the right one is about more than just brand names. The best charger for you depends on your specific vehicle, how much you drive daily, and how quickly you need to recharge. A plug-in hybrid with a small battery has different needs than an all-electric SUV used for long commutes. Similarly, the location of your charger matters. You’ll want to install it somewhere convenient, like your garage or driveway, ensuring the charging cable can easily reach your car’s port without being a tripping hazard. Thinking through these details beforehand ensures your final setup is both practical and efficient for your daily routine.
Ignoring Your Electrical System’s Limits
A Level 2 charger adds a significant electrical load to your home, similar to a new electric oven or central air conditioner. Before you buy anything, it’s essential to have a qualified electrician determine if your home’s electrical panel can handle the extra demand. If your panel is older or already at capacity, you might need an upgrade to safely support the new charger. This isn’t a step you can ignore. Overloading your system can lead to tripped breakers or, in worse cases, create a serious fire hazard. A professional assessment of your residential electrical system will identify any necessary upgrades, keeping your home safe.
Missing Out on Available Rebates
Many homeowners don’t realize they can get money back for installing an EV charger. Federal, state, and even local utility companies often have programs that offer tax credits or cash rebates to encourage electric vehicle adoption. These incentives can save you hundreds of dollars on the total cost of your installation, but they often have specific requirements and deadlines. Before you start your project, take a few minutes to check with your electric company and look up state programs. A knowledgeable installer is often aware of local incentives and can help you find programs you qualify for, making your switch to home charging even more affordable.
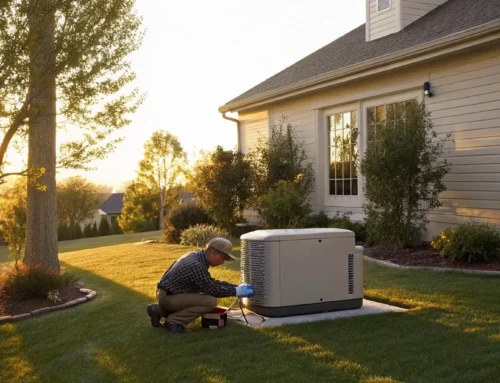
How Do You Find the Right EV Charger Installer?
Choosing the right EV charger is only half the battle; finding a qualified professional to install it is just as important. This isn’t a typical DIY project. It involves working with your home’s high-voltage electrical system, which requires expertise to ensure everything is safe, up to code, and functions correctly for years to come. A proper installation protects your vehicle, your home, and your family.
The key is to find a licensed electrician with specific experience in EV charger installations. They’ll understand the unique power requirements, the best equipment to use, and how to integrate the charger seamlessly with your existing electrical panel. Taking the time to vet your installer will give you peace of mind knowing the job was done right.
Verify Their Qualifications and Certifications
Before you hire anyone, your first step is to confirm they are a licensed and insured electrician. This is non-negotiable. A licensed professional ensures the work complies with the National Electrical Code (NEC) and local regulations, which is crucial for safety and for passing any required inspections. Ask for their license number and verify it with your state’s licensing board. Insurance is equally important, as it protects you from liability in case of accidents or property damage during the installation. You should also ask about their direct experience with EV chargers. A general electrician might be able to do the job, but one who specializes in residential electric services and EV installations will be more familiar with the specific products and potential challenges.
Get Multiple Quotes and Compare Services
It’s always a good idea to get at least three quotes from different qualified electricians. This helps you get a sense of the fair market rate in your area and allows you to compare what each professional offers. Be aware that prices can vary significantly, so look closely at what’s included in each estimate. The lowest bid isn’t always the best choice. A detailed quote should break down the costs for labor, materials (like conduit, wiring, and breakers), the charger itself if included, and permit fees. A vague quote is often a red flag. Comparing detailed proposals helps you make an informed decision based on value and expertise, not just the bottom-line price.
Ask These Questions Before You Hire
Once you have a few quotes, it’s time to ask some specific questions to finalize your decision. A trustworthy electrician will be happy to provide clear answers.
Start with these:
- Will you handle the permitting process?
- Is the cost of the charger included in this quote? If so, what brand and model is it?
- Can you provide details on the wiring you plan to use, including its thickness (gauge)?
- Does the estimate include patching any drywall if you need to run wires through walls?
- What is your warranty on parts and labor, and how do you handle service calls or electrician repairs if something goes wrong?
This is also a great time to ask if they are aware of any local utility company rebates for EV charger installations. Many providers offer programs that can save you money, and an experienced electrician in your area should know about them.
Related Articles
- Home Car Charger Installation: A Step-by-Step Guide
- EV Charger Installation Cost: A 2025 Breakdown
- EV Charger Home Installation Diagram: A Visual Guide
Frequently Asked Questions
Do I really need a professional electrician to install my EV charger? Yes, absolutely. A Level 2 charger requires a dedicated 240-volt circuit, which is a serious electrical project. A licensed electrician will ensure the installation is done safely, meets all local codes, and won’t overload your home’s system. This isn’t just about following rules—it’s about protecting your home, your vehicle, and your family from potential fire hazards.
How long does a typical Level 2 charger installation take? The installation itself is usually completed in just a few hours. However, the entire process from your first call to the final sign-off can take a bit longer. It includes an initial assessment of your electrical panel, securing any necessary permits from your town, and then the actual installation day. A professional installer will give you a clear timeline after they’ve seen your home’s specific setup.
Is a Level 2 charger going to make my electricity bill skyrocket? Your electricity bill will certainly go up, but it’s important to put that cost in perspective. For most drivers, charging an EV at home is significantly cheaper than buying gasoline. You can also manage the cost by charging during off-peak hours when electricity rates are lower. Many modern chargers even have scheduling features that make this easy to do automatically.
My home is older and I’m worried my electrical panel can’t handle a charger. What are my options? An older electrical panel doesn’t automatically mean you can’t get an EV charger. The first step is to have a qualified electrician perform an assessment. They can determine if your current panel has enough capacity. If it doesn’t, the solution is typically a panel upgrade. While this adds to the project cost, it also makes your entire home’s electrical system safer and better equipped for modern life.
Is it really worth paying for a Level 2 installation when a Level 1 charger came with my car for free? For most people, the answer is a definite yes. While a Level 1 charger is a good backup, it can take days to fully charge your car. A Level 2 charger adds significant range in just a few hours, meaning you can always leave home with a full battery. It’s an investment in convenience and peace of mind that removes any anxiety about your daily driving range and makes the EV experience truly seamless.