
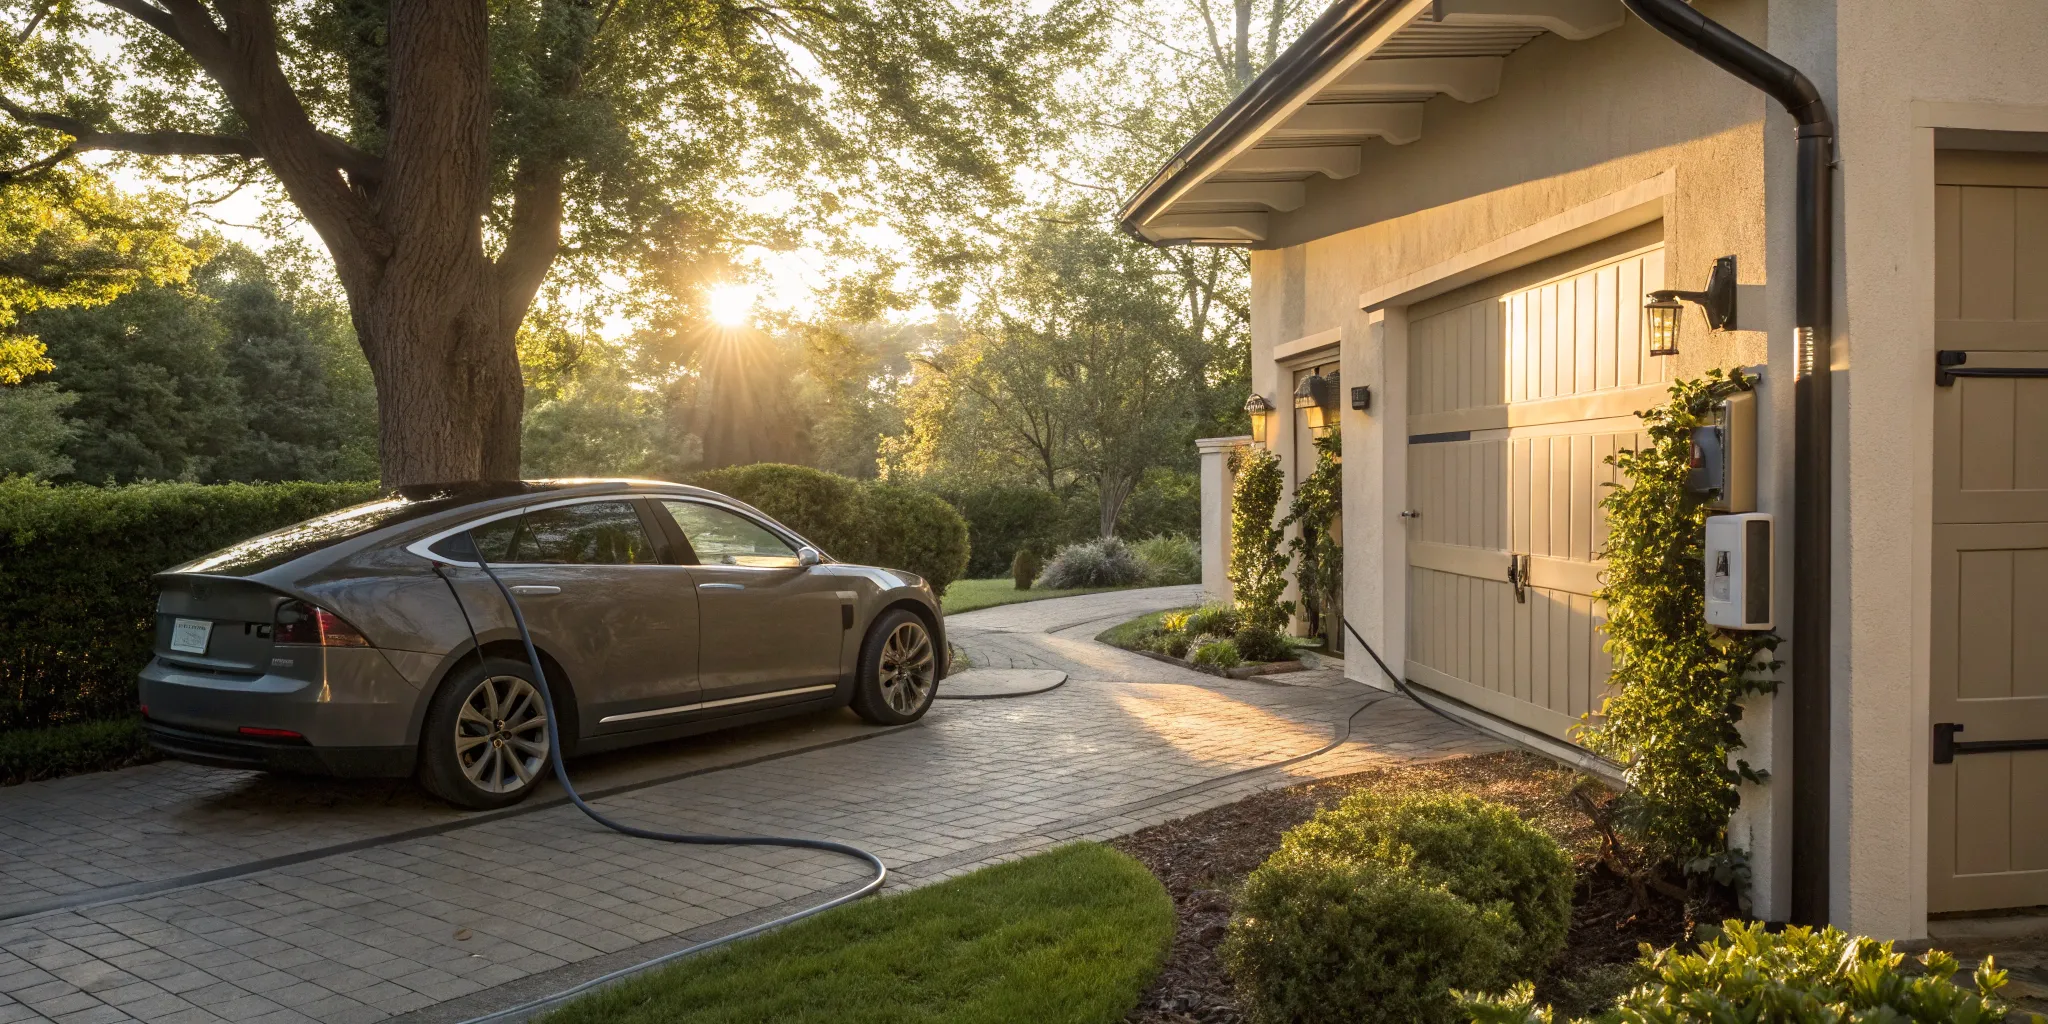
One of the best parts of owning an EV is saying goodbye to the gas station. Instead, you get the simple convenience of plugging in at home. Waking up every morning to a fully charged car, ready for whatever the day holds, is a major perk. But to get there, you first need to understand how to make a car charger work in the house safely and correctly. A professional home car charger installation is the key to unlocking this convenience. It might sound like a big electrical project, but it’s a surprisingly straightforward process when you know what to expect.
Key Takeaways
- Prioritize a Professional Installation: A licensed electrician is essential for a safe and effective setup. They will assess your home’s electrical panel, help you choose the right location, and install a dedicated circuit to prevent overloading your system.
- Budget for the Complete Project: The sticker price of the charger is only one part of the equation. Your total cost will also include professional labor, permit fees, and possible electrical panel upgrades, so be sure to get a detailed quote upfront.
- Look for Rebates and Tax Credits: You can significantly reduce your total cost by exploring available incentives. Check for federal tax credits, Pennsylvania state programs, and local utility rebates before you begin your project to maximize your savings.
Which Home EV Charger Is Right for You?
Choosing a home charger for your electric vehicle can feel like a big decision, but it really comes down to your driving habits and how quickly you need to power up. Think of it like picking a coffee maker—some people are fine with a slow drip, while others need a high-speed espresso machine. The good news is there’s a perfect fit for every lifestyle. Let’s walk through the main types of chargers so you can find the right one for your garage.
Level 1 Chargers: Just Plug In and Go
The Level 1 charger is the most basic option and the one that likely came with your car. It’s incredibly straightforward: you just plug it into a standard 110V household outlet, the same kind you use for your phone or a lamp. The trade-off for this simplicity is speed. A Level 1 charger adds about two to three miles of range per hour, making it best for drivers with short daily commutes or plug-in hybrids. If you can leave your car plugged in all night, you’ll wake up with enough juice for typical daily errands. It’s a no-fuss solution that requires no special installation.
Why a Safety Check is Still a Smart Move
Even with a Level 1 charger that uses a standard wall outlet, getting a professional safety check is a wise first step. Think of it this way: your EV will be drawing a significant amount of power continuously for hours at a time, which is a much bigger job than charging your phone. A licensed electrician can inspect the outlet and the circuit it’s connected to, ensuring the wiring is in good shape and can safely handle that sustained load. This is especially important in older homes, where electrical systems might not be designed for the demands of modern technology. A quick inspection provides peace of mind that you won’t be overloading your system.
An electrician will also look at your home’s main electrical panel to see what else shares the circuit with your charging outlet. If that same circuit powers your garage freezer and workshop tools, you could face constantly tripped breakers. The U.S. Department of Energy recommends a dedicated circuit for Level 1 charging to ensure consistent and reliable power. This simple step prevents your car from competing for electricity with other appliances, ensuring it charges reliably overnight without disrupting the rest of your home’s electrical flow.
Ultimately, this safety check is about protecting your home, your vehicle, and your family. High-voltage electricity demands respect, and an improper setup can create serious risks, including overheating and potential fire hazards. Having a certified professional confirm that your system is up to code and ready for the task is a small investment that prevents major headaches later on. It ensures your transition to at-home charging is not only convenient but also completely safe and secure, giving you total confidence every time you plug in.
Level 2: Get a Faster Charge at Home
For most EV owners, a Level 2 charger is the sweet spot. This is the most common type of home charger because it offers a great balance of speed and cost. Running on a 240V circuit—similar to an electric dryer or oven—a Level 2 unit can add 10 to 35 miles of range per hour. This means you can easily get a full charge overnight, even if you come home with a nearly empty battery. Because it requires a higher voltage outlet, this charger needs professional installation by a licensed electrician to ensure it’s done safely and correctly, but the convenience is well worth it for daily drivers.
Hardwired vs. Plug-In Chargers
When you step up to a Level 2 charger, you’ll have another choice to make: hardwired or plug-in. A hardwired charger is connected directly to your home’s electrical system by an electrician. This creates a permanent, seamless installation that often looks a bit cleaner in your garage. It’s a set-it-and-forget-it solution. A plug-in model, on the other hand, connects to a 240V outlet, much like an electric stove. The main benefit here is flexibility. If you move, you can simply unplug your charger and take it with you. Both options require a dedicated circuit, so you’ll need a professional to handle the electrical work safely, whether it’s installing the outlet or the charger itself.
Understanding Connector Types: J1772 vs. NACS
The final piece of the puzzle is making sure the charger’s plug fits your car’s port. For years, the J1772 was the universal connector for nearly every EV except Teslas. However, the industry is shifting, and many automakers are now adopting Tesla’s connector, which has been renamed the North American Charging Standard (NACS). Before you buy a charger, confirm which connector your vehicle uses. Don’t worry if you have a J1772 car and find a great deal on a NACS charger (or vice-versa)—adapters are widely available and work perfectly. This ensures you can charge your vehicle easily, no matter which standard becomes dominant in the future.
Level 3 / DC Fast Charging: Not for Home Use
You’ve probably heard of DC Fast Charging, often called Level 3 charging. This is the super-speed option you see at public stations along major highways, capable of adding 100 miles of range or more in under 30 minutes. It’s a lifesaver on a long road trip, but this powerful technology is strictly for commercial and public use—it’s not something you can install in your garage. The reason is simple: DC Fast Chargers require an incredible amount of power, operating on a high-voltage direct current (DC) system that residential electrical panels just aren’t built to handle. Think of it as the difference between a garden hose and a fire hydrant; they both supply water, but on completely different scales.
While DC Fast Charging is a game-changer for travel, your day-to-day charging will happen at home with a Level 2 setup. Having a reliable charger in your garage ensures you wake up every morning with a full battery, ready for whatever the day holds. It’s the foundation of a stress-free EV ownership experience. Installing a Level 2 charger requires a dedicated 240V circuit, which is a job for a licensed electrician. They will assess your home’s electrical system and ensure your charger is installed safely, giving you peace of mind and dependable performance for years to come.
What Can a Smart EV Charger Do for You?
If you love tech and want more control over your energy use, a smart charger is a fantastic choice. These are typically Level 2 chargers equipped with Wi-Fi connectivity. This allows you to manage your charging through a smartphone app. You can schedule sessions to run during off-peak hours when electricity rates are lower, saving you money on your utility bills. You can also track your energy consumption, get notifications when your car is fully charged, and even connect it to your home’s smart assistant. It’s a great way to make your EV charging more efficient and cost-effective.
Picking Your Perfect Charger: A Quick Checklist
When you’re ready to pick a charger, think about your daily driving needs and your home’s electrical setup. Consider hardwiring the unit directly into your electrical system, as this is often more durable and can sometimes simplify installation. As you gather quotes, make sure they are detailed. Ask if the price includes the charger itself and, if so, which brand and model. A trustworthy electrician will be transparent about all costs involved. Getting clear answers upfront helps you make an informed decision and ensures there are no surprises when it comes to your home electrical services.
Look for Safety Certifications (UL, ETL, ENERGY STAR)
When you’re shopping for a charger, think of it like buying any other major appliance for your home—safety comes first. You’ll want to look for specific labels on the packaging or the unit itself, like UL, ETL, or ENERGY STAR. These certifications mean the product has been independently tested to meet strict safety and performance standards. According to the U.S. Environmental Protection Agency, you should always choose a charger that is safety-certified to ensure it’s reliable. A certified charger is a great start, but the installation is just as crucial for your peace of mind. Hiring a qualified professional ensures the charger is connected to a dedicated circuit and that the entire setup complies with local electrical codes, protecting both your home and your new vehicle from potential electrical hazards. This is a job that requires expert professional electrical work, not a DIY project.
What’s the Real Cost to Install an EV Charger at Home?
Figuring out the budget for a home EV charger installation can feel a bit like putting together a puzzle. The final price isn’t just one number; it’s a combination of the charger itself, the cost of professional labor, any necessary electrical work, and local permits. While the total can vary quite a bit depending on your specific home and needs, understanding each piece of the puzzle will give you a clear picture of what to expect.
Think of the total cost in four main parts: the hardware, the installation service, potential home upgrades, and administrative fees. Breaking it down this way helps you see where your money is going and why certain costs are necessary for a safe and reliable setup. The best way to get a precise number for your home is to have a qualified electrician perform an assessment, but let’s walk through the typical costs you can anticipate.
Comparing Home vs. Public Charging Costs
When it comes to charging your electric vehicle, understanding the cost difference between plugging in at home and using a public station is essential for your budget. Home charging is almost always the most economical option, letting you refuel your car for a fraction of the price of public alternatives. According to Mercury Insurance, “Electricity at home is often cheaper than public chargers,” and you can maximize those savings by charging during “off-peak” hours, like late at night when utility rates are lowest. This simple habit means you can wake up to a fully charged car every morning without breaking the bank on your energy bill.
In contrast, public charging stations can be significantly more expensive. The same source notes that “public charging costs can be $0.20-$0.60 per kilowatt-hour (kWh) or more,” which adds up quickly for frequent drivers. Beyond the cost, the convenience of home charging is a huge advantage. As the US EPA highlights, “Most EV charging happens at home. It’s usually the cheapest and most convenient way to charge.” This saves you money and the time you’d otherwise spend searching for an available public charger. While the initial setup involves costs for the charger and professional electrical services, the long-term savings make it a worthwhile investment for most EV owners.
First, The Cost of the Charger Unit
First up is the charging unit. The cost for a Level 2 charger, which is what most homeowners install, typically falls between $300 and $1,200. This wide range comes down to factors like brand reputation, charging speed, and extra features. A basic, no-frills charger will be on the lower end, while “smart” chargers with Wi-Fi connectivity, app integration, and scheduling capabilities will cost more. While it’s tempting to go for the cheapest option, investing in a quality charger from a reputable brand can give you better performance and a longer lifespan.
What to Budget for an Electrician
This is where a licensed electrician comes in. Professional installation costs generally range from $850 to $1,400. This fee covers the electrician’s time and expertise to run a new dedicated 240-volt circuit from your electrical panel to your garage or driveway, mount the charger, and ensure everything is safely connected. Hiring a professional is non-negotiable—it guarantees the work is done correctly and meets all local electrical codes, protecting your home and your new vehicle. Our team of expert electricians can provide a detailed quote based on your home’s layout.
Will Your Home Need an Electrical Upgrade?
Sometimes, a home’s existing electrical system needs a little help to handle the new charger. If you live in an older home, you might have a 100-amp electrical panel, which may not be sufficient to support the added load of a Level 2 charger alongside your other appliances. In this case, you may need to upgrade your panel to 150 or 200 amps. This is a more significant project that will add to the overall cost, but it’s a crucial step for safety and for future-proofing your home’s electrical capacity.
Future-Proofing with a 50-Amp Circuit
When you discuss the installation with your electrician, it’s wise to plan for the future. Even if your current EV charges perfectly on a 30 or 40-amp circuit, consider installing wiring for a 50-amp circuit instead. The cost difference for the slightly thicker wire is minimal, and the labor to run it is usually the same. As electric vehicle technology advances, future cars may be able to charge even faster, requiring more power. By installing a 50-amp circuit now, you’re future-proofing your setup and avoiding the much larger expense of having to re-run wiring down the road. It’s a small, smart investment in your home’s electrical infrastructure.
Solutions for Homes with Low-Capacity Panels
If your home has an older electrical system with a 100-amp panel, don’t worry—it doesn’t automatically disqualify you from getting a Level 2 charger. The first step is to have a professional electrician assess your home’s total electrical load to see if there’s enough capacity. If the panel is maxed out, you have a few options. You could install a charger with a lower amperage setting or use a smart load management system that balances power between the charger and other large appliances. The most comprehensive solution is often a panel upgrade, which not only supports your EV charger but also improves your home’s overall electrical safety and capacity for any future needs, including a home standby generator.
Accounting for Permits and Inspection Fees
To ensure your installation is safe and up to code, a permit from your local municipality is usually required. Permit fees are typically modest, often around $20, but this can vary depending on where you live in Southeastern Pennsylvania. The permit process also involves an inspection after the work is complete to verify that everything was installed correctly. A professional contractor will handle all the paperwork and scheduling for permits and inspections, making the process seamless for you. This is a standard part of any professional residential electrical project.
How Utility Rate Plans Can Lower Your Charging Costs
Beyond the initial installation, one of the best ways to save money with your EV is by being smart about when you charge. Many utility providers offer special rate plans that charge you less for electricity during “off-peak” hours—usually late at night when overall energy demand is low. By simply scheduling your car to charge overnight, you can significantly cut down on your monthly electricity bill. This simple habit often makes charging at home far more affordable than relying on public charging stations. This is where a smart charger really shines; you can use its app to set a schedule, so your car automatically starts charging when rates are cheapest, making the whole process effortless. It’s a fantastic way to make your EV ownership both eco-friendly and budget-friendly.
Your Home EV Charger Installation: A 5-Step Guide
Getting a home EV charger installed might sound complicated, but when you work with a professional, it’s a pretty straightforward process. Knowing the steps ahead of time can make you feel more confident and prepared. From the first look at your electrical panel to the final test run, here’s a simple breakdown of what the installation process looks like.
Step 1: Your Initial Home Assessment
Before any tools come out, the first step is a professional home assessment. A licensed electrician will visit your home to get a clear picture of your current electrical setup. They’ll take a close look at your main electrical panel to see if it has enough capacity to handle the extra load from an EV charger. They’ll also inspect the existing wiring to ensure everything is safe and up to code. This initial check is crucial because it determines if your home needs any electrical service upgrades before the charger can be installed, ensuring a safe and reliable charge every time.
Working with a Qualified Electrician
When it comes to installing a home EV charger, working with a licensed electrician isn’t just a good idea—it’s a must for a safe and reliable setup. A qualified professional will start by assessing your home’s electrical panel to make sure it can handle the added power draw from the charger. They’ll also help you find the best spot for the unit and install a dedicated circuit to prevent any system overloads. This expert guidance is especially important if your home is older and might need some upgrades to support a Level 2 charger. An expert electrician also ensures all the work meets local electrical codes, protecting your home and vehicle, and will handle all the necessary permits and inspections for you. This is a standard part of any professional residential electrical project and gives you total peace of mind.
Step 2: Finding the Perfect Spot for Your Charger
Where you put your charger matters for both convenience and cost. During the assessment, you and your electrician will decide on the perfect spot. Ideally, it should be in your garage or driveway, close to where you park your car, making it easy to plug in. The location also needs to be relatively close to your electrical panel. The farther away it is, the more wiring and labor are needed, which can increase the installation cost. Your electrician will help you find a location that is practical, safe, and compliant with all local codes, so you don’t run into any issues down the road.
Planning for Cord Length and Outdoor Safety
Once you’ve pinpointed a general location, it’s time to think about the practical details, like the charging cord and outdoor safety. The cord needs to comfortably reach your car’s charging port no matter how you park. While longer cords are available, a well-placed charger is often the better solution. If your charger will be outside, it needs to be tough enough to handle Pennsylvania’s weather. Look for weatherproof models with a NEMA 3 or NEMA 4 rating, which are designed to stand up to rain and snow. Proper cable management is also key to prevent tripping hazards and protect the cord from damage. A professional can ensure your entire setup is safe, secure, and perfectly suited to your home’s layout, handling all the details of a proper electrical installation.
Step 3: Handling Permits and Scheduling Your Install
Once you’ve got a plan, it’s time to get on the schedule. Most home EV charger installations require a permit from your local municipality. This is a good thing—it ensures the work is done correctly and safely by a qualified professional. A reputable electrical contractor will handle the entire permitting process for you, from filling out the paperwork to coordinating with local inspectors. This step is a key reason why you should always hire a licensed pro who understands the specific requirements in your service area. It takes the guesswork and stress off your plate.
Step 4: Installation Day! What to Expect
On installation day, a qualified electrician will arrive to get the job done. The process typically takes a few hours. They will start by turning off the power to your home for safety. Then, they’ll install a new, dedicated 240-volt circuit on your electrical panel specifically for the EV charger. From there, they will run the necessary wiring from the panel to your chosen location and securely mount the charging unit to the wall. Having an experienced team handle the installation is key to avoiding common mistakes that could damage your charger, your vehicle, or even your home.
Step 5: Final Checks and Your First Charge
After the charger is mounted and wired, the final step is to make sure everything works perfectly. Your electrician will restore power and perform a series of tests to confirm the charger is operating correctly and safely. They’ll also show you how to use your new charger and answer any questions you have. Depending on your local regulations, a municipal inspector may need to visit to give the final approval and close out the permit. This final check gives you peace of mind, knowing your installation is professionally done and completely up to code.
Planning for Special Circumstances
Not every home has a straightforward garage-and-driveway setup, but that doesn’t mean you have to miss out on the convenience of home charging. Whether you’re renting an apartment or building your dream home from the ground up, a little extra planning can make your transition to an EV smooth and successful. Thinking through these unique situations ahead of time ensures you can find a charging solution that fits your lifestyle perfectly. Let’s look at a couple of common scenarios and how to approach them.
Charging Solutions for Renters and Apartments
If you live in an apartment or rental home, installing a personal Level 2 charger can be tricky, but it’s not impossible. The first step is to open a conversation with your landlord or property management company. Many are becoming more open to EV infrastructure as a valuable amenity. You can also explore the growing number of shared charging stations in apartment complexes and public lots. Apps like PlugShare are a great resource for locating nearby options. Even without a garage, you can still use a Level 1 charger with a standard outdoor outlet for a slow, steady charge, which is often enough for daily driving needs.
Building a New Home? Make it EV-Ready
Constructing a new home gives you the perfect opportunity to plan for the future. Making your home “EV-ready” from the start is one of the smartest and most cost-effective decisions you can make. This involves asking your builder to pre-wire a dedicated 240-volt circuit to the garage or driveway during construction. Installing a NEMA 14-50 outlet at this stage is much simpler and cheaper than retrofitting one later. It’s also wise to ensure your new home has at least a 150-amp electrical service to comfortably handle the load. Planning these residential electrical details upfront will save you significant money and hassle, ensuring your home is prepared for your first EV and any that follow.
Don’t Make These Home EV Charger Installation Mistakes
Installing a home EV charger is an exciting step toward convenience, but it’s a project that needs to be done right. A few common missteps can lead to frustration, extra costs, or even safety hazards down the road. Knowing what to watch out for helps ensure your installation is smooth, safe, and perfectly suited to your needs from day one. By steering clear of these frequent errors, you can make sure your investment works for you without any headaches. Here are the top mistakes to avoid when setting up your home charging station.
Choosing the Wrong Charger for Your EV
It might seem basic, but one of the most critical errors is choosing a charger that isn’t fully compatible with your electric vehicle. Not all chargers and cars speak the same language. Using the wrong one can result in slow, inefficient charging or, in worse cases, could potentially harm your car’s battery over time. Before you buy anything, double-check your vehicle’s charging specifications. Make sure the charger you select matches your car’s requirements for voltage, amperage, and connector type to ensure you get a safe and effective charge every time you plug in.
Why You Absolutely Need a Dedicated Circuit
Your new EV charger needs its own space in your home’s electrical system. A common mistake is trying to wire it into an existing circuit that already powers other parts of your home. EV chargers draw a significant and continuous amount of power, and they require a dedicated circuit to handle that load safely. Skipping this step can lead to constantly tripped breakers and can overload your wiring, creating a serious safety risk. A professional electrician will always install a dedicated circuit to provide the necessary power without putting a strain on the rest of your home’s electrical setup.
Are You Overloading Your Electrical Panel?
Before installing a charger, you have to make sure your main electrical panel can handle the extra demand. Many homeowners don’t realize that their panel might already be at or near capacity from powering all the other appliances in the house. Adding a high-draw device like an EV charger without assessing the panel can lead to major problems, from flickering lights and tripped breakers to the risk of an electrical fire. A qualified electrician will perform a load calculation to determine if your current panel is sufficient or if an upgrade is needed to safely support your new charger.
Understanding Your Car’s Built-in Power Regulation
It’s a common worry: can you damage your car by using a charger that’s “too powerful?” The short answer is no, and it’s thanks to some pretty smart technology inside your vehicle. Think of your EV as having its own built-in power manager. This onboard system carefully regulates the flow of electricity, ensuring the car only draws as much power as it can safely handle at any given moment. So, even if you connect to a high-speed Level 2 charger, your car’s battery is never at risk of being overloaded. This built-in safety feature is what makes charging so reliable and worry-free. You can plug in overnight and trust your vehicle to manage the process perfectly, waking up to a full battery. To ensure this system works flawlessly, always use a safety-certified charger and have it installed by a professional who can guarantee your home’s electrical system is up to the task.
Putting Your Charger in the Wrong Place
Where you put your charger matters more than you might think. It’s easy to pick a spot that seems convenient at first, only to find it’s a daily hassle. You’ll want to choose a location that’s easily accessible from your car’s charging port, so you aren’t stretching cables across walkways or struggling to reach. It also needs to meet safety standards, meaning it should be protected from the elements and have adequate ventilation. Thinking through the placement beforehand ensures your charging station is both convenient and safe for long-term use.
Thinking of a DIY Install? Read This First.
While the temptation to save money with a DIY project is understandable, installing an EV charger is not the place to cut corners. This is a high-voltage installation that involves working directly with your home’s electrical panel. A mistake can lead to serious safety hazards, damage to your vehicle, or a failed inspection. Hiring a licensed and insured electrician ensures the job is done correctly, meets all local electrical codes, and is completely safe for you and your family. It’s an investment in peace of mind and the longevity of your charging system.
Save on Your Installation: A Guide to EV Charger Rebates
One of the best parts about installing a home EV charger is that you don’t have to bear the full cost alone. A variety of federal, state, and local programs are available to make your installation more affordable. Taking the time to explore these options can lead to significant savings, turning a smart investment into an even smarter one. These incentives are designed to encourage the switch to electric vehicles, and they can make a real difference in your budget. Let’s walk through the key programs you should know about.
Start with Federal Tax Credits
The federal government offers a significant tax credit that can help lower the cost of your EV charger installation. The 30C EV charging tax credit allows you to claim up to 30% off the total cost of purchasing and installing your charger. This credit applies to equipment installed between January 1, 2023, and December 31, 2032, making it a fantastic long-term incentive. When it’s time to file your taxes, you’ll use IRS Form 8911 to apply for the credit. It’s a straightforward way to get a portion of your investment back directly.
Don’t Miss Out on PA State Programs
Beyond federal incentives, Pennsylvania often has its own programs to support residents switching to electric vehicles. These state-level rebates and grants can change from year to year, so it’s always a good idea to check for the most current information. The Pennsylvania Department of Environmental Protection is the best place to look for active programs that could help fund your home charging station. A quick search on their website can uncover additional savings you might not have known were available.
Your Local Utility Company Might Pay You Back
If you live in Chester, Montgomery, Bucks, or Delaware County, don’t forget to check with your local utility company. Many providers in our area offer their own rebates for installing a Level 2 charger at home. These programs often reward you for choosing energy-efficient models or for agreeing to charge during off-peak hours, which helps manage demand on the electrical grid. A quick call or a visit to your utility provider’s website can tell you exactly what rebates you’re eligible for, adding another layer of savings to your project.
Ask About Potential Car Insurance Discounts
When you’re tallying up the costs of EV ownership, remember to look past the obvious savings on gas and maintenance. Your car insurance premium could also be a source of savings. Many insurance companies offer special discounts for electric vehicles, making the switch even easier on your wallet. As some insurers point out, EVs often come equipped with advanced safety features, which can make them a lower risk to cover. It’s a great situation: you drive a safer car, and your insurance provider may reward you for it. To make sure you’re getting every available discount, it’s smart to call your agent and ask specifically about their policies for EV owners. That one phone call could uncover some welcome savings on your monthly bill.
Pro Tips for a Successful Application
Getting the most out of these programs is all about being organized. First, do your homework and research all the available federal, state, and local incentives so you don’t miss anything. Be sure to keep every receipt and all documentation related to your charger purchase and installation—you’ll need them for your applications. Working with certified electricians who understand the local requirements can also make the process much smoother. Finally, when claiming tax credits, filing early helps ensure you get your refund without delay.
Frequently Asked Questions
Can I get by with a Level 1 charger, or do I really need a Level 2? You can think of it in terms of your daily driving. If your commute is short and you consistently drive less than 30 miles a day, a Level 1 charger that plugs into a standard wall outlet might be all you need. However, for most drivers, a Level 2 charger is the more practical choice. It provides peace of mind that you can fully recharge your car overnight, even after a long day of driving, and it ensures you’re always ready for unexpected trips.
Can I install an EV charger outside if I don’t have a garage? Absolutely. Many homeowners install their chargers in a driveway or on the side of their house. The key is to choose a charging unit that is specifically rated for outdoor use, which will protect it from rain, snow, and temperature changes. A professional electrician will also ensure the wiring and installation are done in a way that is completely weatherproof and safe for outdoor conditions.
What’s the difference between a hardwired charger and a plug-in model? A plug-in Level 2 charger connects to a 240V outlet, similar to an electric stove, which gives you a bit of flexibility if you ever want to move it. A hardwired charger is connected directly to your home’s electrical circuit by an electrician. This creates a more permanent and durable connection that is often considered more reliable and is generally the preferred method for outdoor installations.
How much will my electric bill actually increase? The exact amount depends on your car’s efficiency, your local electricity rates, and how many miles you drive each month. A simple way to estimate the cost is to find out how many kilowatt-hours (kWh) your car uses per mile and multiply that by your monthly mileage and your utility’s price per kWh. Many people find that charging at home, especially during off-peak hours, is still significantly cheaper than buying gasoline.
Do I really need a permit for the installation? Yes, in most cases, a permit is required to install a Level 2 charger. Think of it as a layer of protection for your home and your investment. The permit process ensures that the work is performed by a licensed professional and inspected to confirm it meets all safety codes. This is crucial for your home insurance, your charger’s warranty, and most importantly, your family’s safety.


