
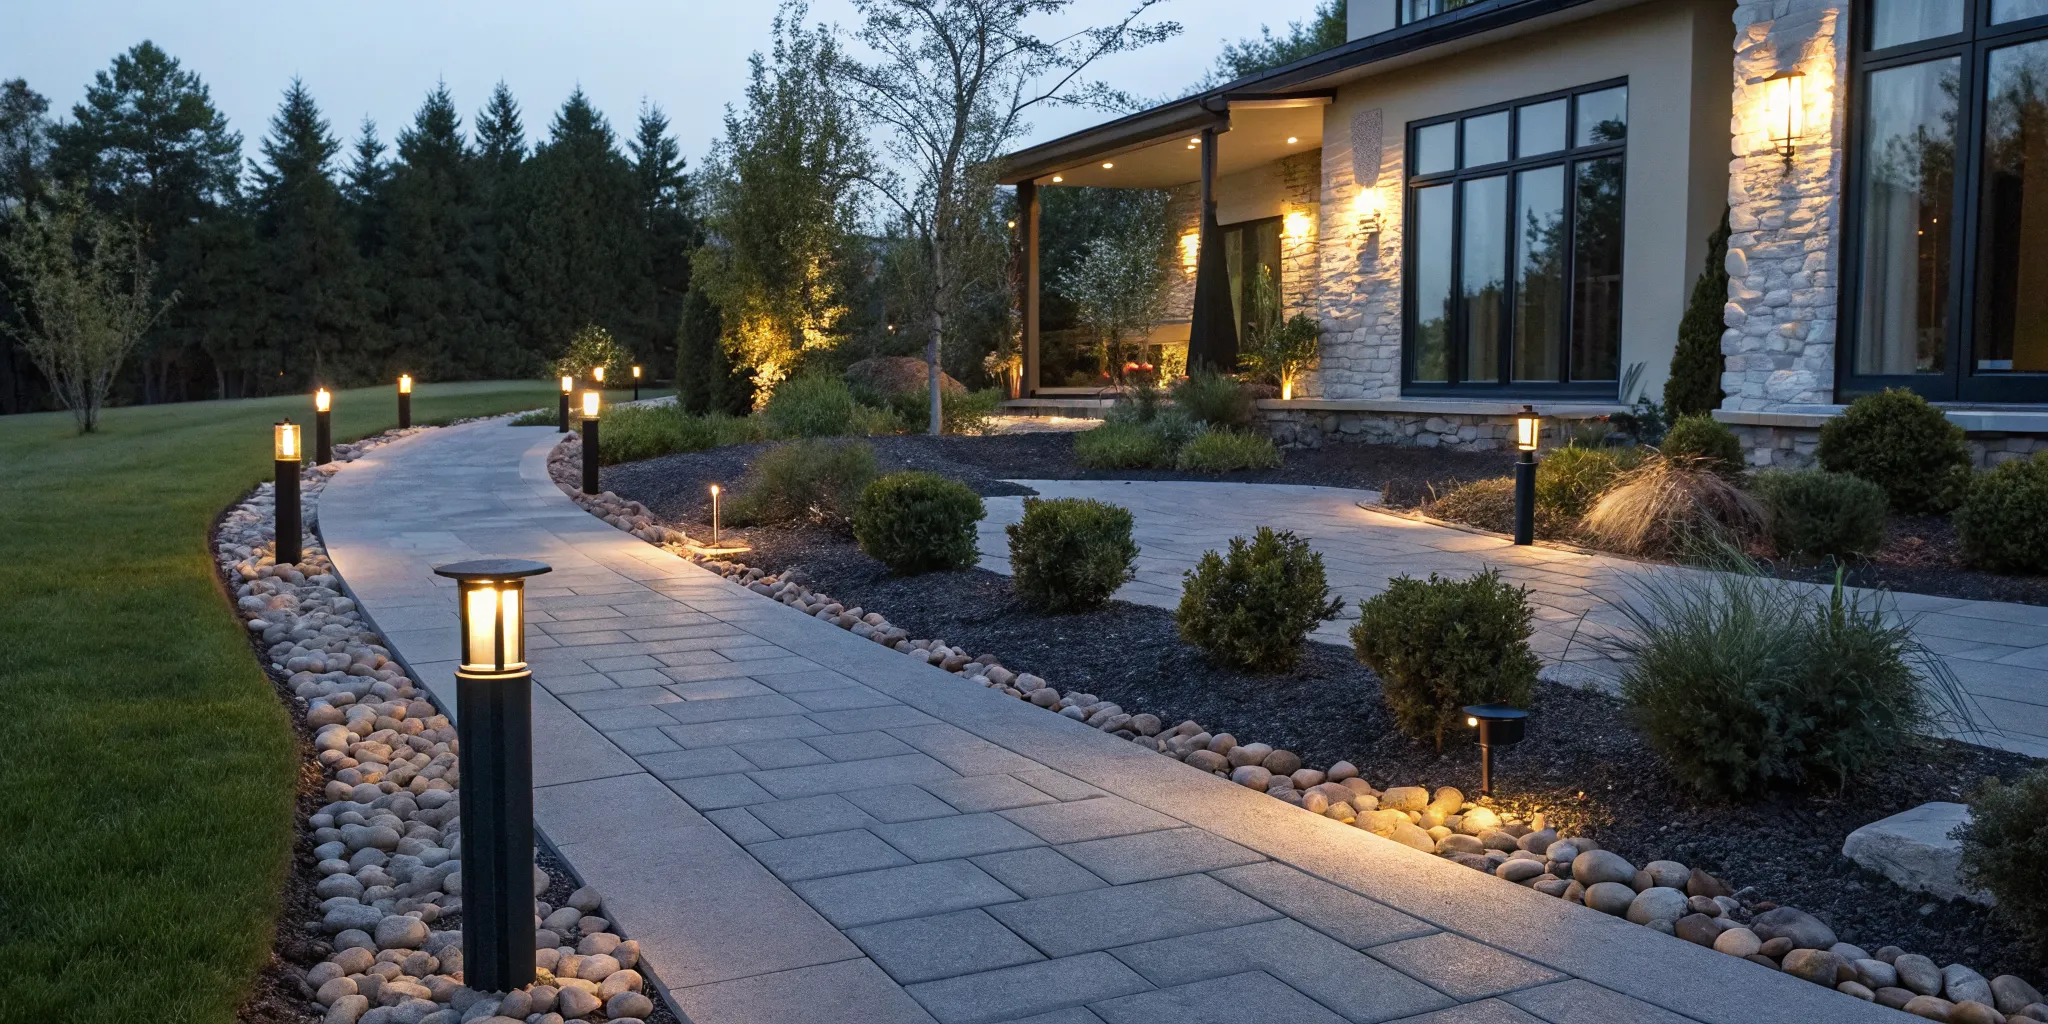
Your home’s beauty shouldn’t disappear when the sun sets. A dark yard can feel uninviting and hide the features you love most about your property. With a thoughtful approach, you can bring it to life at night, creating a warm, welcoming, and secure environment. This isn’t just about sticking a few lights in the ground; it’s about using light to paint a new picture of your home. We’ll show you how to think like a designer and a technician. This comprehensive guide provides the clear, step-by-step instructions you need for a successful outdoor landscape lighting installation that will make you proud.
Key Takeaways
- Plan your layout before you buy: Sketch a map of your yard to decide where lights should go, what features you want to highlight, and what purpose each light will serve. Adding up the wattage of your planned fixtures helps you choose the right size transformer from the start.
- Prioritize electrical safety: For a DIY project, always use a low-voltage system and plug it into a GFCI-protected outdoor outlet. Recognize your limits; any work involving your home’s main electrical panel requires a licensed electrician.
- Focus on clean installation and simple upkeep: A professional look comes from burying wires just below the surface and waiting until dark to make final adjustments to light positions. Keep your system shining by cleaning the lenses seasonally and upgrading to long-lasting LED bulbs.
Why Install Outdoor Landscape Lighting?
Thinking about adding landscape lighting is more than just a cosmetic upgrade. It’s a practical project that transforms how you see and use your home after the sun goes down. The right lighting plan can make your property safer, highlight its best features, and turn your backyard into a go-to spot for evening relaxation. It’s one of those home improvements that offers a great return, both in enjoyment and in value. Let’s look at the key reasons why installing outdoor lighting is such a bright idea.
Enhance Safety and Security
First and foremost, outdoor lighting makes your home safer for you, your family, and your guests. Well-lit pathways, steps, and entryways help prevent trips and falls, especially on uneven ground. As one expert puts it, “Outdoor lighting makes your home safer, more secure, and more useful after dark.” Beyond preventing accidents, a well-lit property is a powerful deterrent for potential intruders. Dark shadows around your home can provide cover, but strategic lighting on your home’s perimeter eliminates those hiding spots. For any complex wiring, it’s always a good idea to consult with a professional for any electrician repairs or installation needs.
Improve Curb Appeal and Property Value
Landscape lighting has a dramatic effect on your home’s curb appeal. It adds a touch of elegance and warmth, making your property stand out. As one DIY blogger noted, it “makes a big difference in how a home looks at night, giving it a ‘high-end’ or ‘fancier’ appearance.” You can use light to draw attention to beautiful trees, architectural details, or a garden. This isn’t just about aesthetics; it’s a smart financial move. According to some studies, professional landscape lighting can increase your home’s perceived value by as much as 20%, making it a worthwhile investment.
Extend Your Outdoor Living Hours
Why limit your enjoyment of the outdoors to daylight hours? Landscape lighting lets you reclaim your yard after sunset. Suddenly, your patio, deck, or garden becomes a perfect spot for evening activities. You can host a dinner party, watch the kids play, or simply relax with a book. As landscape professionals often say, lighting “helps to extend the time our clients are able to enjoy their outdoor space.” It creates a welcoming and functional environment, turning your entire property into usable living space. With a proper residential electric setup, you can safely and beautifully light up your nights.
What Are the Different Types of Outdoor Lighting Systems?
Before you start digging trenches or buying fixtures, the first step is to decide which type of lighting system is right for your home. Your choice will come down to your budget, how bright you want your lights to be, and your comfort level with electrical work. The three main players in the outdoor lighting game are solar-powered, low-voltage, and line voltage systems. Each has its own set of benefits and challenges, and understanding them will help you create a landscape you love for years to come.
Thinking about how your lighting will be powered is key. Wired systems offer consistent, reliable light, which is especially important for security. A well-lit exterior is one of the best deterrents for potential intruders, and you want that protection to be dependable. For ultimate peace of mind, connecting your lighting to a system backed by a Generac generator means your property stays well-lit and secure, even during a power outage. This ensures your safety measures never fail when you need them most. Let’s walk through the options so you can make the best choice for your landscape and feel confident in your decision.
Solar-Powered Options
Solar lights are the easiest entry point into landscape lighting. You simply stake them into the ground, and you’re done. Each fixture has a small solar panel that charges an internal battery during the day, which then powers the light at night. There’s no wiring, no increase in your electric bill, and installation is a breeze. However, there are trade-offs. Solar lights are generally not as bright as their wired counterparts, and their performance depends heavily on getting enough direct sunlight. This can be a challenge in shady yards or during the shorter days of winter. They’re a great, low-cost solution for decorative accents along a path, but they may not be the best choice for security or illuminating large trees.
Low-Voltage Wired Systems
Low-voltage systems are the most popular choice for DIY landscape lighting, and for good reason. They strike a perfect balance between performance, safety, and ease of installation. These systems use a transformer to convert your home’s standard 120-volt electricity into a much safer 12 volts, which is much less dangerous to work with. This makes it a manageable project for most homeowners. You get the reliability and brightness of a wired system without the risks of high-voltage work. Installation involves plugging the transformer into an outdoor GFCI outlet and running a special low-voltage cable to each fixture. It’s a straightforward process that delivers professional-looking results.
Line Voltage Systems
Line voltage systems operate on the same 120-volt power as the outlets inside your house. This is the most powerful option, delivering bright, consistent light that’s ideal for security purposes, lighting up tall trees, or illuminating large architectural features. If you need dependable, powerful lighting for driveways, patios, or main entryways, this is the system to consider. Because you’re dealing with standard household voltage, this is not a DIY project. Installing line voltage systems requires running wires and connecting to your home’s circuits. For your safety and to ensure everything is up to code, this work must be handled by a professional. Our team of licensed electricians can safely install a line voltage system that provides the power and reliability you need.
Gather Your Tools and Materials for DIY Installation
Before you dig your first trench or connect a single wire, it’s smart to get all your supplies in order. A little preparation goes a long way in making your installation process smooth and successful. Think of it like cooking a new recipe; you want to have all your ingredients measured and ready on the counter before you start. Having the right tools and materials on hand not only saves you time but also ensures your new lighting system is safe and built to last. Let’s walk through exactly what you’ll need to bring your outdoor lighting vision to life.
Lighting Fixtures and Parts
The first step is choosing the right lights for the job. Each type of fixture serves a different purpose, so think about what you want to accomplish. You can use path lights to illuminate walkways for safe passage after dark or add drama with up-lights to highlight beautiful trees and architectural features on your home. Flood lights are great for washing a wall with a wide beam of light, while well lights sit flush with the ground to cast a soft glow up through garden beds. Selecting a mix of these allows you to create a layered, professional-looking design that makes your outdoor space both functional and inviting.
Electrical Supplies and Wiring
Getting the electrical components right is critical for a system that works correctly and safely. Your main components will be a transformer and low-voltage electrical wire. The transformer steps down your home’s electrical current to a safe, low voltage. You’ll need to calculate how many lights your transformer can support. For example, a 100-watt transformer can power ten 10-watt lights. The wire you choose should also be appropriate for the number of lights and the total length of your wire run. Different wire thicknesses, or gauges, are available to handle various electrical loads and distances, so be sure to check the requirements for your specific setup.
Essential Installation Tools
You don’t need a professional-grade workshop, but a few key tools will make this project much easier. At the top of the list is a reliable outdoor electrical outlet to plug in your transformer. If you don’t have one conveniently located, installing one is a job best left to a certified electrician to ensure it’s safe and up to code. You’ll also want a shovel or trenching tool for burying the wire, wire strippers for making connections, and a screwdriver. Many people find that watching a few instructional videos online can also provide helpful tips and build confidence before starting the installation.
How to Plan Your Outdoor Lighting Layout
A little planning goes a long way in making your outdoor lighting project a success. Before you buy a single fixture or dig any trenches, taking the time to create a solid plan will save you from headaches and extra trips to the hardware store. Think of this as creating a blueprint for your yard’s new look. A good plan ensures your lighting is not only beautiful but also functional and safe. It helps you map out exactly what you need, where it will go, and how much power it will require. Let’s walk through the three key steps to designing a layout that brings your outdoor space to life after the sun goes down.
Assess Your Landscape’s Needs
First, take a walk around your property, both during the day and at night. Grab a notepad and sketch a rough map of your yard, marking key features like trees, flower beds, pathways, and patios. Think about what you want to accomplish. Are you lighting a walkway for safety? Highlighting a favorite oak tree? Creating a warm, inviting glow for your deck? As you walk, locate all your existing outdoor electrical outlets. These are crucial because they’re where you’ll plug in your transformer. If you find you don’t have a convenient power source, you may need a professional to handle the residential electric work to install a new GFCI outlet.
Create a Lighting Design Plan
With your landscape map in hand, you can start designing. Decide on the purpose of each light. Is it for security, safety, or simply for looks? For example, path lights should be staggered along a walkway to prevent a “runway” effect, while a spotlight can draw attention to a beautiful statue or architectural feature. Think about the mood you want to set. Soft, warm light creates a cozy atmosphere, while brighter, cooler light is better for security. Mark on your sketch what type of fixture you want to use in each location and the direction you want the light to shine. This visual plan will be your guide during installation.
Calculate Your Power Requirements
This step sounds technical, but it’s pretty straightforward. Every light fixture has a wattage rating, which tells you how much power it uses. To choose the right size transformer, you just need to do some simple math. Add up the total wattage of all the light fixtures in your plan. For example, if you have ten 5-watt lights, your total is 50 watts. It’s a good idea to choose a transformer that has a higher wattage capacity than your total. This gives you the flexibility to add more lights later without overloading the system. A good rule of thumb is to find a transformer that can handle at least 25% more wattage than your current plan requires.
What Electrical Basics Should You Know Before Starting?
Before you even think about digging a trench or connecting a wire, let’s talk about the most important part of this project: electrical safety. Working with electricity can be dangerous, especially outdoors where moisture is a factor. But don’t let that scare you off. Understanding a few key concepts will help you complete your project safely and confidently. Getting these basics right ensures your beautiful new lighting doesn’t become a hazard. It’s all about knowing what you’re working with, following the rules, and recognizing when a project is better left to the pros.
Understand Voltage Requirements
Most DIY landscape lighting kits are low-voltage systems, and for good reason. Your home’s standard outlets provide 120-volt electricity, which can be dangerous. Low-voltage systems use a transformer, a box that plugs into an outdoor outlet and “steps down” the power to a much safer 12 volts. This is the key that makes this type of installation a manageable DIY project. The lower voltage significantly reduces the risk of serious electric shock. Always double-check that you’re working with a low-voltage kit, as line-voltage systems carry the full 120 volts and require a licensed electrician for installation.
Follow GFCI Protection and Safety Codes
Water and electricity are a dangerous combination, which is why any outdoor electrical project has strict safety codes. The power source for your transformer must be a Ground Fault Circuit Interrupter (GFCI) outlet. This special type of outlet is designed to shut off the power instantly if it detects an imbalance in the current, which can happen if water gets into the system. This quick action can prevent a serious electric shock. If your outdoor outlet isn’t a GFCI, you should have one installed before you begin. Proper residential electric work is crucial for keeping your home and family safe.
Know When to Call a Professional Electrician
It’s vital to know your limits. While plugging a transformer into an existing GFCI outlet and running low-voltage wires is a great DIY task, more complex work is not. If your project requires running new wiring from your home’s electrical panel, drilling through exterior walls, or connecting directly to a 120-volt circuit, it’s time to stop and call a professional. These tasks require a deep understanding of electrical codes and safety procedures. For any complex wiring or if you’re unsure about any step, contacting a certified expert for electrician repairs is the safest and smartest choice.
Your Step-by-Step Outdoor Lighting Installation Guide
Ready to get your hands dirty? This is where your design plan comes to life. Installing a low-voltage system is a manageable weekend project for most homeowners. Just remember to work carefully and always prioritize safety. If you ever feel unsure about a step, especially when it involves your home’s main power, it’s always best to call in a professional. An experienced electrician can ensure everything is installed safely and correctly, giving you peace of mind.
Before you begin, lay out all your fixtures and cables according to your plan. This simple step helps you visualize the final result and ensures you have enough cable to reach every light. Once you’ve confirmed your layout, you can start the installation process.
Install the Transformer and Timer
The transformer is the heart of your lighting system. It plugs into an existing outdoor GFCI outlet and converts your home’s standard 120-volt electricity to a safe, low 12-volt current. It’s a smart move to pick a transformer with more power than you currently need. This gives you the flexibility to add more lights later without having to upgrade your whole system. Mount the transformer on a wall or post near your outlet, at least one foot above the ground. If you don’t have a suitable outdoor outlet, a certified electrician can install one for you.
Run the Low-Voltage Cable
With your transformer in place, it’s time to run the low-voltage cable. Start at the transformer and lay the cable out along the path you planned, running it to each fixture location. You don’t need to bury the wire deep; a few inches is enough to protect it and keep it out of sight. You can use a flat-head shovel or a garden edger to create a shallow trench. Tuck the wire neatly along garden beds, pathways, or your home’s foundation. Just be sure not to run the cable across driveways or main walkways where it could become a hazard or get damaged.
Connect and Position Your Fixtures
Now for the fun part: connecting your lights. Before you do anything else, make sure the transformer is unplugged from the outlet. Safety first! Most modern low-voltage lights come with simple, tool-free connectors that pierce the cable to make a connection. Attach each fixture to the main cable according to the manufacturer’s instructions. Once all the lights are connected, place them in their designated spots but don’t bury the bases just yet. You’ll want to wait until dark to make final adjustments and get the positioning perfect.
Test Your New System
Once the sun goes down, plug the transformer back in and turn on your new system. This is your chance to play with the lighting effects. Adjust the angle and position of each fixture to perfectly highlight your trees, illuminate your walkway, or create a warm glow on your patio. Take your time with this step, as small adjustments can make a big difference. If a light isn’t working, it’s usually a poor connection at the cable. If you’ve checked all your connections and still have issues, our team is always here to help with any electrical repairs.
How Do You Effectively Highlight Landscaping Features?
Once your lighting system is installed, the real fun begins. Strategic lighting is all about painting with light to bring out the best features of your yard after dark. Instead of flooding the entire space with light, think like a designer and focus on creating depth, drama, and ambiance. The right techniques can transform a familiar daytime view into something truly magical at night. By layering different types of light, you can guide the eye, showcase your favorite elements, and create a warm, inviting atmosphere. It’s less about just seeing in the dark and more about creating an experience. Let’s walk through a few popular methods for making your landscape shine.
Use Uplighting for Trees and Architecture
Uplighting is a classic technique for a reason. It involves placing a light fixture at the base of an object and aiming it upward to create a dramatic, eye-catching effect. This is perfect for highlighting the texture of tree bark, the grandeur of a tall evergreen, or the architectural details of your home. For this kind of project, many people suggest using low-voltage exterior lighting, which is often simple and easy to install, even for beginners. Placing lights at the base of columns or along a stone wall can add a sense of dimension and elegance to your property. It’s a simple way to add a professional touch to your residential electric lighting plan.
Create Natural Effects with Downlighting
If you’re aiming for a softer, more subtle look, downlighting is the way to go. This technique involves mounting fixtures high up in trees or on your home’s eaves and directing the light downward. The goal is to mimic the gentle glow of the moon. Downlighting can create a natural moonlight effect, which is ideal for illuminating pathways and garden areas without being overly bright. This soft wash of light is perfect for patios and seating areas where you want a relaxed ambiance. It also casts beautiful, dappled shadows through leaves, adding a layer of texture and movement to your garden floor.
Spotlight Focal Points and Water Features
Do you have a favorite statue, a beautiful fountain, or a uniquely shaped tree? Give it the attention it deserves with a spotlight. Spotlights use a focused beam of light to draw the eye directly to a specific feature, turning it into a nighttime focal point. They are great for shining up on your house and can be used to highlight water features, creating a stunning visual effect at night. The key is to be selective. Highlighting just a few key elements creates a sophisticated and curated look, preventing your yard from looking cluttered or overly bright. A well-placed spotlight on a bubbling fountain or a piece of garden art can add that perfect finishing touch.
What Common Installation Mistakes Should You Avoid?
Even the most carefully planned DIY project can go wrong if you’re not aware of a few common pitfalls. When it comes to outdoor lighting, these mistakes can range from a messy-looking yard to serious safety hazards. Taking a little extra time to get these details right will ensure your new lighting system is safe, durable, and looks fantastic for years to come. Let’s walk through some of the most frequent errors so you can sidestep them completely and achieve a professional-quality result you can be proud of.
Improper Wire Management and Burial Depth
One of the quickest ways to spot an amateur installation is seeing wires snaking across the mulch. Proper wire management is crucial for both aesthetics and safety. You don’t need to dig a deep trench; for low-voltage wiring, you just need to create a shallow channel in the dirt or mulch to tuck the wire away. This simple step protects the cable from being tripped over, snagged by a lawnmower, or chewed by critters. Taking a few extra minutes to bury the wire correctly prevents future headaches and potential calls for electrician repairs down the line. A clean, hidden wire is the finishing touch that makes your project look polished.
Using Indoor Fixtures in an Outdoor Setting
This is a mistake you absolutely cannot afford to make. Using lighting fixtures meant for indoors in an outdoor setting is a serious safety risk. Indoor lights are not built to withstand moisture, temperature changes, or UV exposure. They aren’t waterproof, and introducing them to rain or humidity can lead to short circuits, electrical failures, or even a fire. Always check that the fixtures you buy are specifically rated for outdoor use (look for a “UL Wet Location” or “UL Damp Location” rating). Investing in the right equipment is an essential part of any safe residential electric project and ensures your system will last.
Overloading Circuits and Poor Fixture Placement
Your transformer is the heart of your lighting system, and overloading it is a recipe for flickering lights or complete system failure. Before you buy a transformer, you need to do some simple math. Add up the total wattage of all the light bulbs you plan to use. To give yourself a safe buffer, multiply that total by 1.25. This new number is the minimum transformer size you should get. This extra capacity accounts for any power loss over long wire runs and gives you room to add a fixture later. Also, as a critical safety reminder, always make sure the transformer is unplugged while you are connecting the fixture wires.
How to Maintain and Troubleshoot Your Lighting System
Once your beautiful new landscape lighting is installed, a little regular upkeep will keep it shining bright for years to come. Think of it like tending to your garden; a bit of attention each season ensures everything functions safely and looks its best. Performing routine checks helps you catch small issues before they become big problems, protecting your investment and keeping your property well-lit. From simple cleaning to smart upgrades, maintaining your system is straightforward and makes a world of difference.
Perform Seasonal Cleaning and Inspections
To keep your lights performing at their peak, give them a quick check-up every few months. Over time, dirt, pollen, and yard debris can accumulate on lenses, dimming their glow. Gently wipe down fixtures with a soft, damp cloth to clear away any grime. While you’re there, trim back any overgrown plants or bushes that might be blocking the light. It’s also smart to inspect for any visible wires, ensuring they remain properly buried and protected. If you spot any frayed wiring or damage, it’s best to call in a professional for electrician repairs to handle the issue safely.
Replace Bulbs and Upgrade to LEDs
When a bulb eventually burns out, see it as an opportunity for an upgrade. Switching to LED bulbs is one of the best moves you can make for your landscape lighting system. As experts often recommend, “LED lights are recommended because they save energy and you can find them in ‘warm white’ colors that look nice.” Not only do they consume significantly less power, which is great for your energy bill, but they also have a much longer lifespan than traditional halogen bulbs. This means you’ll spend less time and money on replacements. The next time you need a new bulb, check your fixture’s specifications and swap it with a compatible LED.
Protect Your System from Weather Damage
Your outdoor lighting is built to withstand the elements, but it’s still wise to ensure it’s well-protected. Safety is crucial, especially since outdoor electrical work is constantly exposed to weather. A poorly protected system can be a hazard. After a heavy storm or during your seasonal cleanings, check that all fixture housings and transformer boxes are securely sealed. Make sure all wire connections are tight and waterproofed. If you notice any fixtures holding water or connections that seem loose, address them right away. For any concerns about the safety and integrity of your system, our team is always ready to help with your residential electric needs.
Related Articles
- A Guide to the Best Outdoor Motion Sensor Light Installation
- Commercial Exterior Lighting: A Complete Guide
- Exterior Lighting for Business: A Complete Guide
- Sensor Light Installation in 5 Easy Steps
Frequently Asked Questions
Can I really install outdoor lighting myself, or should I hire an electrician? For most homeowners, installing a low-voltage lighting system is a very manageable weekend project. These kits are designed for safety and use a transformer to reduce your home’s power to a safe 12 volts. However, if your plan requires installing a new outdoor GFCI outlet, or if you’re considering a more powerful line-voltage (120-volt) system for security, that work should always be left to a licensed professional. It’s always best to know your limits and call for help when dealing with your home’s main electrical circuits.
What’s the most important thing to remember when planning my layout? The most important step is to walk your property at night before you buy anything. This helps you see what areas are truly dark and need light for safety, like stairs and pathways. It also shows you which features, such as a beautiful tree or stone wall, would make great focal points. Planning with a purpose, whether for safety or for style, ensures you buy the right fixtures and place them effectively instead of just scattering lights randomly.
Are LED lights really that much better for outdoor systems? Yes, they absolutely are. While they might cost a little more upfront, LED bulbs save you money and effort in the long run. They use significantly less electricity than older halogen bulbs, which is great for your utility bill. Plus, they last for years, meaning you won’t be outside on a ladder changing bulbs every season. Modern LEDs also come in a variety of warm, welcoming tones, so you can get that soft, high-end look without the high energy consumption.
My path lights look like an airport runway. How do I make them look more natural? This is a very common issue. To avoid the “runway” look, stagger the lights on opposite sides of the path instead of placing them in straight, parallel lines. This creates a more organic and visually interesting effect. You can also mix in other types of lighting. For example, try placing a light high in a nearby tree to cast a soft, moon-like glow over the area, which helps break up the uniformity of the path lights.
What’s the first thing I should check if one of my lights stops working? Before you worry about a major problem, check the simplest thing first: the connection. Make sure the transformer is plugged in and turned on. Then, head to the light that isn’t working and inspect where the fixture’s connector pierces the main cable. Sometimes, these connections can wiggle loose over time. Gently squeezing the connector to ensure the metal prongs are making solid contact with the wire inside often solves the problem instantly.