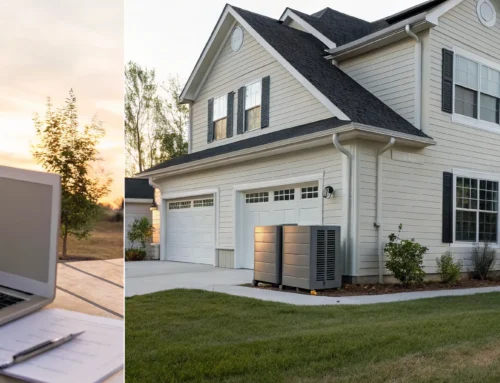
Ever fumbled for your keys in the dark? Or tripped on the steps taking out the trash? A little light makes a huge difference. While known for security, outdoor motion sensor lights are also champions of everyday convenience. They automatically light the way, making your daily routines easier and safer for everyone. This simple upgrade turns dark, hazardous areas into well-lit spaces without wasting energy. But to get these rewards, a proper sensor light installation is key. This guide provides a complete walkthrough, ensuring your new fixture works perfectly from day one.
Key Takeaways
- Get More Than Just Light: Motion sensor lights offer a triple benefit of improved security by startling intruders, energy savings by activating only when needed, and added safety by illuminating your path at night.
- Strategic Placement is Key for Performance: For your light to work effectively, mount it 8-10 feet high and angle the sensor towards walkways and driveways—not the street. A clear line of sight is crucial to avoid false alarms.
- Put Safety First During Installation: While a DIY installation is possible, always start by shutting off the power at the breaker. If the wiring seems complicated or you’re not 100% confident, calling a professional ensures your new light is installed safely and correctly.
How Do Outdoor Motion Sensor Lights Work?
Outdoor motion sensor lights are a fantastic way to add security and convenience to your home’s exterior. Instead of fumbling for a switch in the dark or leaving lights on all night, these smart fixtures automatically light up when they detect movement. They’re a simple, effective upgrade that can make a big difference in how you use your outdoor space, from lighting up the driveway when you get home late to deterring unwanted visitors.
But how do they actually know when something is moving? It’s not magic—it’s just clever technology. Understanding the basics of how they operate can help you choose the right lights for your home and ensure they work exactly as you need them to. It’s a small but powerful addition to your home’s overall residential electric system that provides peace of mind and practical, everyday benefits.
How the Sensor Detects Motion
At its core, a motion sensor light is designed to do one thing: turn on automatically when it senses movement in its detection zone. This simple function is what makes it so useful for home security and energy efficiency. By only activating when needed, these lights save a significant amount of energy compared to traditional fixtures that are left on for hours. Whether it’s a person walking up the path, a car pulling into the garage, or an animal crossing the yard, the sensor picks up the activity and instantly illuminates the area, making your property safer and easier to see at night.
Infrared, Microwave, and Dual-Technology Sensors
To pick the perfect motion sensor light, it helps to know a little about what’s going on inside. The sensor is the “brain” of the fixture, and different types use different methods to detect movement. The three main players are infrared, microwave, and dual-technology. Each has its own strengths, and choosing the right one can make all the difference between a reliable light and one that seems to have a mind of its own.
Infrared Sensors, often called Passive Infrared (PIR) sensors, are the most common type you’ll find in residential lights. They work by detecting heat signatures. When a person, animal, or even a warm car enters its detection zone, the sensor notices the change in temperature and triggers the light. They’re fantastic for clearly defined areas like walkways or doorways. The key is to aim them away from things that can give off false heat readings, like a dryer vent or a patch of asphalt that gets baked by the sun all day.
Microwave Sensors operate a bit differently. They send out low-power microwave signals and then measure the “echo” that bounces back. When something moves in the area, it disrupts the signal, and the light switches on. These sensors can cover a larger area than PIR sensors and can even detect motion through thin barriers like glass or plastic sheeting. Their sensitivity is both a pro and a con; while they’re great at catching movement, they can sometimes be triggered by swaying trees or blowing debris if not adjusted correctly.
Dual-Technology Sensors combine the best of both worlds. These smart sensors have both a PIR and a microwave sensor inside, and both have to be triggered before the light will activate. This two-step verification process dramatically reduces false alarms. If a gust of wind blows a warm plastic bag across the yard, the PIR might see the heat, but the microwave sensor won’t register significant movement, so the light stays off. These are an excellent choice for tricky spots or if you find other sensors are too sensitive. If you’re constantly dealing with a flickering or malfunctioning light, it could point to a deeper issue, and it might be time to call in an expert for electrician repairs to ensure everything is wired safely.
The Anatomy of a Motion Sensor Light
Most motion sensor lights use one of a few key technologies to detect movement. The most common type is the Passive Infrared (PIR) sensor, which works by detecting the heat signatures given off by people, animals, and cars. They are reliable and don’t often trigger false alarms, making them perfect for most homes. Another type is the microwave sensor, which sends out low-energy waves and detects movement when those waves are disturbed—it can even work through thin walls. To get the best of both worlds, some lights use dual-technology sensors that combine PIR and microwave tech to reduce false alarms from things like blowing leaves or small critters.
Why You’ll Love Motion Sensor Lights
Installing outdoor motion sensor lights is one of the smartest and most effective upgrades you can make to your home. It’s a simple change that offers a powerful combination of security, efficiency, and convenience. These lights do more than just illuminate your yard; they provide peace of mind by actively deterring unwanted visitors, help you save on energy costs by only activating when needed, and make your daily routines safer and easier. Whether you’re coming home late at night or just taking the dog out, motion-activated lighting is a practical solution that works for you around the clock.
Deter Intruders and Feel Safer
A well-lit property is a less attractive target for intruders, and motion sensor lights are your first line of defense. A sudden, bright light can easily startle and scare away anyone who isn’t supposed to be there. Think about it from their perspective—the last thing they want is a spotlight shining on their activities. Studies have shown that better neighborhood lighting can reduce property crime by over 30%. By strategically placing lights around your home’s entry points, like doors, windows, and driveways, you create an effective deterrent. It’s a simple security measure that makes a big difference, and our team can help you with any residential electric needs to get it done right.
Smart Security: Motion-Activated vs. Always-On
When it comes to outdoor lighting, you have two main choices: leave your lights on all night or opt for a smarter approach. While an always-on light provides constant illumination, it also leads to a higher energy bill and can become just another part of the landscape for potential intruders. Motion-activated lights, on the other hand, offer a superior security advantage. The sudden burst of light is far more effective at startling and scaring off anyone who isn’t supposed to be there. Plus, they only use energy when needed, saving you money while still providing light for safety and convenience when you arrive home or take the dog out. This smart activation makes your home a less predictable and less attractive target. If you ever find your system isn’t working as it should, reliable electrician repairs can ensure your first line of defense is always ready.
Lower Your Electric Bill
Leaving outdoor lights on all night can really add up on your electricity bill. Motion sensor lights solve this problem by only turning on when they detect movement. This means you aren’t wasting energy illuminating an empty yard for hours on end. Modern LED motion sensor lights are especially efficient, using as little as 5% of the energy consumed by older incandescent bulbs that are left on continuously. This smart use of power not only lowers your monthly utility costs but also extends the lifespan of your bulbs, saving you money on replacements over time. It’s an eco-friendly choice that’s also kind to your wallet.
No More Fumbling for Keys in the Dark
Beyond security, motion sensor lights add a layer of everyday convenience and safety to your home. Imagine pulling into your driveway after dark with a car full of groceries—the lights turn on automatically, lighting your path to the door so you don’t have to fumble for your keys in the dark. They make taking the trash out or letting your pet out at night much safer by illuminating walkways, stairs, and any potential tripping hazards. This automated lighting helps prevent slips and falls for you, your family, and any guests visiting your home. If you’re looking to upgrade your current setup, our experts handle all types of electrician repairs and installations.
How to Choose the Right Motion Sensor Light
Picking the right motion sensor light can feel like a big decision, but it doesn’t have to be complicated. Before you even think about installation, you need to find a fixture that fits your space and your needs. The best light for a long driveway is very different from the one you’d want for a small side patio. By focusing on a few key features—brightness, durability, and sensor type—you can easily narrow down the options and find the perfect light to make your home safer and more convenient. Let’s walk through what you should look for.
What to Know About Brightness and Range
First, think about the size of the area you want to light up. For large spaces like a backyard or a long driveway, you’ll want a light with a wide detection angle (around 120 to 180 degrees) and a long range. Some models can detect motion from over 70 feet away, which is perfect for giving you a heads-up long before someone reaches your door. On the other hand, if you’re lighting a smaller area like a porch or entryway, a narrower detection range is actually better. This prevents the light from being triggered every time a car drives down the street or a neighbor walks their dog, saving you from annoying false alarms.
Power Sources and Weatherproofing
Since this light will be living outside, it needs to be tough enough to handle Pennsylvania weather. Look for a weather-resistance rating on the packaging, called an IP rating. A rating of at least IP65 is a great starting point, as it means the fixture is protected from dust, rain, and snow. You’ll also need to decide on a power source. Solar-powered lights are simple to install, but hardwired lights are the most reliable option. Tying directly into your home’s power means you never have to worry about cloudy days, and it’s a secure, permanent solution for your home’s residential electric system.
Choosing the Right Fixture and Bulb Type
After settling on a power source, it’s time to pick the right fixture and bulb. The best fixture depends on what you need it to do. For big spaces like a backyard or driveway, a powerful floodlight is your best bet for covering a wide area. If you’re lighting up a smaller spot like a porch or pathway, a focused sconce or a decorative lantern will provide plenty of light without being too harsh. The bulb you choose is just as important. LEDs are the clear winner for outdoor lighting; they’re incredibly energy-efficient and can last for years, saving you money on your utility bill and on replacements. Their bright, instant-on light is perfect for security and safety, making them the go-to for any modern residential electric lighting project.
Considering Special Features like Pet Immunity
Don’t forget to look at the special features that can make your life easier. If you have pets, you know the drill—the lights flick on every time the dog goes out. To avoid this, look for fixtures with “pet-immune” sensors, which are smart enough to ignore smaller animals and prevent false alarms. Other handy features include adjustable sensitivity to fine-tune the detection range and timers that let you control how long the light stays on. Some models even connect to your smart home system, so you can get notifications and control the lights right from your phone, adding an extra layer of convenience and security.
Getting the Right Coverage Area
The best sensor in the world won’t work correctly if it can’t see anything. The placement and angle of your light are crucial for getting the coverage you want. For optimal performance, most motion sensor lights should be mounted between 6 and 10 feet off the ground. This height gives the sensor a great vantage point to detect motion effectively across a wide area. Make sure nothing is blocking the sensor’s view, like a tree branch, a downspout, or a decorative column. These lights are most effective when installed near entryways, above garage doors, along driveways, and in dark corners of your property.
Understanding the Cost of Installation
When you’re planning any home improvement project, the budget is always a top consideration. Installing outdoor motion sensor lights is a relatively affordable upgrade, but the final cost can vary quite a bit. The total price tag is a combination of two main things: the cost of the light fixture itself and the labor for professional installation. On average, you can expect to pay around $400 to have a new LED floodlight installed by a professional. This figure gives you a solid starting point, but your specific choices and the details of your property will determine the final cost. Understanding what goes into that number will help you budget effectively and make smart decisions for your home.
Factors That Influence Professional Installation Costs
Hiring a licensed electrician ensures your new light is installed safely and correctly, which is especially important for hardwired fixtures. The cost for professional installation typically falls between $350 and $500, but several factors can shift that price. The biggest variable is the complexity of the job. For instance, replacing an existing outdoor light is much simpler than running new wiring to a location that has never had a fixture before. The number of lights you want to install will also affect the total labor time. Our team handles all kinds of electrician repairs and installations, and we always consider these details to provide an accurate quote for your project.
Material Costs: The Light Fixture Itself
Beyond the labor, the light fixture you choose plays a significant role in the overall cost. There’s a wide range of options available, each with a different price point. A simple spotlight might only cost between $15 and $65, while a powerful floodlight for a large area can range from $35 to $200. If you’re looking for something with more style, decorative fixtures usually run from $40 to $110. For those who love tech, smart lights that you can control with your phone are a popular choice, typically costing between $100 and $300. Your selection will depend on your security needs, aesthetic preferences, and how much you want to invest in the hardware.
Your Sensor Light Installation Checklist
A little prep work goes a long way in making your installation a success. Before you even think about touching a wire, taking a few minutes to get organized will ensure the process is smooth, safe, and stress-free. It’s the difference between a quick weekend project and a frustrating afternoon of running back and forth to the hardware store. By gathering your supplies and reviewing some basic safety guidelines, you’ll be ready to tackle the job with confidence.
What You’ll Need for the Job
Having the right tools on hand is half the battle. For most motion sensor light installations, you’ll need a screwdriver, wire strippers, a voltage tester, and a sturdy ladder. It’s also a good idea to have some wire nuts and electrical tape nearby. Before you start, unbox your new light and read the instructions from front to back. Following the manufacturer’s guide is crucial for specific details on wiring and sensor settings. Laying everything out ensures you’re prepared for any residential electric project, making the entire process much more efficient and preventing mid-job hardware store runs.
Checking for Permits and HOA Rules
Before you climb that ladder, there’s one last bit of homework: checking in with your local authorities and Homeowners’ Association (HOA). This quick step can save you a major headache down the road. Many HOAs have specific guidelines for outdoor lighting to prevent issues like light trespass, where your new fixture shines into a neighbor’s window. They might have rules about how high you can mount the light, require timers to reduce light pollution, or state that the “cone of light” can’t cross property lines. It’s always best to review your community’s rules to ensure your installation is compliant. Similarly, while you typically don’t need a permit to replace an existing light, running new wiring often does. A quick call to your local municipal office can clarify any requirements, ensuring your project goes off without a hitch.
Safety First: Essential Electrical Tips
When you’re working with electricity, safety is always the top priority. The single most important step is to turn off the power at the circuit breaker that controls your outdoor light. Use a voltage tester on the existing wires to confirm there is no live current before you proceed. It’s also essential to follow local electrical codes, which means ensuring your new light is properly grounded and protected with a weatherproof cover. If you feel unsure at any point or the wiring looks different than you expected, it’s always best to stop and request electrician repairs from a professional. Your safety is not worth the risk.
Using GFCI Outlets for Outdoor Safety
When you’re installing any electrical fixture outside, safety is paramount. That’s where Ground Fault Circuit Interrupter (GFCI) outlets come into play. These aren’t your standard outlets; they are smart safety devices designed to protect you from electrical shock. A GFCI constantly monitors the electrical current, and if it detects even a tiny imbalance—which can happen when electricity meets water—it instantly shuts off the power. This quick-acting feature is essential for outdoor fixtures like motion sensor lights that face rain, snow, and humidity. Plus, electrical codes in most areas require them for outdoor spaces. If your current outlet isn’t GFCI-protected, or if you’re not sure, upgrading is a crucial step before installing your new light. Taking care of these types of electrician repairs will ensure your home is both safe and compliant.
How to Install a Motion Sensor Light
Ready to get started? Installing an outdoor motion sensor light is a fantastic weekend project that can make a big difference in your home’s security and convenience. If you’re comfortable with basic electrical work, you can likely handle this yourself. The key is to work carefully, prioritize safety, and follow each step in order. We’ll walk you through the entire process, from turning off the power to fine-tuning the settings on your new light.
Before you begin, make sure you have all your tools ready and have read the manufacturer’s instructions that came with your specific light fixture, as there can be slight variations between models. While this is a common DIY task, remember that working with electricity requires caution. If at any point you feel unsure about the wiring or encounter something unexpected, it’s always smartest to stop and call a professional. Our team of experienced electricians is always ready to help with any residential electric projects to ensure the job is done safely and correctly.
Step 1: Turn Off the Power and Remove the Old Light
Your first and most important step is to completely shut off the power to the light fixture you’re replacing. Head to your home’s circuit breaker panel and flip the breaker that controls the outdoor light. To be absolutely certain the power is off, use a voltage tester on the existing wires after you remove the fixture. Once you’ve confirmed there’s no electricity flowing, you can safely begin. Carefully unscrew and detach the old light fixture from the wall, exposing the electrical box and the wiring inside.
Step 2: Connect the Wires Safely
Now it’s time to connect your new motion sensor light. Typically, you’ll see three wires: a black (hot), a white (neutral), and a green or bare copper wire (ground). Match the wires from your new fixture to the corresponding wires coming out of your wall—black to black, white to white, and ground to ground. Twist the ends of the matching wires together and secure them tightly with wire nuts. For extra security, you can wrap each connection with electrical tape. If your home’s wiring is older and doesn’t follow this color code, it’s best to pause the project. Handling confusing or outdated wiring requires an expert, so it’s a good time to call for professional electrician repairs.
Step 3: Mount the New Fixture
With the wiring complete, you can mount your new light. Start by attaching the new mounting bracket or strip to the electrical box in the wall using the screws provided. Carefully tuck all the connected wires back into the electrical box, making sure no connections are loose. Then, align the new light fixture with the mounting bracket and secure it firmly in place with the mounting screws. Make sure the fixture is snug against the wall with no gaps.
Step 4: Weatherproof Your Work
To protect your new light and its electrical connections from rain, snow, and moisture, you need to create a waterproof seal. Apply a thin bead of exterior-grade silicone caulk around the top and sides of the fixture’s base where it meets the wall. This prevents water from seeping in from above. It’s a good practice to leave a small, unsealed gap at the very bottom of the base. This allows any moisture that might find its way inside to drain out instead of getting trapped.
Step 5: Test and Adjust the Settings
You’re on the home stretch! Go back to your circuit breaker and turn the power back on. Your new light should power up. Most motion sensor lights have adjustable settings that let you customize how they work. You can typically adjust the motion sensitivity (how much movement is needed to trigger the light), the duration (how long the light stays on), and the light sensitivity (so it only turns on after dark). Take a few minutes to test and tweak these settings to get the performance just right for your space.
Pro-Tip: Test Before You Mount
Here’s a tip that will save you a lot of hassle: test your light and adjust its settings *before* you mount it permanently. It’s far easier to fine-tune the motion sensitivity, brightness, and duration while you’re safely on the ground rather than trying to make tiny adjustments from the top of a ladder. Simply connect the light temporarily (you can even use a spare cord with wire nuts for a quick test) and walk through its detection zone to see how it responds. This quick check ensures everything works as expected and allows you to get the settings just right, making the final installation much smoother.
Setting the Time Delay and Sensitivity
Once your light is up, you’ll want to dial in its performance. The two most important settings are sensitivity and time delay. Sensitivity determines how easily the sensor is triggered. You’ll want to find a balance where it picks up people and cars but ignores blowing leaves or passing traffic. The time delay controls how long the light stays on after it stops detecting movement, usually from one to ten minutes. A shorter duration is great for walkways, while a longer one is useful for a driveway. If you find the settings tricky, our team is always here to help with any electrician repairs or adjustments to get your system working perfectly.
Adjusting Light Color Temperature
Many modern LED fixtures also allow you to adjust the color temperature, which changes the look and feel of the light. This is measured in Kelvin (K). A lower Kelvin number, like 2700K, produces a warm, yellowish light that’s inviting and great for patios or front porches. A higher number, like 5000K, creates a cool, bright white light that mimics daylight and is excellent for security purposes over a garage or in a dark side yard. This feature lets you customize the lighting to match your home’s aesthetic while still getting all the security and safety benefits.
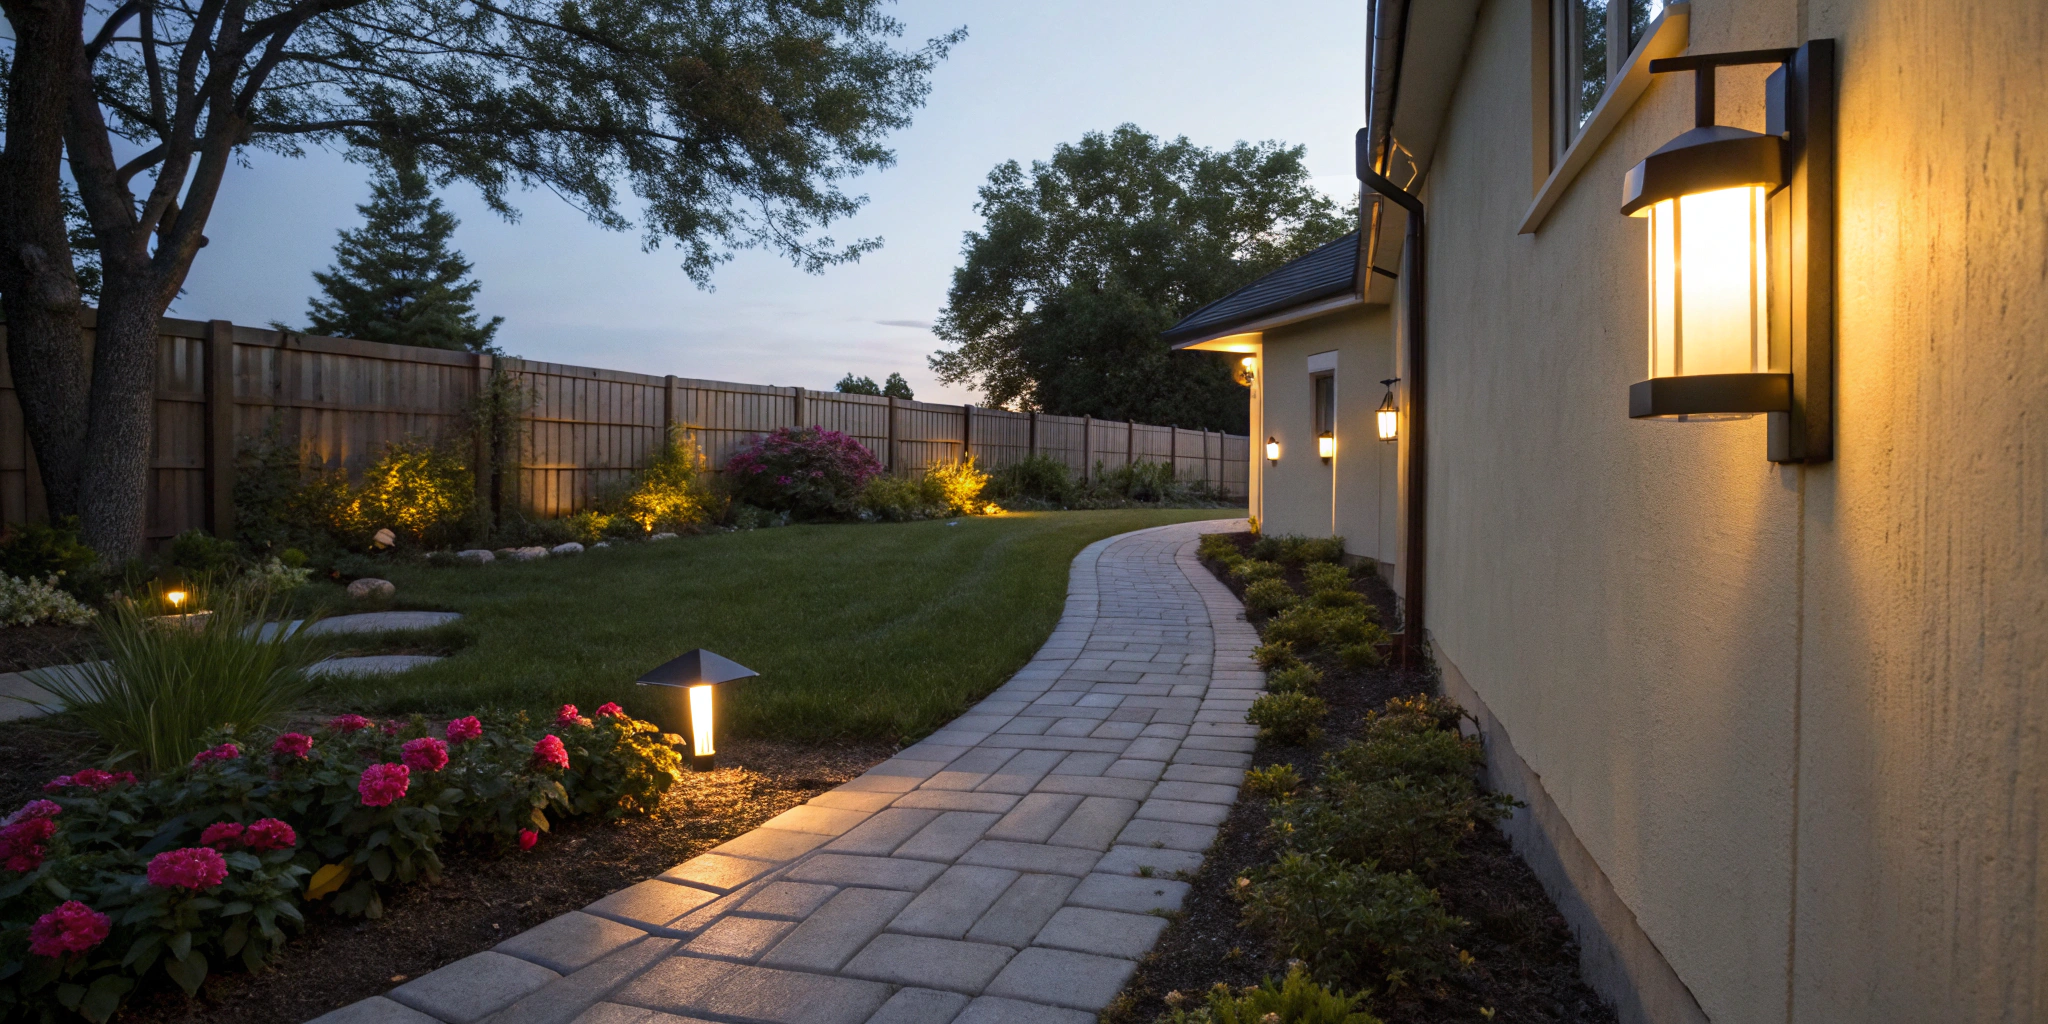
Where to Place Your Motion Sensor Lights
You’ve picked out the perfect motion sensor light—now comes the fun part: deciding where it goes. It might seem simple, but strategic placement is the key to getting the most out of your new fixture. Where you install your light is just as important as which one you choose. The right spot ensures you get reliable security alerts, safe illumination when you need it, and fewer false alarms from passing cars or neighborhood cats. Think of it as setting up a little lighting system that works for you, not against you. A well-placed light can make your home feel more secure and welcoming, lighting up your path as you come home with groceries and deterring anyone who shouldn’t be there. Before you grab the ladder, take a walk around your property at night to identify the darkest spots and most-used pathways. This little bit of planning will help you create a seamless layer of light that improves both safety and security, making your home a less attractive target for potential intruders while making it easier for you and your family to get around after dark. Let’s walk through how to find the perfect spots for your new lights.
Getting the Height and Angle Just Right
Getting the height just right is crucial for your motion sensor’s performance. The sweet spot is typically between 8 and 10 feet off the ground. Mounting your light in this range gives the sensor a great vantage point to cover a wide area. If you go too low, you risk the light being triggered by small animals. Too high, and it might not detect motion close to the house. Angling the sensor downward slightly helps focus the detection zone on your property, like your walkway or driveway, instead of the public sidewalk or street. This simple adjustment makes a huge difference in how effectively your light works.
Focus on Entry Points and Walkways
Think about the main pathways people use to approach your home. These are the prime locations for motion sensor lights. You’ll want to cover all major entry points, including your front door, back door, and garage. Placing lights along driveways and walkways not only makes it safer to get around in the dark but also instantly illuminates anyone approaching. Don’t forget about those dark, hidden corners of your property, like the side of your house or a back gate. Lighting up these spots can eliminate potential hiding places and add another layer of security. A professional can help with any electrical installation needed to get lights in these key areas.
How to Avoid False Alarms
Nothing is more annoying than a security light that flicks on and off all night for no reason. You can prevent most false alarms with smart placement. Point the sensor toward the areas you want to monitor, like your yard or porch, and away from things that move constantly. Avoid aiming it directly at a busy street where cars will trigger it all the time. Swaying tree branches, clotheslines, or even heat sources like an HVAC unit can also cause false triggers. The goal is to give the sensor a clear, unobstructed line of sight to the detection zone, ensuring it only activates when it’s supposed to.
Fine-Tuning Sensor Coverage
Once your light is securely mounted, it’s time for the final touch: fine-tuning the sensor’s coverage. Most motion sensors aren’t static; you can physically tilt and swivel them to aim the detection zone exactly where you want it. This is how you ensure it catches someone on your walkway but ignores cars on the street. You can also adjust the sensitivity, which is perfect for preventing small animals from triggering the light all night. The best way to dial in these settings is with a “walk test” at dusk. Have a friend or family member walk through the target area while you adjust the sensor’s angle and sensitivity until it activates perfectly. If you’ve tried everything and the light still isn’t working as expected, it could point to an underlying wiring issue that requires professional electrical repairs.
Common Installation Mistakes to Avoid
Installing a motion sensor light can feel like a huge win, but a few common slip-ups can keep it from working its best. Even small mistakes in placement or setup can lead to false alarms or, worse, a light that doesn’t turn on when you need it to. Taking a moment to get these final details right ensures your new light is a reliable addition to your home’s security and not just a source of frustration. Let’s walk through the most frequent installation errors so you can sidestep them completely.
Aiming the Sensor the Wrong Way
Think of the motion sensor as the eyes of your new light. If they aren’t looking in the right direction, they can’t do their job. A common mistake is aiming the sensor at a busy street, which can cause the light to trigger every time a car drives by. Instead, point the sensor directly at the area you want to monitor, like your walkway or driveway, to catch movement coming towards your home. Also, be mindful of large shrubs that sway in the wind, as this can also cause annoying false alarms.
Forgetting to Seal Your Fixture
Your outdoor light will face everything from pouring rain to intense summer heat. Forgetting to weatherproof it is like leaving a window open during a storm. Make sure you use all the gaskets and seals included with your light. The fixture should be properly grounded, and the electrical box must have a weatherproof cover to protect the wiring from moisture. This simple step is crucial for preventing short circuits, rust, and other electrical issues down the road. Properly sealing your installation protects the light and ensures it works safely for years.
Mounting in a Bad Location
Finding the right height for your motion sensor light is a balancing act. If you mount it too high, the sensor’s detection range might not reach the ground effectively. If it’s too low, it might be triggered by small animals or fail to cover a wide enough area. The sweet spot is typically between 8 and 10 feet off the ground. Just as important is ensuring the sensor has a clear line of sight. A light mounted behind a pillar or tree branch won’t be able to see anything, making it ineffective. A professional installation can help guarantee the perfect placement.
Overloading an Electrical Circuit
Adding a new light, even an energy-efficient one, places another demand on your home’s electrical circuit. Each circuit is designed to handle a specific amount of electricity, and pushing it past that limit can cause wires to overheat, creating a serious fire hazard. Be aware of warning signs that your circuit is already strained, such as frequently tripping breakers, lights that flicker when you turn on an appliance, or outlets that feel warm to the touch. If you notice any of these issues or are simply unsure if your circuit can handle the extra load from your new fixture, it’s a clear signal to pause. This is one area where it’s always better to be safe, and getting help with electrician repairs or an assessment is the smartest move to protect your home.
Know When to Call M.T. Ruhl for Help
While tackling a DIY project can be incredibly satisfying, there’s also a lot of wisdom in knowing when to call for backup. When it comes to electrical work, safety is everything. If you hit a point in your installation where you feel uncertain or the job becomes more complex than you expected, that’s the perfect time to pause and bring in a professional. It’s not about giving up; it’s about making the smart, safe choice for your home and family. Our team at M.T. Ruhl is always here to help you finish the job correctly and give you peace of mind.
When the Wiring Looks Complicated
You’ve opened up the junction box, and the wiring looks more like a bowl of spaghetti than the simple diagram you saw online. It’s a common moment in any DIY electrical project. If you’re feeling unsure about which wire goes where, it’s a clear sign to stop and call a professional. Tasks like drilling through brick to run power or connecting the new fixture to your home’s main circuit require an expert touch. While you might handle the mounting, a certified electrician must make the final connections to ensure everything is safe and functional, preventing any potential hazards down the road.
For Peace of Mind and Safety
Beyond just getting the light to turn on, a proper installation needs to be safe and compliant with local electrical codes. These codes aren’t just suggestions—they’re in place to protect you. A professional installation guarantees that your motion sensor light is properly grounded, uses weatherproof covers, and is protected by the right circuit breakers or GFCI outlets, which is especially important for outdoor fixtures exposed to rain and moisture. Our electrical repair services ensure every connection is secure and insulated, minimizing risks and making sure your new light works reliably for years to come.
Troubleshooting and Maintaining Your Lights
Once your motion sensor light is installed, a little bit of upkeep and troubleshooting will keep it working perfectly for years. Like any piece of technology, these lights can sometimes act up, but the good news is that most common issues have simple fixes. Whether your light is staying on too long or not turning on at all, a few quick checks can often solve the problem. By learning how to handle these minor hiccups and perform some basic maintenance, you can ensure your lights remain a reliable part of your home’s security and convenience.
What to Do If Your Light Stays On
It can be frustrating when your motion sensor light decides to stay on indefinitely, but this is often an easy fix. The most common cause is that the light has been accidentally switched into a manual override mode. Try flipping the light switch that controls the fixture off for about 30 seconds, then turn it back on to reset it. If that doesn’t work, the issue could be a power surge. Head to your circuit breaker, turn off the breaker connected to the light for a full minute, and then switch it back on. This simple power cycle can resolve many sensor glitches. If the light still won’t turn off, the sensor itself might be faulty, which may require a professional look.
Fixing a Light That Won’t Turn On
If your motion sensor light isn’t turning on, start with the most obvious culprits. First, check if the lightbulb has burned out and replace it if needed. Next, confirm that the circuit breaker hasn’t been tripped. You should also check the sensor’s settings—many models have a light sensitivity dial that prevents them from turning on during the day. Make sure it’s adjusted correctly for dusk-to-dawn operation. Finally, check the sensor itself for any obstructions like dirt or a spiderweb. If you’ve tried all these steps and the light still won’t activate, there could be an issue with the wiring, and it’s safest to call for professional electrician repairs.
How to Upgrade an Existing Light Fixture
You don’t always need to install a brand-new fixture to get the benefits of motion-activated lighting. If you have an existing outdoor light you love, you can often upgrade it with motion-sensing capabilities. The easiest way is to use a special motion-sensing lightbulb, which has a sensor built right in. You just screw it into your current fixture, and you’re good to go. Another option is a motion sensor kit, which you can wire between your home’s power and the existing light. These simple solutions are a great way to enhance your current residential electric setup without the work of a full replacement.
Simple Maintenance for Long-Lasting Performance
A little routine care will go a long way in keeping your motion sensor light in top shape. Every few months, take a moment to gently wipe down the sensor with a soft cloth to remove any dust, cobwebs, or grime that could be blocking its view. This simple step prevents false triggers and ensures it can accurately detect motion. It’s also a good idea to test the light periodically by walking through its detection zone to make sure it’s still responding correctly. Check the weatherproof seal around the base of the fixture to ensure it’s intact, as this prevents moisture from damaging the internal wiring and keeps your light shining bright for years.
Related Articles
- How to Add a Motion Sensor to Existing Outdoor Lights
- The Ultimate Guide to Motion Sensor Light Installation
- Outdoor Motion Sensor Light Wiring Diagram Explained
Frequently Asked Questions
My motion light keeps turning on for no reason. What can I do? This is a common frustration, and it’s usually caused by the sensor’s placement. Your light might be aimed at a busy street, picking up passing cars, or it could be pointed at a tree branch that sways in the wind. Try angling the sensor downward more, focusing it only on the area you want to monitor, like your direct walkway. You can also adjust the sensitivity setting on the fixture itself, which can help it ignore smaller movements.
Can I adjust my motion sensor light so it only works at night? Absolutely. Most motion sensor lights have a setting, often called a photocell or “dusk-to-dawn” feature, that you can adjust. This tells the sensor to only activate when it’s dark outside, so it won’t turn on every time you walk past it during the day. This is a great way to save energy and ensure the light only works when you actually need it.
Are solar-powered motion lights as good as hardwired ones? Solar lights are a great option if you need a quick installation in a spot without existing wiring. However, hardwired lights are generally more reliable. They are connected directly to your home’s power, so you never have to worry about cloudy days affecting their performance. For a permanent security solution, a hardwired fixture is the most dependable choice.
Can I use any kind of light bulb in my motion sensor fixture? It’s important to check the manufacturer’s instructions for your specific fixture, as some have limitations. That said, most modern motion sensor lights are designed to work with LED bulbs. LEDs are the best choice because they turn on instantly, use very little energy, and last for years, which is perfect for a light that will be turning on and off frequently.
How do I know if my old wiring is safe for a new light fixture? If you remove your old light and see wires that are frayed, brittle, or have crumbling insulation, that’s a clear sign to stop and call a professional. The same goes for wiring that doesn’t match the standard black, white, and ground color code. Working with old or confusing electrical systems isn’t worth the risk, and an experienced electrician can make sure everything is connected safely and brought up to current standards.