You already know the benefits of motion sensor lights—they save energy, improve security, and add a ton of convenience. But the difference between a frustrating fixture that triggers every time the wind blows and a truly smart light is all in the installation. Getting the placement, height, and sensitivity settings just right is key to a system that works for you, not against you. This guide focuses on doing the job correctly from start to finish. We’ll walk you through a safe and effective motion sensor light installation, ensuring your new lights perform reliably for years to come.
Key Takeaways
- Place Lights Where They Matter Most: Install motion sensors at key entry points like doors, driveways, and dark side yards. This strategic placement improves your home’s security and makes it safer to walk around your property at night.
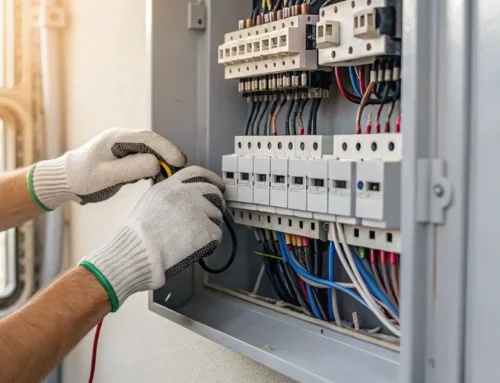
- Prioritize Safety Above All Else: Before touching any wires, always turn off the power at the circuit breaker and verify it’s off with a voltage tester. If you feel unsure at any point, calling a professional electrician is the smartest and safest decision.
- Calibrate Your Settings for Reliable Performance: Take a few minutes to adjust the sensor’s sensitivity, timer, and detection range. This fine-tuning ensures your light activates for people on your property, not for passing cars, making it a helpful feature instead of a nuisance.
How Do Motion Sensor Lights Work?
Motion sensor lights seem almost magical, turning on right when you need them. But it’s not magic—it’s smart technology designed to detect movement. Understanding how they work can help you choose the right fixtures for your home and get the most out of them. At their core, these lights use specialized sensors to identify when someone or something enters a specific area, automatically triggering the light to switch on. Let’s break down the most common technologies you’ll find.
Understanding Motion Sensor Types
Most motion lights you’ll find for your home use one of two main technologies, or sometimes a combination of both. The most common are “passive infrared” (PIR) sensors, which work by detecting body heat. Think of them as tiny heat-seeking devices. Another type uses “microwave” (MW) sensors, which are more active. These send out small microwave pulses and then measure the reflections that bounce back to detect movement. Some high-end models are dual-sensor lights that use both PIR and microwave technology. This combination helps reduce false alarms, ensuring your lights only turn on when there’s genuine activity. For most residential needs, a quality PIR sensor light is a reliable and effective choice for improving home security.
How PIR Sensors Detect Activity
So, how exactly does a passive infrared (PIR) sensor “see” you? It’s all about heat. These sensors are designed to detect infrared radiation, which is the heat energy that all living things (and even some objects) give off. When your yard is empty, the sensor sees a consistent background temperature. But when a warm body, like a person, a pet, or a car with a warm engine, moves into its detection zone, it causes a rapid change in the infrared energy the sensor is reading. This sudden change is what triggers the light to switch on. It’s a simple yet brilliant system that provides light exactly when and where you need it, without you having to flip a switch.
Why Install Motion Sensor Lights?
If you’re looking for a simple upgrade that offers a ton of value, motion sensor lights are a fantastic choice. They’re one of those home improvements that work quietly in the background, making your life easier, safer, and even a bit more affordable. Instead of leaving your outdoor lights on all night or fumbling for a switch in the dark, these smart fixtures only turn on when they detect movement. This simple function delivers some pretty significant benefits, from enhancing your home’s security to trimming down your monthly energy bills. Let’s look at why installing motion sensor lights is a smart move for any homeowner.
Improve Your Home’s Security
One of the biggest reasons people install motion sensor lights is for peace of mind. A sudden, bright light is an excellent deterrent for anyone who might be lurking where they shouldn’t be. Think about it: if someone is approaching your home in the dark, the last thing they want is to be caught in a spotlight. Illuminating key areas like your front door, driveway, or backyard can make potential intruders think twice and move on. It’s a straightforward and effective way to make your property feel more secure without complex systems. Our team can help with professional electrical installation to ensure your lights are placed for maximum effect.
Save Energy and Lower Your Bills
We all want to find ways to reduce our energy consumption, and motion sensor lights are an easy win. Instead of running your outdoor lights from dusk until dawn, they only activate when needed. This means you’re not paying for electricity to light up an empty yard or driveway all night long. Over time, that energy savings really adds up, leading to noticeably lower electricity bills. It’s a practical investment that pays for itself by cutting down on wasted energy. This simple switch is a great step toward making your home more efficient and eco-friendly, one light at a time.
Add Everyday Convenience and Safety
Beyond security and savings, motion sensor lights just make life more convenient. Imagine pulling into your driveway with a car full of groceries and having the path to your door light up automatically—no more fumbling for keys in the dark. They also improve safety by illuminating walkways, stairs, and patios, helping to prevent trips and falls for your family and guests. Plus, they can be helpful for scaring away curious critters like raccoons or deer that might wander into your yard. It’s these small, thoughtful touches that make a house truly feel like a home, and our expert electrician repairs and installation services can get them set up for you.
Where to Install Motion Sensor Lights
Deciding where to put your new motion sensor lights is just as important as choosing the right ones. Strategic placement ensures you get the maximum benefit, whether you’re focused on security, safety, or just making it easier to get around in the dark. By thinking through the key traffic areas and vulnerable spots around your property, you can create a seamless and effective lighting plan. Let’s walk through the most effective spots to install them around your home.
Front and Back Doors
Your main entryways are the most logical and important places for motion sensor lights. A well-lit front door is welcoming to guests and makes it much easier for you to find your keys at night. More importantly, a sudden flood of light is a powerful deterrent for anyone approaching your home with bad intentions. Placing a light above or beside your front, back, and garage doors creates a strong first line of defense. This simple upgrade is one of the most effective residential electric projects for improving home security.
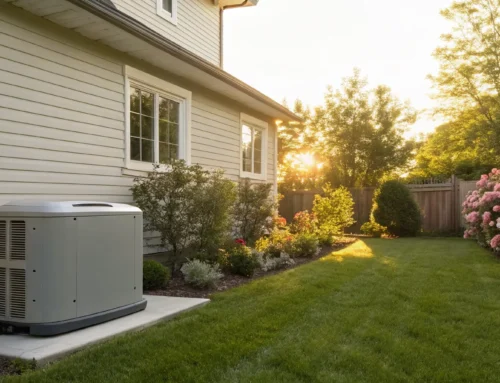
Driveways and Garages
Lighting up your driveway and garage provides both safety and peace of mind, especially when you arrive home after dark. A motion sensor light can illuminate the path from your car to your door, helping you see any potential obstacles. It also discourages anyone from lurking near your vehicles or trying to access your garage. Installing a light on the exterior of your garage or positioned to cover the length of your driveway ensures you never have to step out of your car into complete darkness again. If the wiring seems tricky, our team can handle any electrician repairs or installation needs.
Pathways and Walkways
Dark pathways are a recipe for trips and falls. Installing motion-activated lights along walkways, garden paths, and stairways is a fantastic way to improve safety for your family and any visitors. These lights guide the way, clearly showing any steps, uneven ground, or other potential hazards. For the best coverage, it’s a good idea to mount these lights about 7 to 10 feet off the ground. This ensures the light spreads over a wide area, making every step you take a secure one.
Backyards and Side Areas
The dark, often-overlooked areas on the sides of your house and in the backyard can be weak points in your home’s security. Motion sensor lights are perfect for illuminating these blind spots. Consider installing them near side gates, basement windows, sheds, or back patios. By lighting up these hidden corners when motion is detected, you eliminate potential hiding spots for intruders. This simple step helps create a complete perimeter of security around your property, ensuring every angle is covered.
Gather Your Tools and Materials
Before you start any project, it’s always a good idea to get all your supplies in one place. Having everything ready to go makes the installation process much smoother and safer. Think of it as your pre-flight check. For this project, you’ll need a few basic tools, the right materials for the job, and some essential safety gear. Taking a few minutes to prepare now will save you from running back and forth to the garage or hardware store later. Let’s walk through exactly what you’ll need to have on hand.
Your Toolkit Essentials
You don’t need a professional-grade workshop for this installation, but a few key tools are non-negotiable. First, grab a reliable screwdriver—both a Phillips head and a flathead will be useful. You’ll also need wire cutters or strippers to handle the electrical wiring cleanly and safely. A set of wire connectors (also called wire nuts) will be necessary for joining the wires together securely. Finally, since you’ll likely be working above your head, have a sturdy ladder or step stool ready. Having these basics within arm’s reach will make the entire process feel much more manageable.
Necessary Materials and Hardware
Beyond your tools, let’s talk about the materials. The most important is the wiring. If you’re connecting to a standard 15-amp light circuit, you’ll use 14-gauge (AWG) wire. However, if your home’s circuit uses 12-gauge wire, you must match it with 12-gauge wire for your new fixture. Using the wrong wire size is a serious fire hazard. Also, check that your new motion sensor light comes with a rubber gasket. This small piece is crucial for creating a weatherproof seal that protects the electrical components from moisture, ensuring your light works properly for years to come.
Important Safety Gear
This is the most important step of your preparation. Before you touch a single wire, you must turn off the power to the light fixture at your home’s main electrical panel. Don’t just flip the light switch off—shut it down at the source. To be absolutely certain the power is off, use a non-contact voltage tester. Simply hold it near the wires; it will light up or beep if there’s still an electrical current. If you’re ever unsure about your home’s wiring or feel hesitant about this step, it’s always best to call for professional help. Your safety is always the top priority.
Prepare for a Safe Installation
Before you even think about touching a wire, let’s talk about safety. Getting your new light installed correctly is important, but doing it safely is everything. A little bit of prep work goes a long way in preventing accidents and ensuring your installation is a success. These next few steps are the most critical part of the entire process, so take your time and make sure you get them right. If you ever feel unsure about handling electrical work, remember that our team is always here to help with professional electrician repairs and installations. Your safety is the top priority.
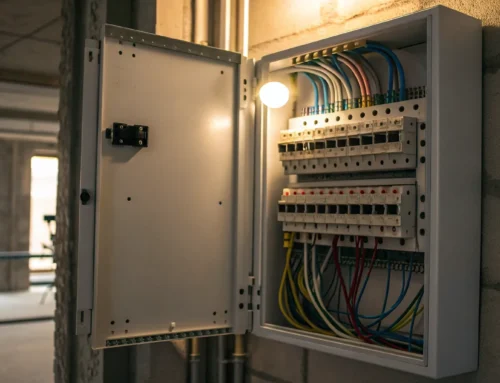
Turn Off Power at the Breaker
This is the most important rule of any electrical project: always turn off the power. Head to your home’s breaker box and find the circuit that controls the light fixture you’re replacing. Flip the switch to the “Off” position. Once you’ve done that, it’s a good idea to put a piece of tape over the breaker to prevent someone from accidentally turning it back on while you’re working. Even after you flip the breaker, you should always double-check that the power is truly off. Use a non-contact voltage tester at the fixture to confirm there’s no electricity running through the wires before you proceed.
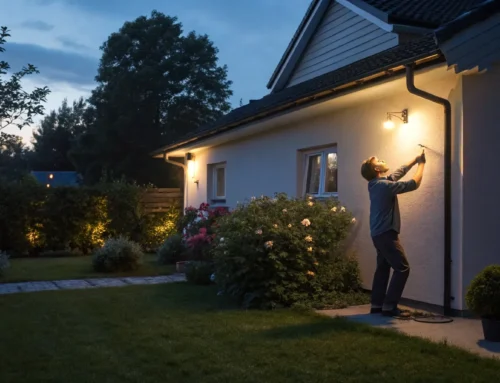
Choose the Right Height and Angle
Where you place your light matters just as much as how you wire it. For the best performance, you’ll want to mount your motion sensor light between 6 and 10 feet off the ground. This height gives the sensor a great vantage point to cover a wide area, like your entire driveway or backyard patio. Mounting it too low can limit its range, while mounting it too high can make it less sensitive to movement closer to the ground. Also, consider the angle. Point the sensor downwards and outwards to capture motion in the desired zone while avoiding false alarms from passing cars or neighbors walking by.
Plan Your Wire Connections
Getting the wiring right is straightforward if you follow the color code. In most cases, you’ll match the wires from your new fixture to the existing wires in the electrical box: black to black (for the power), white to white (for the neutral), and the green or bare copper wire to the ground wire. After twisting the corresponding wires together, secure them tightly with wire connectors. For extra security, you can wrap the connectors with electrical tape. It’s also important to know that motion sensor lights have their own built-in switch, so they shouldn’t be wired to an indoor light switch that controls them.
Test the Existing Wiring
One final safety check before you connect your new light is to test the existing wiring one more time. After you’ve removed the old fixture and exposed the wires, use your non-contact voltage tester again on each wire (black, white, and ground) to be absolutely certain there is no power. This step might feel repetitive, but it’s a crucial final confirmation that your work area is safe. If your tester detects any voltage or if the wiring looks old, frayed, or different from what you expected, it’s best to stop and call a professional. Proper residential electric work ensures your home stays safe.
How to Install Your Motion Sensor Light: Step-by-Step
Alright, you’ve done your prep work, and now it’s time for the main event. Installing your new motion sensor light is straightforward if you follow the steps carefully. Remember, safety is always the top priority. While this guide covers the basic process, every home’s wiring can be a little different. If you open up your electrical box and see something that doesn’t match this guide, or if you feel unsure at any point, it’s always best to pause and call a professional. Handling your home’s residential electric systems correctly is key to keeping your family safe.
Step 1: Remove the Old Fixture
First things first: make sure the power is completely off at the circuit breaker. With the power off, you can safely begin removing your old light fixture. Most fixtures are held in place by a couple of decorative nuts or screws. Loosen them and carefully lower the fixture to expose the wiring inside the electrical box. You should see three wires coming from the fixture connected to three wires in the box. Before you disconnect anything, snap a quick photo with your phone—it’s a great reference just in case. Carefully untwist the wire connectors and separate the fixture’s wires from the house wires.
Step 2: Mount the New Motion Sensor Light
Your new motion sensor light will come with its own mounting hardware, including a mounting bracket or strap. This piece attaches directly to the electrical box in your wall or ceiling. Use the screws provided to secure it firmly in place. For the best results, you’ll want to install the light at a height of about 7 to 10 feet off the ground. This gives the sensor a great vantage point to detect motion effectively across your yard or driveway. Make sure the bracket is level and tight before moving on to the wiring.
Step 3: Connect the Wires
Now it’s time to connect your new light. The wiring is typically color-coded to make it simple: connect the black wire from the fixture to the black wire from the house (this is the “hot” wire). Next, connect the white wire to the white wire (the “neutral”). Finally, connect the green or bare copper wire to the corresponding ground wire in the box. Use the new wire connectors included with your light to twist the matching wires together until they are snug. Give each connection a gentle tug to ensure it’s secure. Any complex wiring issues should be handled by a professional to ensure all electrician repairs are done safely.
Step 4: Secure All Connections
With the wires connected, gently tuck them back into the electrical box, making sure no connections are loose. Now, you can attach the new motion sensor light fixture to the mounting bracket you installed earlier, securing it with the provided screws. If you’re installing the light on an uneven surface like brick or stucco, run a bead of silicone caulk around the edge of the light’s base. This creates a watertight seal that protects the wiring from moisture. Once everything is tight and secure, you’re ready to move on to the final step: testing your new light.
Test and Adjust Your New Light
Okay, your new light is installed on the wall—great job! But don’t put that ladder away just yet. The final, and arguably most important, step is calibrating the sensor to work exactly how you want it to. Getting these settings right is the difference between a light that reliably catches a visitor on your walkway and one that flips on every time a car drives down the street. Think of it as teaching your light what to look for and what to ignore. This process involves a simple power-on check followed by a few tweaks to the sensitivity, timer, and detection range. A little fine-tuning now will ensure your light is both effective and efficient, providing security and convenience without any annoyances. It might take a few tries to get it perfect, so be patient with the process. The goal is to create a seamless experience where the light feels helpful, not distracting. If you’ve followed all the steps and something still seems off, our team is always ready to help with any electrical repairs you might need.
Run an Initial Power-On Test
First things first, let’s make sure everything is working correctly. Head back to your breaker box and carefully flip the circuit breaker back to the ON position. The light may turn on immediately and then shut off after a minute or two—this is a normal part of its initial power-up sequence. Once it’s off, it’s time for a walk test. Simply walk into the area the sensor is pointed at. The light should turn on. Wait for it to turn off, then walk past it from a different direction. This initial test confirms that your wiring is correct and the fixture is functional before you start adjusting the settings.
Adjust Sensitivity and Timer Settings
Now it’s time to customize. Most motion sensor lights have small dials or switches that let you control their behavior. You can typically adjust the sensitivity and the timer. The sensitivity setting determines how much movement is needed to trigger the light. A lower setting might ignore a squirrel or falling leaves, while a higher setting will catch smaller movements. The timer setting controls how long the light stays on after it detects motion, usually anywhere from one to ten minutes. Start with a medium sensitivity and a short timer for testing, then adjust until you find the perfect balance for your home’s needs.
Fine-Tune the Detection Range
The final adjustment is setting the physical detection zone. You want the light to activate when someone is on your property, not when your neighbor gets their mail. To do this, you’ll need to physically aim the sensor—the small dome or box on the fixture. Point the sensor toward the middle of the area you want to cover, like your driveway or front path, aiming it slightly downward. The goal is to create a specific “walk zone” that triggers the light. You may need to go back and forth a few times, walking through the area and adjusting the sensor’s angle until it covers the exact space you need and ignores everything else.
Keep Your Lights Working: Maintenance and Troubleshooting
Once your new motion sensor light is installed, a little upkeep will ensure it works reliably for years to come. Like any piece of outdoor equipment, it’s exposed to the elements and can run into occasional hiccups. Most common issues are easy to fix with a bit of troubleshooting. From a simple cleaning to adjusting the settings, you can handle many of the typical problems yourself. But it’s also important to know when a problem points to a deeper electrical issue that’s best left to a professional. Here’s how to maintain your light and what to do if it starts acting up.
Perform Regular Cleaning and Inspections
One of the easiest ways to keep your motion sensor light working properly is to keep it clean. Over time, dust, cobwebs, and other debris can build up on the sensor, blocking its view and causing it to either miss motion or trigger erratically. About once a month, or whenever you notice it looking dirty, gently wipe the sensor with a soft, dry cloth. While you’re there, take a quick look at the fixture itself. Check for any signs of damage, moisture inside the housing, or frayed wires. A quick, regular check-up can prevent small issues from turning into bigger problems down the road.
Avoid These Common Installation Mistakes
If your light seems overly sensitive or isn’t catching motion correctly, the problem might be its placement or settings. Motion sensors can sometimes be triggered by things you don’t want them to be, like leaves blowing in the wind or a pet running across the yard. You can usually fix this by adjusting the sensitivity dial on the fixture. Another common issue is placing the sensor where it can “see” through a window, causing it to pick up movement inside your house. Pointing the sensor away from windows and busy streets will help it focus only on the areas you want to monitor, giving you fewer false alarms.
When to Call M.T. Ruhl for Professional Help
While many motion sensor light issues are simple fixes, some problems signal it’s time to call in an expert. If your light is flickering, making a buzzing sound, or won’t turn on at all after you’ve checked the bulb and the breaker, there could be an underlying wiring issue. Don’t risk your safety trying to diagnose complex electrical problems. Our team of skilled electricians is here to help with any electrician repairs you might need. Whether it’s a faulty connection or a more complicated issue, we can troubleshoot the problem safely and get your lights working perfectly, giving you peace of mind.
Related Articles
- Hiring an Electrical Repair Service? Read This First
- Energy Survey Job – M.T. Ruhl Electrical Contracting
- Electrical Security – M.T. Ruhl Electrical Contracting
- Lighting Work – M.T. Ruhl Electrical Contracting
Frequently Asked Questions
Why does my motion sensor light stay on all the time? This is a common issue, and it’s usually an easy fix. Most motion lights have a manual override mode that can be accidentally triggered by flipping the indoor light switch on and off too quickly. To reset it, turn the light off at the circuit breaker for about a minute, then turn it back on. If that doesn’t work, the sensitivity setting might be too high, causing it to react to even the slightest movements, like wind-blown leaves.
Will my pets or passing cars constantly set off my lights? They don’t have to! This is exactly why adjusting your light’s settings is so important. You can typically lower the sensitivity so it ignores smaller animals and fine-tune the sensor’s angle to aim it away from the street. By pointing the sensor directly at your walkway or driveway, you create a specific detection zone, which helps ensure the light only turns on when someone is actually on your property.
Can I just add a motion sensor to a light I already have? Yes, you can purchase standalone motion sensors that can be wired to an existing outdoor light fixture. This can be a great option if you love your current light but want the added function. Just keep in mind that the installation process involves the same electrical wiring and safety precautions as installing a completely new fixture, so you need to be comfortable and careful when working with your home’s power.
Do I have to wire my motion sensor light to a switch inside? Motion sensor lights are designed to work on their own and need a constant supply of power to function correctly. While they are connected to a circuit that is controlled by a breaker, they shouldn’t be wired to a standard indoor on/off switch. Using an indoor switch can interfere with the sensor’s settings and prevent it from working automatically as intended.
Is it really safe for me to install this myself? If you have experience with basic home electrical projects and are diligent about following safety procedures, especially turning off the power at the breaker, this is a manageable DIY task. However, your safety is what matters most. If you open the electrical box and the wiring looks old, confusing, or you feel even slightly unsure about what you’re doing, the smartest move is to call a professional electrician.