Our homes are demanding more power than ever. From charging an electric vehicle overnight to running a high-efficiency heat pump, standard outlets often can’t keep up. A 240V outlet is the gateway to accessing that power. A proper 240v electrical outlet installation is more than just an upgrade; it’s about future-proofing your home for the next generation of technology. This guide will explain why these outlets are becoming a modern necessity, which appliances require them, and how you can safely add one to your home. I’ll provide a clear, step-by-step process so you know exactly what to do.
Key Takeaways
- Prioritize Safety Above All Else: Always turn off the main power and confirm it’s off with a voltage tester before touching any wires. A secure ground connection at the panel, box, and outlet is essential for preventing electric shock.
- Match Your Components Correctly: To avoid a serious fire hazard, ensure the wire gauge you use is properly rated for the amperage of the new double-pole breaker. Mismatched parts can cause wires to overheat.
- Recognize When to Call a Professional: If you have an old electrical panel, need a permit for the work, or simply feel the job is beyond your skill level, it’s time to call an expert. A professional ensures the installation is safe, efficient, and compliant with local codes.
What Is a 240V Outlet (And Do You Need One)?
If you’ve ever tried to plug in a new heavy-duty appliance only to find the plug is enormous and doesn’t fit a standard wall socket, you’ve likely encountered the need for a 240V outlet. Think of it as the high-performance version of your regular electrical outlet, designed specifically for machines that need a lot more power to get the job done.
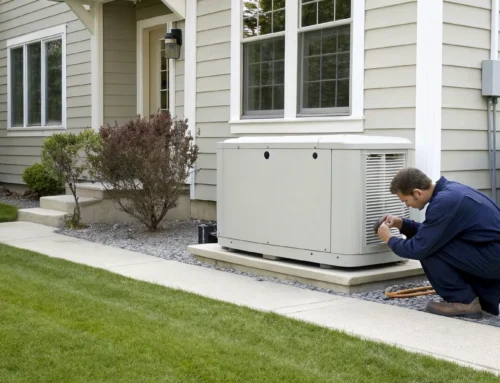
You can usually spot a 240V outlet by its size and shape. They are larger than the familiar 120V outlets and often have a rounded top with three or four large holes for the prongs. While most of your home’s electronics, like lamps and phone chargers, run perfectly on standard 120V power, your home’s hardest-working appliances require a dedicated, high-power circuit. Having the right residential electric setup is essential for running these appliances safely and efficiently. It’s also a key part of ensuring your home is prepared for anything, whether that’s installing a new oven or connecting a powerful home backup generator.
Which Appliances Require a 240V Outlet?
So, which appliances need this extra power? Typically, it’s the major equipment that generates a lot of heat or uses a powerful motor. Big appliances like electric clothes dryers, ovens, stoves, and central air conditioners are the most common examples.
Other items that often require a 240V outlet include:
- Electric water heaters
- Electric vehicle (EV) chargers
- Hot tubs and saunas
- Large workshop tools like welders or air compressors
If you’re planning to buy or replace any of these items, it’s a good idea to check your existing electrical setup first. If you don’t have the right outlet, you’ll need a qualified electrician to install one.
120V vs. 240V: What’s the Difference?
The main difference between 120V and 240V outlets comes down to the amount of power they can deliver. A standard 120V circuit, which powers most of your outlets, uses a single 120-volt “hot” wire. In contrast, a 240V circuit uses two 120V hot wires. By combining them, it effectively doubles the voltage delivered to your appliance.
This is also why the amperage ratings are different. Your standard outlets are typically on 15- or 20-amp circuits. A 240V circuit, however, is built to handle a much higher load, usually between 30 and 50 amps. This increased capacity is what allows large appliances to run efficiently without constantly tripping the circuit breaker.
Common Reasons to Add or Replace an Outlet
Why You Might Need a New 120V Outlet
While big appliances get the high-voltage treatment, our daily lives are powered by the humble 120V outlet. And if you find yourself constantly searching for a free socket or creating a tangle of extension cords, it might be time to add a few more. As we bring more technology into our homes—from smart speakers and tablets to kitchen gadgets—the demand for accessible power grows. Adding new outlets in convenient spots, like next to the sofa or above a kitchen counter, makes life easier and your space tidier. It’s a simple upgrade that enhances your home’s functionality and ensures your electrical system keeps up with your needs.
Replacing an Existing 120V Outlet: A Simpler DIY
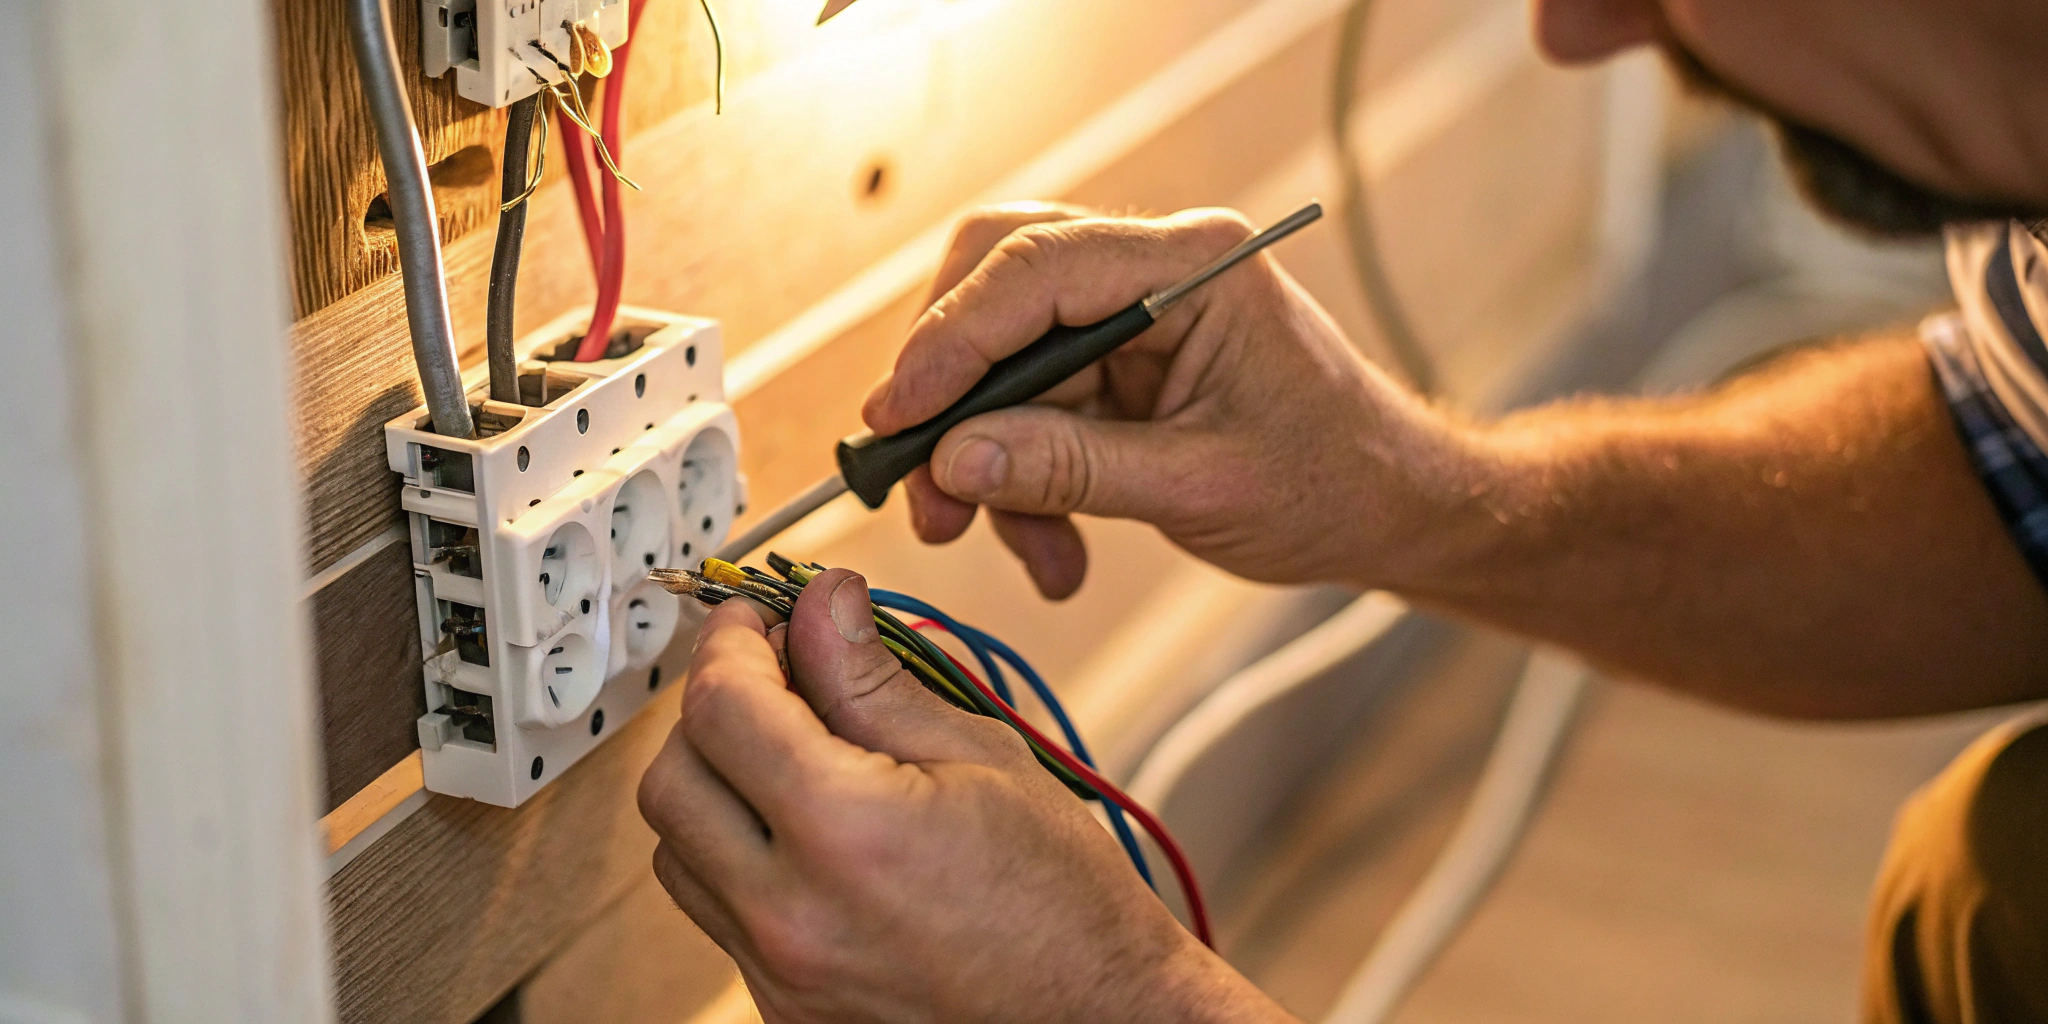
If you have an outlet that’s cracked, discolored, or just not working, replacing it can be a fairly straightforward project. Unlike running a new circuit, you’re just swapping out one component for another. The most important rule is to always put safety first. Before you do anything, shut off the power at the circuit breaker and double-check that the outlet is dead with a voltage tester. From there, it’s a matter of removing the old outlet and connecting the new one by matching the wires correctly: black to brass, white to silver, and the bare copper wire to the green ground screw. If the wiring looks old or you feel unsure at any point, it’s always best to call for professional electrician repairs to ensure the job is done safely.
What You’ll Need for a Safe 240V Outlet Installation
Before you start any electrical project, success and safety begin with having the right equipment on hand. Taking the time to gather everything you need upfront prevents mid-project trips to the hardware store and ensures you can work carefully and efficiently. Think of it as setting up your workspace for a smooth process. You’ll need a combination of hand tools, safety equipment, and the correct electrical components specified for a 240V installation. Getting these details right is the foundation of a safe and successful project. For any major residential electric work, proper preparation is a non-negotiable first step. Let’s walk through exactly what you’ll need to get the job done correctly.
Your Must-Have Tools and Safety Gear
First, let’s talk tools. You’ll likely need a drill, screwdrivers (both Phillips and flathead), wire strippers, and pliers. But the most critical tool in your bag is a voltage tester. Whether it’s a multimeter or a non-contact voltage pen, this is your most important safety device. You must use it to double-check that the power is completely off before you touch any wires. Don’t forget safety glasses to protect your eyes from debris and insulated gloves for an extra layer of protection. Laying everything out before you begin helps you stay organized and focused on the task at hand.
Essential Tools for Adding an Outlet
To make sure you have everything within reach, here’s a quick checklist of the essential items. Having these ready before you start will help the installation go smoothly and safely. It’s not just about having the tools, but also the correct, specific components for a high-voltage job. This is where attention to detail really matters for preventing future issues.
- Voltage Tester: This is non-negotiable. Whether you choose a non-contact pen or a multimeter, this is the only way to be 100% certain the power is off before you proceed. Always test the tester on a known live circuit first to ensure it’s working correctly.
- Standard Hand Tools: You’ll need a reliable drill, a set of Phillips and flathead screwdrivers, wire strippers designed for the gauge of wire you’re using, and a sturdy pair of pliers.
- Safety Gear: Protect yourself. Safety glasses are a must to shield your eyes from dust and debris, and insulated gloves provide an important extra layer of protection against accidental shock.
- Correct Electrical Parts: This is critical. You need a 240V outlet, an electrical box with enough capacity, and the right gauge of wire that matches your new double-pole breaker. Using mismatched components is a serious fire risk. If you’re unsure about selecting the right parts, it’s best to call a professional for electrician repairs to guarantee a safe installation.
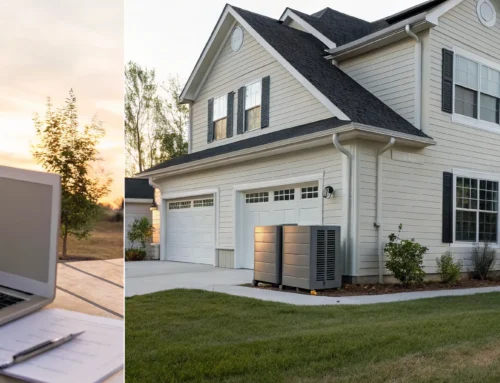
Estimating Your Time and Material Costs
When you’re planning a 240V outlet installation, it’s helpful to understand the potential costs in both materials and time. The good news is that the parts themselves—the outlet, wiring, and a new double-pole breaker—are generally not very expensive. The real variable is the time and complexity of the installation. If you’re simply replacing an existing 240V outlet, the job might only take an hour or so. However, if you need to run a brand-new circuit from your electrical panel to a new location, the project becomes much more involved and time-consuming. If you find the task is more complex than you anticipated, or if your electrical panel looks outdated, it’s always best to consult a professional. Ensuring the installation is safe and up to code is crucial, and sometimes that means calling for expert electrician repairs to get the job done right.
How to Choose the Right Cable and Breaker
Next up are the core components. The wire, or cable, you choose is crucial because it needs to handle the high electrical load of a 240V appliance. For a 50-amp outlet, you’ll typically use a “6-gauge, 3-conductor” cable, which contains two hot wires, a neutral wire, and a ground wire. For other appliances, you might use a “10-3 non-metallic sheathed cable.” The key is to match the wire gauge to the amperage of the circuit breaker. The breaker itself must be a two-pole breaker that fits your specific electrical panel. If you’re unsure about matching these components, our team can handle any electrician repairs to ensure your system is safe and up to code.
How to Select the Right Outlet and Box
Finally, you need the outlet and the box it will be housed in. Not all outlets are created equal. Look for one that is rated for the amperage you need (e.g., 30-amp or 50-amp) and is designed for heavy use. Some outlets are even marked “EV” for electric vehicles, indicating they are built to be more durable for continuous, high-power demand. The electrical box must be large enough to safely contain the wires without cramming them in, and it should be securely mounted to a stud in the wall. Choosing a sturdy, appropriate box ensures your new outlet is stable and secure for years to come.
Safety First: Critical Steps Before You Begin
Okay, before you even think about touching a wire, let’s talk about safety. This isn’t the part of the project to skim through. Working with electricity demands respect and careful attention to detail, but don’t let that intimidate you. By following a few critical steps, you can approach this project confidently and safely. Think of this as your pre-flight checklist—a series of non-negotiable steps that ensure everything goes smoothly from start to finish. Taking a few extra minutes to prepare will not only protect you from injury but also prevent damage to your home’s electrical system.
We’re going to walk through the three pillars of electrical safety for this project. First, we’ll cover the absolute must-do of shutting off the power and verifying that it’s truly off. Next, we’ll touch on the administrative side: checking local codes and permit requirements to make sure your work is fully compliant and legal. Finally, we’ll get into the specifics of the wiring itself, focusing on the crucial role of grounding for a safe and stable connection. Getting these fundamentals right from the very beginning is the key to a successful DIY installation.
Safely Turn Off and Test the Power
First things first: kill the power. Head to your main circuit breaker panel and switch off the main breaker that controls power to your entire house. This is the only way to ensure the panel is safe to work in. But don’t just trust the switch. Your next step is to verify. Grab a voltage tester—a non-negotiable tool for this job—and test the wires you plan to work on to confirm there is absolutely no current. This double-check is your most important safety measure. If you feel even slightly unsure about this process, it’s the perfect time to call for professional electrician repairs instead.
Do You Need a Permit? Checking Local Codes
Now for the paperwork part. Before you install your new outlet, you need to check your local building codes. Electrical work is regulated for safety, and the rules can vary depending on where you live in Southeastern Pennsylvania. Some townships require a permit for this type of installation, and attempting the work without one could cause issues later on, especially when you sell your home. Doing a little research on your local municipality’s website will tell you what’s required for residential electrical projects. Following these guidelines ensures your work is not only safe but also compliant.
A Quick Guide to Grounding and Wire Safety
Let’s talk about the wires themselves. A 240V circuit is different from your standard 120V outlet. It uses two “hot” wires to deliver more power and one essential ground wire. That ground wire is your safety net. Its job is to provide a path for electrical current to travel safely to the earth in case of a fault, preventing dangerous electrical shocks. When you connect your outlet, you must ensure the ground wire is securely attached to both the electrical box and the outlet itself. Properly grounding your connection is a fundamental part of a safe installation, so take your time to get this step right.
Standard 120V Wiring Color Code
Think of the colors on electrical wires as a universal language for electricians. In a standard 120V circuit, you’ll typically find three wires. The “hot” wire is usually black and is responsible for carrying the electrical current from the breaker panel to your outlet. The “neutral” wire is white, and its job is to complete the circuit by returning that current to the panel. Finally, the ground wire, which is either green or bare copper, is your most important safety feature. It provides a safe path for electricity to travel in case of a fault, protecting you from a dangerous shock. Understanding this basic color scheme is fundamental for any residential electrical project.
How to Install a 240V Outlet: A Step-by-Step Guide
Alright, you’ve gathered your tools, planned your project, and taken all the safety precautions. Now it’s time for the main event: installing the outlet. This process requires careful attention to detail, but breaking it down into clear steps makes it much more manageable. Remember, this is your home’s electrical system—precision is key.
We’ll walk through running the cable, installing the breaker, wiring the outlet, and making sure every connection is perfect. While this guide covers the essential steps, every home’s wiring is a little different. If you encounter anything that doesn’t look right or feel comfortable, it’s always best to pause and call in a professional. Handling these kinds of residential electric projects is what we do every day, and we’re always here to help ensure your home is safe. Ready to get started? Let’s go.
Step 1: Plan the Location and Run the Cable
First things first, decide exactly where your new outlet will go. Think about the appliance you’ll be plugging in and choose a convenient, accessible spot. Once you’ve picked the location, you’ll need to run a new electrical cable from your main electrical panel to the outlet box. For most 240V appliances, you’ll use a 10-3 non-metallic (NM) sheathed cable, which contains three insulated conductors and a ground wire.
Running the cable is often the most labor-intensive part of the job. You may need to route it through an attic, basement, or crawlspace and drill holes through wall studs to get it to its destination. Plan the straightest, most direct path possible to minimize the amount of cable needed and the work involved.
Running Wires with Minimal Drywall Damage
One of the biggest hesitations with a project like this is the thought of cutting into your walls. The good news is that with a little patience, you can often run a new cable without major drywall surgery. The technique is called “fishing,” where you use a flexible fish tape to pull the wire through the wall cavity from one opening to another. This method allows you to add a new outlet with minimal disruption. It takes some practice to get the hang of it, but it’s a great way to avoid a messy patching and painting job. For complex runs or if you’re just not comfortable cutting into your walls, our team handles these kinds of residential electric projects all the time, ensuring a clean and professional result.
Using Nail Plates to Protect Wires
After you’ve drilled holes through wall studs to run your cable, there’s one small but critical safety step you can’t skip: installing nail plates. A nail plate is a small, sturdy piece of metal that you hammer onto the stud directly over the area where the wire passes through. Its job is simple but essential: it protects the wire from being accidentally punctured by future nails or screws. Imagine hanging a heavy picture frame a year from now—without a nail plate, you could easily drive a nail right into your high-voltage cable, creating a serious fire hazard. This simple component ensures your wiring stays safe and secure inside the wall.
Step 2: Install the New Breaker in Your Panel
With the main power to your house completely shut off (and verified with a voltage tester!), you can now work inside the electrical panel. A 240V outlet requires a double-pole breaker, which is twice as wide as a standard breaker and occupies two slots in the panel. Find two adjacent, empty slots and firmly snap the new breaker into place.
Next, you’ll connect the wires from the 10-3 cable you just ran. The black and red wires connect to the two screw terminals on the breaker—these are your “hot” wires. The white (neutral) wire and the bare copper (ground) wire connect to the corresponding neutral and ground bus bars in the panel. If you feel any hesitation working inside your main panel, this is the perfect time to call for electrician repairs.
Step 3: Wire and Mount the Outlet
Now, head back to where you’re installing the outlet. Carefully pull about eight inches of the 10-3 cable through the electrical box, giving yourself enough slack to work with. Using wire strippers, remove the outer sheathing and then strip about 3/4 of an inch of insulation from the ends of the black, red, and white wires.
Next, connect the wires to the new 240V receptacle. The black and red wires attach to the hot terminals (usually brass-colored), the white wire connects to the neutral terminal (silver-colored), and the bare copper wire goes to the green ground screw. Secure the receptacle to the electrical box with the provided screws, making sure it’s level before attaching the faceplate.
Outlet Orientation: Ground Prong Up or Down?
You’ve probably noticed that some electrical outlets look like they’re installed upside down. This isn’t an accident; it’s a topic of debate among electricians and homeowners. Traditionally, many outlets were installed with the ground prong (the round third hole) at the bottom, creating a “smiley face” look. While there’s often no strict electrical code requirement for orientation in residential settings, a growing number of professionals prefer to install them with the ground prong on top. This isn’t just an aesthetic choice—it’s based on a simple but important safety consideration that could protect your home.
The main argument for the ground-up position is to prevent accidents. Imagine a plug is partially pulled out of the wall, leaving a small gap. If a metal object, like a paperclip or a falling picture frame wire, were to slip into that space, it would land on the ground prong first. This deflects the object from touching the live “hot” and neutral prongs below, preventing a dangerous short circuit that could cause sparks or even a fire. It’s a small detail that adds a significant layer of safety, which is why it’s becoming the standard for many careful electricians during electrician repairs and new installations.
Step 4: Tighten Connections Correctly
This final step is one that many people overlook, but it’s critical for safety. All electrical connections need to be just right—not too loose and not too tight. A loose connection can create heat and arc, posing a serious fire risk. An overly tight connection can damage the wire or the screw terminal itself.
The best way to ensure a secure connection is to use a torque screwdriver to tighten the terminal screws to the manufacturer’s specified setting (usually printed on the device). This guarantees every wire is held with the perfect amount of force. Once all connections in the panel and at the outlet are properly torqued, you’re ready to restore power and test your work.
Avoid These Common Installation Mistakes
Even with the right tools and a clear plan, a few common mistakes can turn a straightforward project into a serious safety risk. Getting the details right isn’t just about making sure your new appliance works—it’s about protecting your home and your family. Let’s walk through the three biggest pitfalls to watch out for so you can complete your installation safely and correctly the first time. Paying close attention to these steps will give you peace of mind long after the project is done.
The Danger of Mismatched Wires and Amperage
One of the most critical errors in any electrical project is using a wire that’s too small for the circuit’s amperage. Think of it like a water pipe: a tiny pipe can’t handle a massive flow of water, and the same is true for wires and electricity. Using an undersized wire creates too much resistance, causing it to overheat and become a serious fire hazard. For example, you can’t simply put a 30-amp breaker on a circuit that has wiring rated for only 20 amps. To do the job safely, you must match the wire gauge to the breaker. For a typical 30-amp, 240-volt outlet, you’ll likely need to use the correct cable, such as a 10-3 non-metallic sheathed cable with a ground.
Why You Can’t Forget Proper Grounding
Proper grounding is a non-negotiable safety feature that protects you from electric shock. A ground wire provides a safe path for stray electrical current to travel to the earth, preventing it from passing through you or your appliance. When installing your outlet, you must ensure the ground wire is securely connected to the grounding terminal on the outlet itself. If you are using a metal electrical box, the box also needs to be grounded. This is usually done by connecting a short wire, called a pigtail, from the ground screw in the box to the ground wires. Skipping this step leaves you and your equipment vulnerable. If you have any doubts about your home’s existing grounding system, it’s best to consult with our team about our residential electric services.
Staying Safe: GFCI Protection and Code Compliance
For outlets in potentially wet or damp locations like garages, basements, or outdoors, a Ground Fault Circuit Interrupter (GFCI) is essential. A GFCI breaker monitors the electrical flow and instantly shuts off the power if it detects an imbalance, which can prevent a dangerous shock. Beyond that, you must follow the National Electric Code (NEC) and your local building codes. These regulations exist for your safety and often specify requirements like using four-prong outlets for new installations. Keep in mind that some areas require a permit for this type of work, and performing it yourself may not be legal. When you’re dealing with permits and inspections, having a professional handle the job ensures everything is done by the book. Our licensed electricians can manage all your electrical repairs and installations to guarantee code compliance.
Know When to Call a Professional Electrician
While tackling a DIY project can be incredibly rewarding, some jobs are best left to the experts, especially when it comes to your home’s electrical system. There’s no shame in knowing your limits; in fact, it’s the smartest thing you can do. Recognizing when a project requires a professional touch ensures the safety of your home and family. If you run into any of the following situations while planning your 240v outlet installation, it’s a clear sign to put down the tools and call for professional electrician repairs. A licensed electrician has the training, tools, and knowledge of local codes to get the job done right, giving you complete peace of mind.
When Your Panel or Wiring Requires a Pro
Before you even think about adding a new 240v circuit, take a hard look at your electrical panel. Is it old, full, or equipped with outdated wiring? Many modern appliances and EV chargers require higher amps than older systems can safely provide. Simply swapping a breaker isn’t enough; you often need to run new, thicker wires all the way from the panel. An expert can assess your current system’s capacity and determine if you need an upgrade to safely handle the new load. This isn’t a corner you want to cut, as overloading an old system is a serious fire hazard.
When a Permit or Inspection Is Required
Electrical work isn’t just about connecting wires; it’s also about following the law. Many municipalities, including those across Southeastern Pennsylvania, require permits for jobs like adding a new 240v circuit. This process ensures the work is inspected and meets strict safety standards set by the National Electrical Code (NEC). A professional electrician is familiar with local permit requirements and will manage the entire process for you. This guarantees your installation is not only safe but also fully compliant, which is crucial for insurance purposes and the future sale of your home.
Trust Your Gut: When to Call for Help
Trust your gut. If at any point you feel uncertain, confused, or simply in over your head, that’s your cue to call a professional. Electrical work is precise, and a small mistake can lead to big problems, from damaged appliances to electrical shock or fire. Reading guides and watching videos is a great start, but it can’t replace years of hands-on experience. A professional can handle your residential electrical needs safely and efficiently, ensuring every connection is secure and every component is correctly installed. Your safety is always worth the investment.
Final Checks: Testing and Maintaining Your New Outlet
With the installation complete, the final step is to test your work and commit to a few simple safety practices. This isn’t just about making sure your new appliance will turn on; it’s about ensuring the outlet is safe for long-term use. A few minutes of testing can give you peace of mind and confirm that every connection is correct and secure. Think of it as the final quality check before you officially call the job done. Regular awareness of your electrical systems, from outlets to your main panel, is key to a safe home. This final check ensures your hard work pays off safely and reliably for years to come.
How to Test for Proper Voltage and GFCI Function
Before you plug anything in, you need to verify that the outlet is delivering the correct voltage. First, turn the power back on at the main panel. Using a voltmeter set to AC, carefully check the outlet’s slots. You should get a reading of around 240 volts between the two hot terminals (the vertical slots). Then, test between one hot terminal and the neutral or ground slot—this should read about 120 volts. If your readings are off, turn the power off immediately and re-check your wiring. If you installed a GFCI breaker, press the “Test” button. You should hear a click as it trips, cutting power to the circuit. This confirms the safety feature is working correctly.
Simple Tips for Long-Term Safety
Maintaining a safe electrical system goes beyond a successful installation. Always prioritize proper grounding for both the electrical box and the appliance cord to prevent shock hazards. It’s also critical to ensure you’ve used the correct wire gauge for the breaker’s amperage, as undersized wires are a serious fire risk. If you ever feel uncertain about your wiring or if your panel is old, it’s always best to call a professional. For ongoing issues or new projects, having trusted electrician repairs on call is the smartest way to protect your home and family. Don’t hesitate to reach out for a professional opinion—it’s a small step that ensures lasting safety.
Related Articles
Frequently Asked Questions
What’s the real difference between a 3-prong and a 4-prong 240V outlet? This is a great question that gets right to the heart of electrical safety. The key difference is the ground wire. Older 3-prong outlets combine the neutral and ground functions, which is no longer considered safe by modern electrical codes. A 4-prong outlet has separate connections for the two hot wires, a neutral wire, and a dedicated ground wire. This separate ground provides a much safer path for electricity in case of a fault, which is why current codes require 4-prong outlets for all new installations.
How do I know if my electrical panel has enough space for a new 240V circuit? The first thing to check is physical space. A 240V circuit requires a double-pole breaker, which takes up two adjacent slots in your panel. If you don’t see two empty slots next to each other, you might be out of room. More importantly, you need to consider the panel’s total capacity. An electrician can perform a “load calculation” to determine if your home’s electrical service can safely handle the added demand of a new high-power appliance without being overloaded.
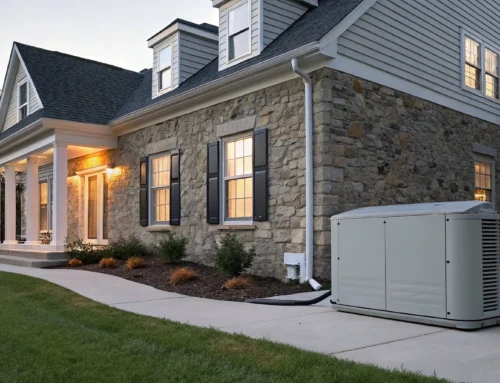
Can I use a 240V outlet to power my home with a portable generator during an outage? While some large portable generators do have 240V outlets, you should never plug one directly into an outlet in your home. This practice, known as backfeeding, is extremely dangerous for you and for utility workers. The safe and correct way to connect a generator to your home is through a professionally installed transfer switch. This switch completely isolates your home from the grid before drawing power from the generator, ensuring a safe transition during an outage.
Is it really that much more expensive to hire a professional than to do it myself? While doing it yourself can save money on labor, the real value of hiring a professional lies in safety and peace of mind. An experienced electrician ensures the job is done correctly and meets all local codes, which protects your home from fire hazards and your family from electrical shock. They also handle any necessary permits and inspections. Think of it as an investment in getting the job done right the first time, without any risks.
My new EV charger needs a 240V outlet in the garage. Is that different from installing one for a dryer? The basic installation process is similar, but there are a few key differences. EV chargers often require a specific amperage and may need a GFCI breaker for safety, especially in a garage. Because a car will be drawing a heavy load for hours at a time, it’s critical that the wire, breaker, and outlet are perfectly matched and installed with high-quality components. Given the specific demands of EV charging, this is a perfect job to entrust to a professional to ensure a safe and reliable setup.