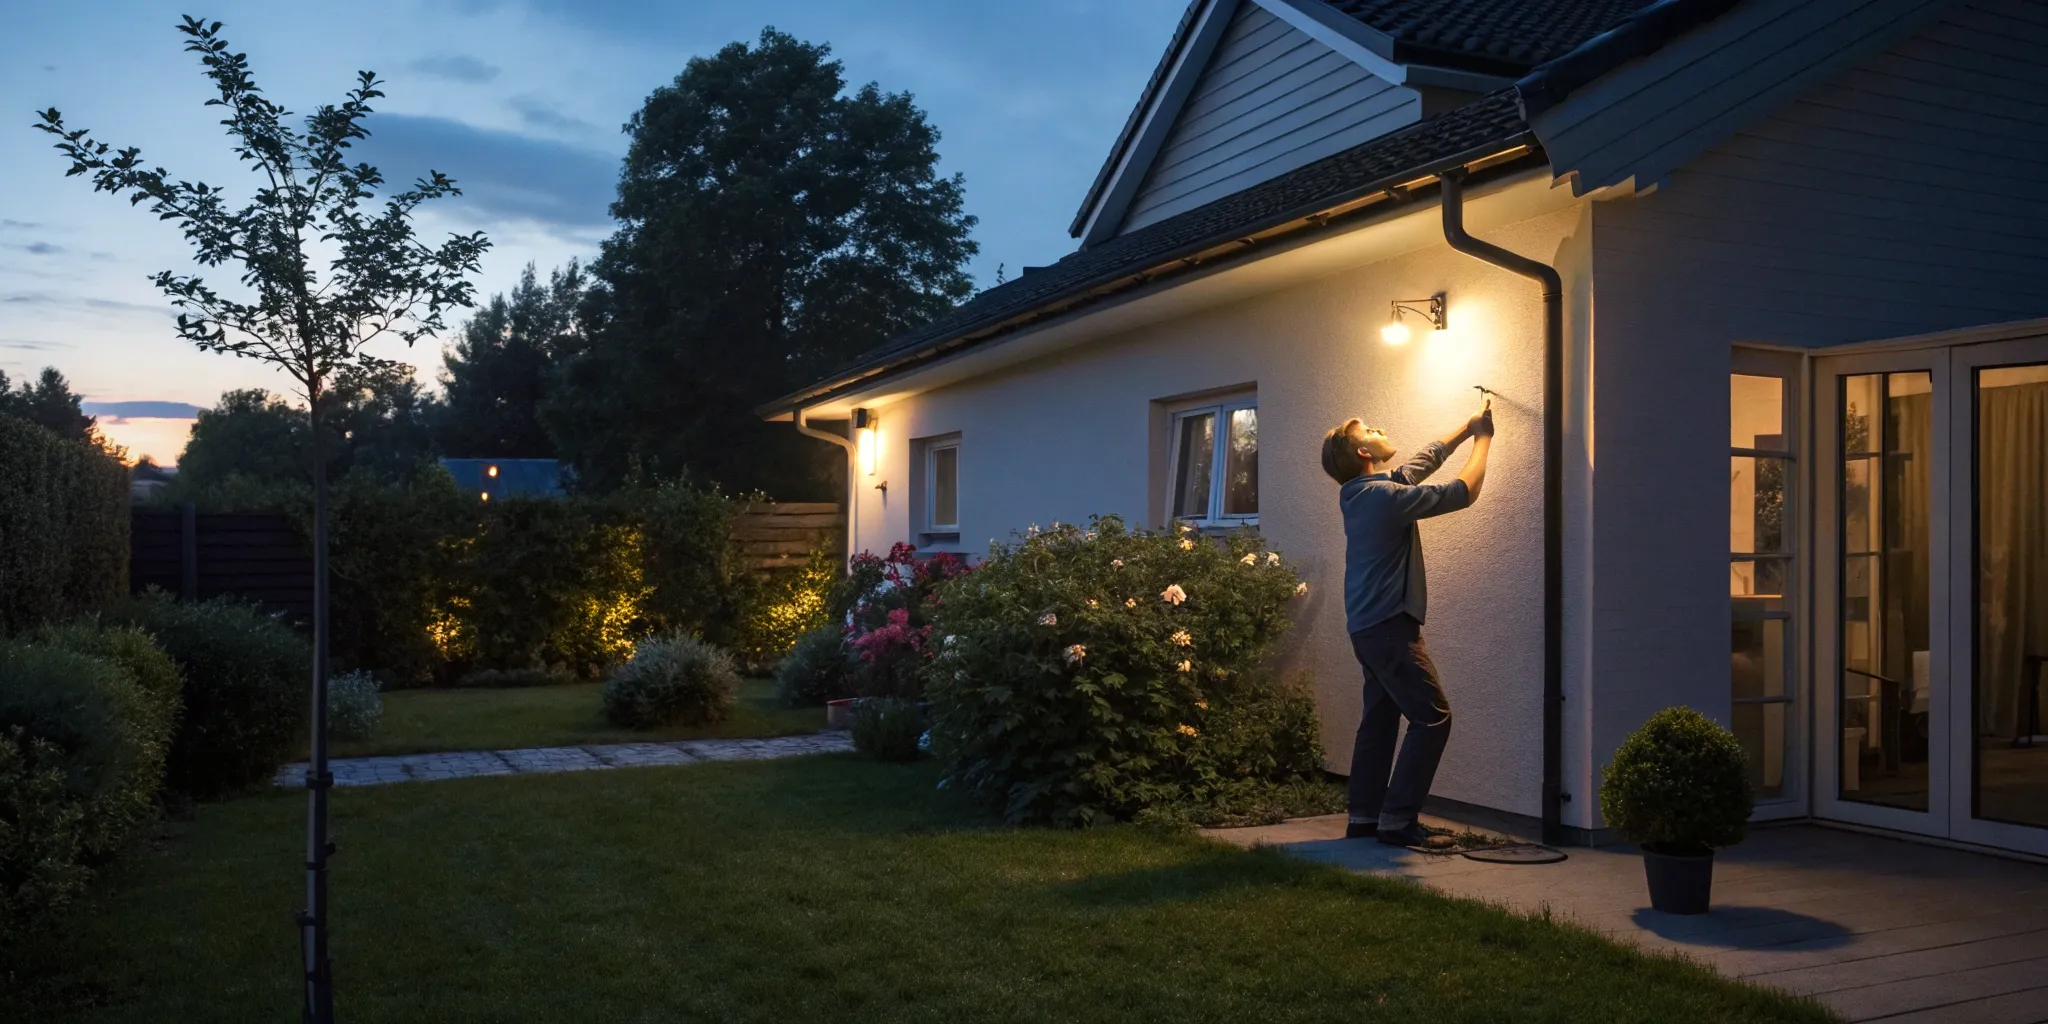
Thoughtfully placed outdoor lighting does wonders for your home’s appearance after the sun goes down. Instead of harsh, constant light, a motion-activated system creates a dynamic and welcoming look that can highlight your home’s best features. It shows you’ve paid attention to every detail, blending sophisticated design with practical security. This project is a great way to increase your home’s curb appeal and functionality at the same time. In the following sections, we will explain how to add a motion sensor to existing outdoor lights, helping you choose the right products and install them correctly for the best possible results.
Key Takeaways
- Upgrade for Security, Savings, and Style: Motion-sensing lights do more than just deter intruders; they also cut down on energy waste by lighting up only when needed and can be used to beautifully highlight your home’s architecture and landscaping.
- Select an Installation Method That Fits Your Skills: For a quick, wire-free update, simply swap in a motion-sensing bulb or use a socket adapter. If you’re comfortable with basic wiring, replacing an existing wall switch offers a more permanent, integrated solution.
- Proper Placement and Knowing Your Limits are Key: For the best results, install your sensor 6-10 feet high and angle it to detect motion across its path, not directly toward it. Always prioritize safety—if you run into complex wiring or feel uncertain, it’s the right time to call a professional.
The Benefits of Motion-Sensing Outdoor Lights
Adding motion sensors to your outdoor lights is one of the smartest and most effective upgrades you can make to your home. It’s about more than just convenience; it’s a practical investment in your property’s safety, efficiency, and overall appearance. Motion-activated lighting provides illumination exactly when and where you need it, whether you’re pulling into the driveway late at night or an unexpected visitor approaches your door.
This simple change transforms your standard outdoor fixtures into an intelligent system that responds to its environment. Instead of leaving lights on all night, which wastes energy and can contribute to light pollution, you get a system that works for you. It enhances your home’s security, saves you money on electricity bills, and even adds a touch of polish to your home’s exterior. Let’s look at the three biggest advantages of making this switch.
Keep Your Home Safe and Secure
A well-lit property is a secure property, and motion-activated lights are a powerful first line of defense. A sudden flood of light can be enough to startle and deter potential intruders who prefer to operate in the dark. This immediate response makes your home a less appealing target. Beyond just scaring away unwanted visitors, these lights improve the effectiveness of your other security measures. Outdoor security cameras get a clearer, more detailed picture when the area is illuminated, and any security signs on your property become instantly visible. It’s a simple addition that makes your entire home security setup work better.
Save Energy and Add Convenience
Leaving your outdoor lights on from dusk until dawn can have a surprising impact on your energy bill. Motion-sensing lights solve this problem by only turning on when movement is detected. This means you aren’t paying for hours of electricity when no one is around. The convenience factor is also a huge plus. You’ll never have to fumble for your keys in the dark or worry about a guest tripping on the front steps. The lights come on automatically to welcome you home and guide your visitors safely. It’s a hands-free solution that provides light right when you need it and saves energy when you don’t.
Increase Your Home’s Curb Appeal
Thoughtfully placed outdoor lighting does wonders for your home’s appearance after the sun goes down. Motion-sensing lights can be part of a beautiful and functional residential electric design. Instead of harsh, constant light, you get a dynamic system that can highlight your home’s best features. You can use them to accentuate architectural details, illuminate pathways, or showcase your landscaping. This creates a warm, welcoming, and high-end look for your property. It shows that you’ve paid attention to every detail, blending security with sophisticated design to make your home look its best at any hour.
Choose the Right Motion Sensor for Your Lights
Adding a motion sensor to your outdoor lights is a fantastic way to improve your home’s security and convenience. The great news is you don’t have to replace your existing fixtures to get the job done. There are several ways to upgrade what you already have, ranging from simple screw-in solutions to more integrated options. The best choice for you really depends on your current lighting setup and how comfortable you are with a little DIY. Let’s walk through the three main types of motion sensors so you can find the perfect fit for your home.
Standalone PIR Motion Sensors
If you love your current outdoor lights and just want to add motion-sensing capabilities, a standalone PIR (Passive Infrared) sensor is an excellent choice. These are separate devices that detect heat and movement, which you then wire directly into your existing light fixture. This approach gives you a lot of flexibility because you can place the sensor in the ideal spot to detect motion, which might be different from where the light is mounted. While it requires some basic wiring, it’s a reliable way to create a custom, permanent solution. You can find wired motion sensors that are separate from the light and integrate them seamlessly into your setup.
Smart Bulbs and Socket Adapters
For a solution that requires no wiring at all, look no further than smart bulbs and socket adapters. This is by far the easiest way to get started. A motion sensor light bulb has the sensor built right in, so all you have to do is swap out your old bulb for the new one. Another simple option is a motion sensor socket adapter. You just screw the adapter into your light’s socket, then screw your existing bulb into the adapter. Both of these are perfect for renters or anyone who wants a quick, effective upgrade without touching any wires. They turn any standard fixture into a motion-activated light in just a few seconds.
Motion-Sensing Switches
Another smart way to control your outdoor lights is by replacing the wall switch inside your home with a motion-sensing switch. This is a great option if one switch controls multiple outdoor fixtures, as it turns all of them into motion-activated lights at once. Instead of sensing motion at the light itself, the switch detects movement in a specific area and turns the lights on. While installing a motion sensor light switch does involve turning off the power and doing some simple wiring, it creates a very clean, integrated look. It’s a powerful way to automate your porch, patio, or walkway lights from a single control point.
Gather Your Tools and Materials
Before you start unscrewing anything, let’s get organized. Taking a few minutes to gather everything you need will make the installation process much smoother and safer. Think of it as your pre-project ritual. Having the right tools and materials on hand means you won’t have to stop midway through to run to the hardware store. It also ensures you can work safely and efficiently.
This project doesn’t require a massive workshop full of equipment, but a few key items are essential for doing the job correctly. We’ll walk through the basic tools, the materials for the job, and the safety gear you should always have on hand for any electrical project.
Your Toolkit Checklist
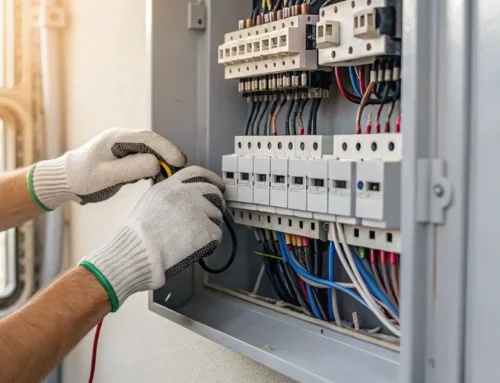
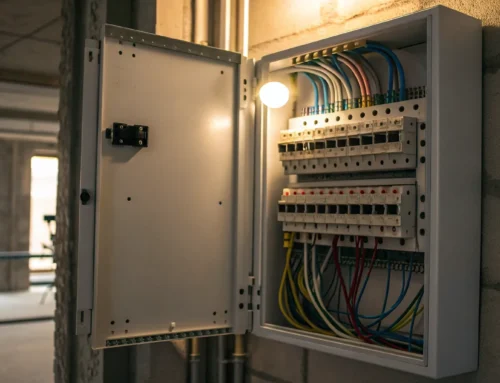
Most motion sensor installations can be done with a few basic hand tools you likely already own. You don’t need anything too fancy, just the essentials. Before you begin, make sure you have a reliable screwdriver (both Phillips and flat-head are good to have), a cordless drill, wire strippers, and a voltage tester. The voltage tester is non-negotiable—it’s the only way to be certain the power is off before you touch any wires. If you open your light fixture and find the wiring is old or damaged, our team can handle any electrician repairs to ensure your home is safe.
Essential Materials and Safety Gear
Aside from your tools, you’ll need the motion sensor kit itself. Make sure you have the right one for your specific light fixture and needs. You may also need some wire nuts to connect the new sensor to the existing wiring. Most importantly, let’s talk about safety gear. Always wear protective gloves and safety goggles when working with electricity. It’s a simple step that protects you from stray sparks or debris. Taking these small precautions is what separates a successful DIY project from a dangerous one.
A Quick Pre-Installation Checklist
You’re almost ready to get started. First, read the manufacturer’s instructions that came with your motion sensor. Every model is slightly different, and the guide will have specific details you need to know. Next, it’s a good idea to be aware of your local electrical codes and regulations to ensure your work is compliant. For homeowners in Southeastern Pennsylvania, understanding these requirements is part of any successful residential electric project. Finally, double-check that you have a clear, well-lit workspace and that you won’t be interrupted.
How to Install a Motion Sensor Switch
If you’re comfortable with basic electrical work, replacing a standard light switch with a motion-sensing one is a fantastic weekend project. This upgrade gives you hands-free control over your outdoor lights without needing to change the fixture itself. The new switch will do all the work, turning the lights on when it detects movement and off after a set time. It’s a simple change that adds a layer of both convenience and security to your home, whether you’re lighting up a dark walkway or deterring unwanted visitors.
Before you begin, remember that safety is always the top priority when working with electricity. The following steps will guide you through the process, but if you ever feel unsure or run into wiring that doesn’t look right, it’s always best to stop and call a professional. Handling these kinds of residential electrical projects is what experts are for, and it’s better to be safe than sorry. This guide assumes you’re replacing a simple, single-pole switch (one switch that controls one light fixture). If your setup is more complex, professional help is definitely the way to go.
Step 1: Turn Off the Power and Remove the Old Switch
First things first: head to your home’s main electrical panel and shut off the power to the circuit you’ll be working on. You can do this by flipping the corresponding circuit breaker to the “Off” position. To be absolutely sure the power is off, try flipping the light switch on and off—if the light doesn’t turn on, you’re good to go.
With the power safely off, you can remove the switch plate cover. Next, unscrew the mounting screws holding the old switch in the wall box. Gently pull the switch out so you can see the wires connected to it. Don’t disconnect anything just yet; take a moment to see how it’s wired.
Step 2: Connect the New Sensor’s Wires
Now it’s time to wire up your new motion sensor switch. Most new switches will have clearly labeled wires: a black wire for power (hot), a red wire for the light fixture (load), a white wire for the neutral connection, and a green or bare copper wire for the ground. Carefully disconnect the wires from the old switch and connect them to the corresponding wires on your new sensor, one by one. Secure each connection with a wire nut. If the wiring in your wall looks different or confusing, this is a great time to pause and get help with electrician repairs to ensure everything is done correctly.
Step 3: Mount and Test Your New Switch
Once all the wires are securely connected, gently tuck them back into the electrical box. Be careful not to bend or crimp them too tightly. Align the new motion sensor switch with the screw holes in the box and secure it with the provided mounting screws. Attach the new faceplate, and you’re almost done.
Now, head back to your electrical panel and turn the circuit breaker back on. Your new motion sensor switch will likely need a few minutes to power up and calibrate. Once it’s ready, test it out by walking into its detection zone. You can then adjust the settings, like sensitivity and how long the light stays on, to get it working just right for your space.
How to Install Motion Sensor Adapters and Bulbs
If you’re looking for a motion sensor solution that doesn’t involve touching any wires, you’re in the right place. These next few methods are incredibly user-friendly and can be done in just a few minutes. They’re perfect for adding security and convenience to your outdoor lighting without needing a full toolkit. While these are simple DIY fixes, remember that for any larger projects or concerns with your home’s wiring, it’s always best to consult a professional for residential electric services. For now, let’s explore the easiest ways to upgrade your existing fixtures.
The Easiest Upgrade: Installing a Motion Sensor Bulb
This is by far the simplest way to add motion-sensing capabilities to an outdoor light. All you have to do is swap your current light bulb for one with a motion sensor built right in. It’s truly as easy as changing a lightbulb. These smart bulbs contain small passive infrared (PIR) sensors that detect heat and movement, automatically turning the light on when someone approaches. Once the motion stops, the light turns itself off after a set period. This is a fantastic, low-commitment way to test out motion lighting at your home and instantly add a layer of security to porches, driveways, and walkways.
How to Use a Socket Adapter
A motion sensor socket adapter is another brilliant no-wiring solution. This small device screws directly into your existing light socket. Then, you simply screw your current light bulb into the adapter. Just like that, your standard fixture is transformed into a motion-activated light. This option is great because it lets you keep using your favorite decorative or high-efficiency bulbs while still getting the benefits of a motion sensor. Many adapters also have adjustable settings for sensitivity and duration, giving you a bit more control over how your light behaves. It’s a versatile and cost-effective upgrade for almost any outdoor fixture.
Setting Up Your Smart Motion Sensor
If you already have a smart home system or are interested in building one, integrating a smart motion sensor is a great move. These sensors communicate wirelessly with a central hub, which then tells your smart bulbs when to turn on and off. The setup is a bit more involved than just screwing in a bulb, but it offers far more control. Through a smartphone app, you can program your lights to only activate during certain hours, adjust sensitivity on the fly, and link them to other smart devices. For example, you could have your porch light turn on and a security camera start recording when motion is detected.
Where to Place Your Motion Sensor for the Best Results
Installing your new motion sensor is a great first step, but where you put it makes all the difference. The right placement ensures your light works when you need it to—and stays off when you don’t. Think of it like setting up a security camera; you want the best possible view of the action. A poorly positioned sensor can lead to missed detections, leaving you fumbling for your keys in the dark, or it can cause constant false alarms from passing cars or swaying branches. Getting it right involves a little strategy, but it’s simple once you know what to look for. The goal is to create a reliable system that adds convenience and security without becoming a nuisance. It’s about finding that perfect balance where the light feels like an intuitive part of your home. If you ever feel unsure about the best setup for your home’s layout or are dealing with tricky wiring, our team’s residential electrical services can help you find the perfect spot for maximum security and convenience. Let’s walk through the three keys to perfect placement: finding the right height, avoiding false triggers, and getting the most coverage.
Find the Perfect Height and Angle
You’ve got the sensor, now let’s find its sweet spot. The goal is to catch movement as it crosses the sensor’s path, not as it comes straight toward it. Think about your driveway or walkway—you want the sensor to see someone walking across it. Most manufacturers recommend a height of about 6 to 10 feet, angled slightly down. This gives the sensor a great vantage point to monitor the area without being too high to detect motion on the ground. Before you permanently mount it, take a moment to visualize the most common paths people take to approach your home and aim the sensor there.
How to Avoid False Alarms
Nothing is more annoying than a light that flicks on and off all night. To prevent false alarms, take a look at what’s in your sensor’s line of sight. Point it away from busy streets, swaying tree branches, or heat sources like dryer vents, which can all trigger it accidentally. Also, keep in mind that most motion sensors can’t see through glass, so placing one behind a window won’t work. A clear, unobstructed view is best. Many sensors have sensitivity settings you can adjust, which is a great way to fine-tune performance and stop your neighbor’s cat from triggering the light every night.
Maximize Your Coverage Area
To get the most out of your sensor, it helps to understand how it “sees.” Most outdoor sensors are Passive Infrared (PIR), meaning they detect changes in heat. When a person or animal walks across the sensor’s detection zones, it creates a strong signal that triggers the light. Movement directly toward the sensor is harder for it to pick up until it’s very close. By positioning your sensor to capture this side-to-side motion, you’ll cover a much wider area effectively. After you’ve installed it, do a quick walk-through test at different distances to see exactly where it triggers and make any final angle adjustments.
Troubleshoot Common Installation Issues
Even with the best preparation, you can sometimes run into a little hiccup during a DIY project. It happens to all of us! If your new motion sensor isn’t working quite right after installation, don’t worry. Most issues are easy to fix with a few simple adjustments. Let’s walk through some of the most common problems and how to solve them, so you can get your new lights working perfectly.
Solve Wiring and Power Problems
The most common culprits behind a non-working sensor are simple wiring or power issues. First, double-check that the power is back on at the circuit breaker. If it is, turn it off again before you do any more investigating. Use a voltage tester to be absolutely sure there’s no power running to the switch or fixture. Then, take a look at your connections. Are all the wires securely fastened in their terminals? A loose wire is often the problem. Make sure the wires are connected exactly as shown in the installation diagram. If you’ve checked everything and are still stumped, or if the wiring looks old or confusing, it’s always safest to call for professional electrician repairs.
Adjust Sensor Sensitivity and Placement
Is your light turning on when a car drives down the street or every time the wind blows? Or maybe it’s not turning on when you walk by. This is a classic sensitivity issue. Most motion sensors have small dials that let you adjust the range (how far it detects motion) and the duration (how long the light stays on). Start with a low sensitivity setting and gradually increase it until it reliably detects movement in your desired area. You might also need to slightly adjust the angle of the sensor to avoid picking up motion from sidewalks or rustling trees. It can take a bit of trial and error to find that sweet spot, so be patient and make small adjustments.
What to Do About Incompatible Fixtures
Sometimes, the issue isn’t your installation—it’s the hardware. Not all motion sensors are compatible with every type of light fixture or bulb, especially older fixtures or certain types of LEDs. If your light flickers or doesn’t turn on at all, check the sensor’s packaging to confirm it works with your bulb type. You may also find that the fixture itself is too old to wire correctly to a new sensor. In these cases, you might need to upgrade the entire fixture. This can be a more involved project, but it’s a great opportunity to update your home’s look while improving its security. For bigger jobs like this, our team is always here to help with any residential electric needs.
Know When to Call a Professional Electrician
While many motion sensor installations are straightforward, it’s important to know your limits. Electrical work isn’t the place for guesswork. If you open up a switch box and find a confusing tangle of wires, or if your home’s wiring is old and brittle, it’s time to pause. Pushing forward when you’re unsure can lead to short circuits, fire hazards, or personal injury. Your safety is always the top priority.
Beyond the immediate risks, there’s also the matter of local regulations. Electrical projects often need to meet specific building codes to be considered safe and legal. A professional electrician not only has the technical skills to get the job done right but also understands the local requirements in your area. They can ensure your new motion sensor is installed safely, functions correctly, and won’t cause issues down the road, whether during a home inspection or with your insurance. Sometimes, the smartest DIY move is knowing when to hand the tools over to an expert.
For Complex Wiring and Your Safety
When you’re dealing with your home’s electrical system, especially outdoors, recognizing when a project is over your head is key. If an installation involves more than a simple swap of wires, or if you feel even slightly uncomfortable working with electricity, it’s best to call a professional. An expert can quickly diagnose and handle situations that might confuse a homeowner, like outdated wiring or multiple lights on a single, complex circuit. Hiring a pro for electrician repairs ensures the job is done safely, protecting your home and family from potential electrical hazards. It’s a simple step that provides complete peace of mind.
To Ensure Code Compliance
Every electrical project, big or small, must follow local building codes and regulations. These rules are in place for your safety, and failing to meet them can create serious problems. If you’re not sure about the specific requirements for outdoor lighting in your area, it’s wise to consult a licensed electrician. A professional is familiar with all the necessary standards and can guarantee your installation is fully compliant. This not only keeps you safe but also prevents potential issues with home inspections or insurance claims in the future. Proper residential electrical work is an investment in your home’s long-term safety and value.
Related Articles
- The Ultimate Guide to Motion Sensor Light Installation
- Security Cameras – M.T. Ruhl Electrical Contracting
- Electrical Security – M.T. Ruhl Electrical Contracting
Frequently Asked Questions
Can I add a motion sensor to any outdoor light I already have? For the most part, yes. The easiest methods, like using a motion-sensing bulb or a screw-in socket adapter, are designed to work with almost any standard light fixture. If you plan to install a motion-sensing switch or wire in a separate sensor, these are also compatible with most fixtures. The key is to check the product specifications to ensure the sensor works with your specific type of bulb and fixture, especially if it’s a very old or uniquely designed light.
Is it possible to override the motion sensor and just keep the light on? Yes, many motion sensors and switches include a manual override mode. This feature is perfect for evenings when you’re entertaining on the patio or just want steady illumination for a while. Typically, you can activate it by flipping the wall switch off and on in a quick sequence. This tells the sensor to stay on until you reset it. Be sure to check the instructions for your specific model to see exactly how it works.
My light seems to be turning on constantly from passing cars or swaying branches. How can I fix this? This is a common problem that usually has a simple solution. Most false alarms are caused by a sensor that is either too sensitive or poorly aimed. Start by adjusting the sensitivity dial on the sensor to a lower setting. You can also try changing the angle of the sensor, pointing it slightly down and away from the street or the moving trees. It might take a few small adjustments to find the perfect balance.
Do motion sensors work well with LED bulbs? They work great with LEDs, and it’s an excellent combination for saving energy. The vast majority of modern motion sensors are built to be compatible with LED technology. When you’re shopping, just give the product description a quick scan to confirm it’s rated for LEDs. If you ever experience a flickering light, it could be an incompatibility issue, but this is rare with newer products.
Should I install a motion-sensing switch or a sensor directly on the light fixture? This depends on your home’s layout and what you want to achieve. A sensor on the fixture itself, like a smart bulb or an adapter, is incredibly simple to install and controls just that single light. A motion-sensing switch requires a bit of wiring but gives you a clean, built-in look and can control an entire group of outdoor lights from one location. If one switch operates your porch, garage, and walkway lights, a motion-sensing switch is a very efficient choice.